I used to daydream about the adventures my kiddos would have sailing the Sandy Seas in the sandboxes featured in catalogs like Pottery Barn Kids... until I made my own - or should I say, until I in-listed my amazing dad to help me build one. My inspiration came from this fabulous Sunset book

If you get a chance, you might want to check it out. It is full of fabulous ideas for turning your backyard into a little piece of heaven for your kids!
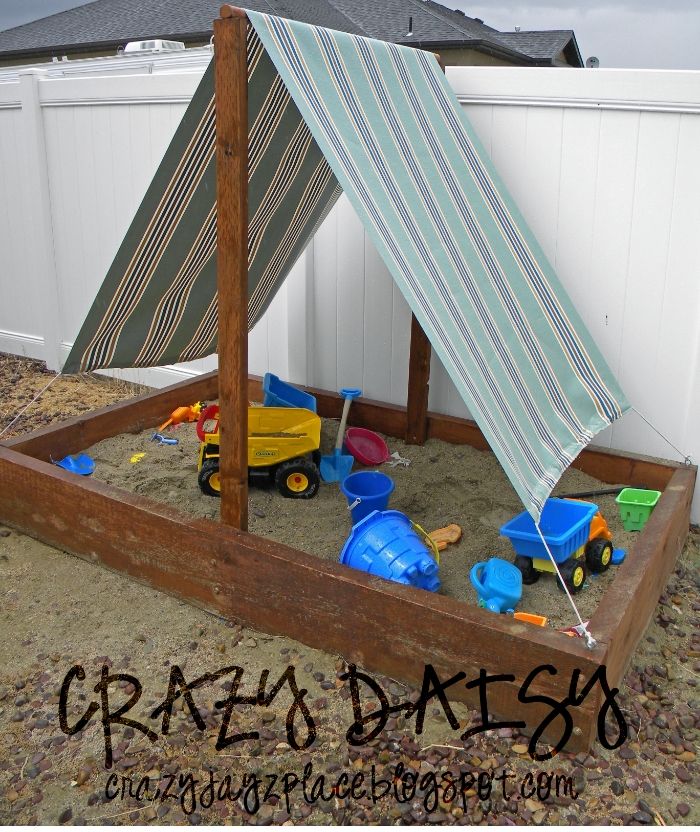
I don't have great step-by-step directions (we didn't exactly follow their instructions) or photos because, even though I just finished today, this project was started long before Crazy Daisy existed, but I can give you the basics. We used lumber my dad already had to make a box and stained it. Then we bolted two 2x4's so they were standing upright directly in the center of the boat (these would be used to support the sail). We measured and cut an old stair-railing to fit on top of the 2x4's and screwed it on. I went to Outdoorfabrics.com and ordered fabric for the sail. My fabric was 46-inches wide. Knowing the width of your fabric is probably one of the most important aspects of designing your project because if planned properly, the factory seams are left intact and no hemming is required. We made sure our sandbox was just wide enough to accommodate the fabric - no trimming, no hemming, no fraying - at least for the width. To figure out the right length to cut the sail, I measured from the top of the crossbar to about two feet above the box (60 inches for each side), added five inches to make it across-ed the top, and another 4 inches (once for each side) for the hem. To hem each side, I folded the edges in one inch and than again two inches. I sewed 1/4-inch seam on each side to make a channel for the rope to thread through. I screwed some metal eyelets into the sandbox corners and anchored the sail by tying each of the corners to an eyelet. That about sums it up! If you have any questions or need clarification, just leave a comment. I think it turned out pretty cute and my kiddos adore it. The fun part is, it was finished just in time to participate in The CSI Project Summertime Challenge.


.jpg)
No comments:
Post a Comment