Monday, June 27, 2011

Glazed Doughnut Muffins


I don't know about you, but brunch, is probably my most favorite meal. Ever. I think it's because you are  expected to eat the most delicious things, and call it a meal. You don't even have to wait for dessert! Now that's what I call perfection! Doughnuts and muffins seem like a pretty natural brunch food, don't you think? Combining the two only makes it better. Doughnuts + muffins = super delicious and easy and perfect. 

Glazed Doughnut Muffins
*Recipe by Crazy Daisy adapted slightly from The Bakery Spot

Muffin Batter
1/4 cup butter, softened (the other half of the stick will be used in the glaze)
1/4 cup canola oil
1/2 cup sugar
1/3 cup brown sugar
2 large eggs
1 1/2 teaspoons baking powder
1/4 teaspoon soda
1 - 1 1/4 teaspoon pumpkin pie spice
1/2 - 1 teaspoon cinnamon
3/4 teaspoon salt
1 teaspoon vanilla
2 2/3 cups flour
1 cup milk

Glaze
4 tablespoons butter, melted
1 cup powdered sugar
3/4 teaspoon vanilla
2 Tablespoons hot water

Preheat oven to 425 degrees. Lightly grease muffin tin, or use paper muffin cups.

Cream together butter, oil, and sugars until smooth. Add eggs, beat to combine. Stir in baking powder, baking soda, pumpkin pie spice, cinnamon, salt, and vanilla. stir in flour, alternating with milk. Begin and end with flour, and make sure everything is mixed well.

Fill muffins cups, until nearly full. (I used an ice cream scoop and then divided the extra batter between all the muffins.)

Bake for 14-17 minutes, our until pale golden brown and the toothpick comes out clean when inserted into the middle.

Prepare the glaze by mixing together the melted butter, powdered sugar, vanilla, and water, whisking until smooth.

Dip tops of muffins into the glaze and allow to harden. You can even double dip if you'd like.

Serve warm, for best results, but muffins will keep at room temperature, covered, for a day.

Next time I think I'll try almond instead of vanilla in the glaze. Mmmmmm! Enjoy!

PS - If you are thinking you've seen these before, I shared them over at Kel's place on Friday! If you haven't ever checked out Between the Lines, head over and say hello for me!
Photobucket
Enter your email address:


Delivered by FeedBurner

Friday, June 10, 2011

The Little Things {Words To Love By}


I just ran across this on Pinterest. I am so excited. This is it! This is what I mean up above when I say finding joy in life's little moments~ they just knew how to say it better. It sounds so easy, but don't be fooled. I don't really think it is. I think that technology, among other modern day culprits, set up huge road blocks because they prevent us from being present and we have to be present to those around us, to ourselves in fact, or the simple things pass us by and we never even know it! We are always so distracted. We have so much we want to do, so much we have to do. We get sucked in. Take a moment. Be present and aware and waiting for those unexpected moments to grab your heart and make your very favorite memories. The ones you will hold on to and laugh and cry about forever. Seriously, until the day that you aren't anymore. This is what this life should be about, what we all should really be working for. Happiness lies somewhere in these moments, in having them to hold on to when things get difficult. Memories. Precious memories, they are all we have left in the end, our greatest treasures. Go make some. I dare you.
Photobucket
Enter your email address:


Delivered by FeedBurner

Thursday, June 9, 2011

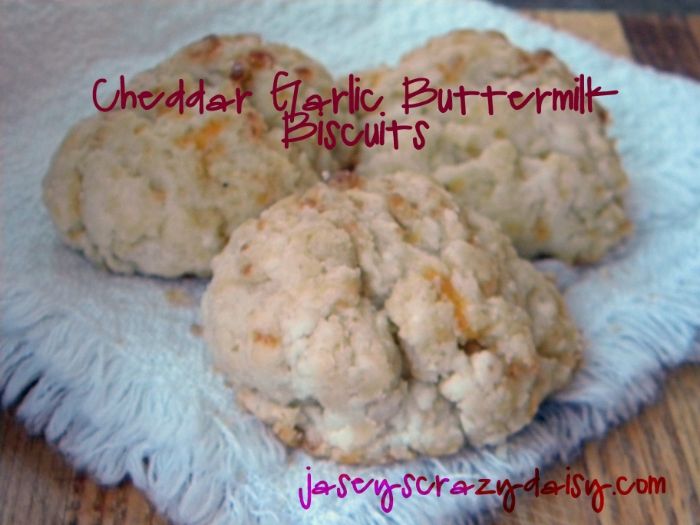
Cheddar Garlic Buttermilk Biscuits {My take on Red Lobster's Cheddar Biscuits}


I have a weakness for carbs. Adding buttermilk, garlic, and cheddar cheese certainly doesn't help matters. At all. I don't want to like them. But I do, I simply can't help it. Sometimes they just call my name and I just can't resist.  Especially when I know they are the perfect match for whatever I am serving for dinner. Or maybe they are dinner. They are what I want for dinner. Just kidding, sort of. Seriously, what's not to like, though? Tell me. Maybe you can help me learn to steer away from them. Until then, you will just have to suffer with me. This is my take on those famous Red Lobster Cheddar Biscuits. We don't have a Red Lobster in my little corner of Wyoming, so I had to figure out how to make my own. I adapted my recipe from this Top Secret Restaurant recipe. They were pretty close, but I certainly don't remember anything green adorning the biscuits in the restaurant. And good luck getting my kids to eat biscuits sprinkled with anything green. Come to think of it, I don't want my biscuits sprinkled with anything green either. I wanted a softer and moister biscuit, enter buttermilk. And cheddar. More cheddar, after all, isn't the cheese the star of this show?

Cheddar Garlic Buttermilk Biscuits
*Recipe by Crazy Daisy Adapted from here.

Biscuit Ingredients 2 1/2 cups Bisquick baking mix
3/4 cups cold buttermilk
4 Tablespoons cold butter, cubed (1/2 stick)
1/4 teaspoon garlic powder
1 3/4 cups sharp grated cheddar (sometimes I even use 2 cups)

Butter Glaze
2 Tablespoons butter, melted
1/2 teaspoon garlic powder

Preheat oven to 400 degrees.

Cut butter into Bisquick mix using a pastry cutter or large fork, until small chunks if butter remain the size of peas. Add cheese, buttermilk, and garlic. Mix by hand or with wooden spoon until just combined, don't over mix. Add a splash of buttermilk if mixture seems too dry, the batter will be super thick though, use just enough buttermilk to make everything stick together.

Drop biscuits, by 1/4 cup portions, onto an ungreased cookie sheet. An ice cream scoop works well.

Bake for 15-17 minutes or until the tops begin to turn golden brown.

Melt two Tablespoons of butter in a small bowl in the microwave. Add 1/2 teaspoon garlic powder and stir to combine. Brush on top of biscuits with a pastry brush, spreading the entire butter mix between all the biscuits. Makes @ one dozen biscuits.


Photobucket

Enter your email address:


Delivered by FeedBurner

Friday, June 3, 2011

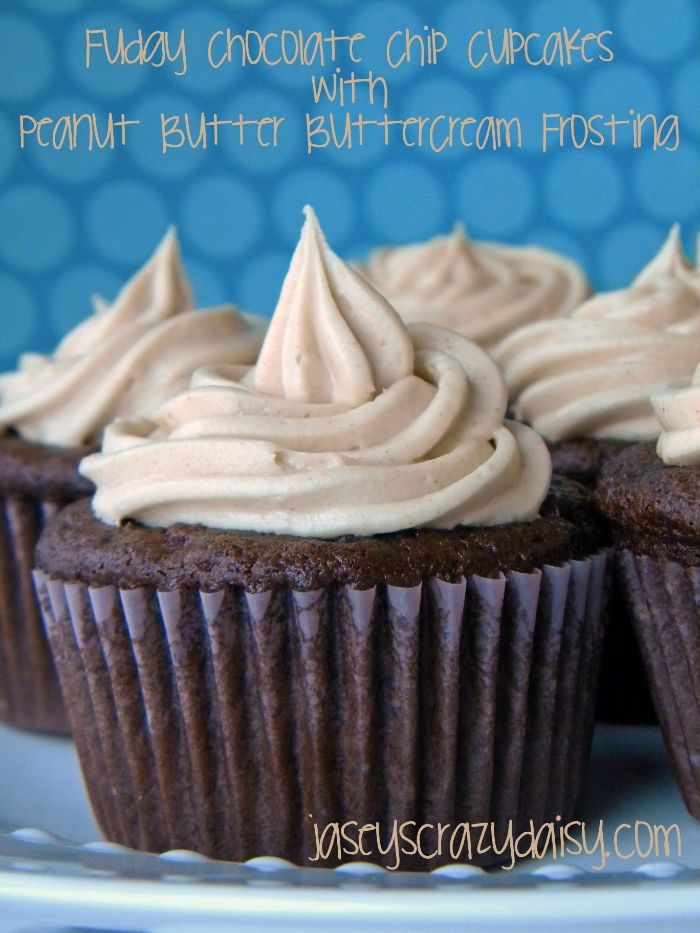
Fudgy Chocolate Chip Cupcakes with Peanut Butter Buttercream Frosting


We just celebrated my littlest's FOURTH Birthday. How did that happen? Seriously, it seems like only moments have passed since the day he was born. We also celebrated my oldest's Kindergarten Graduation... same deal. Time, you are not my friend. I suppose it's a little bittersweet. I want them to be happy and healthy, growing and learning, fun and wonderful. They are, so I really have a lot to be thankful for. They amaze me everyday in a million ways. Blessed. That's what I am. Thankful each time I hear the word "mom", because not all of us have the chance to be parents and so many take it for granted. My life would be so very different without them. I can't don't even want to imagine....blessed, that's what I am. I'll leave it at that and stop whining about time. Should we get back to cupcakes now? I think so!

So those cupcakes up there, they were part of these celebrations. I wanted something kids would be crazy for, but with tastes grown up enough that adults might even enjoy. You can't go wrong with chocolate, especially super moist cupcakes dotted with fudgy melted mini-chocolate chips. Add a little peanut butter buttercream frosting, and you end up with a classic. Here we go.

Fudgy Chocolate Chip Cupcakes with Peanut Butter Buttercream Frosting
*Recipe by Crazy Daisy

Fudgy Chocolate Chip Cupcakes
*The cake recipe itself isn't a JCD original, it's out there just about everywhere, like here at Kevin and Amanda's.

1 box devil's food cake mix (I always use Duncan Hines, I think it's the best)
1 small box instant chocolate pudding mix
1 cup sour cream
1 cup canola oil
4 eggs
1/2 cup milk
1 teaspoon vanilla
1 (12 oz.) package of mini chocolate chips (2 cups)

Preheat oven to 350. Mix together everything except chocolate chips on medium speed, scraping occasionally. Stir in chips. Pour batter into preferred pan(s). Obviously, if you want cupcakes, use lined muffin tins, or grease and flour it. I used a large cookie scoop to fill the tins (about 3 tablespoons). For baking time, add 10 minutes to the time specified on box and check. Do the toothpick test to check, you'll want a few moist crumbs. The middle won't jiggle anymore and the tops will spring back when touched lightly. If not done, check about every five minutes until done. Cool completely and frost with Peanutbutter Butter Cream Frosting.

Peanutbutter Buttercream Frosting
*Recipe by Crazy Daisy

2 sticks butter, softened
1/2 cup creamy peanut butter (don't use the natural kinds that you have to stir, or the old-fashioned brands)
1 3/4 cups powdered sugar
1/2 teaspoon vanilla

With a whisk attachment, beat butter and peanut butter at medium speed until smooth and creamy. Add powdered sugar and beat until mostly moistened. Scrape bowl and beat at medium-low until fully combined. Add vanilla and beat at medium until fully incorporated. Increase speed to medium high and beat until light and fluffy, scraping bowl occasionally. 

Enjoy your cupcakes! 

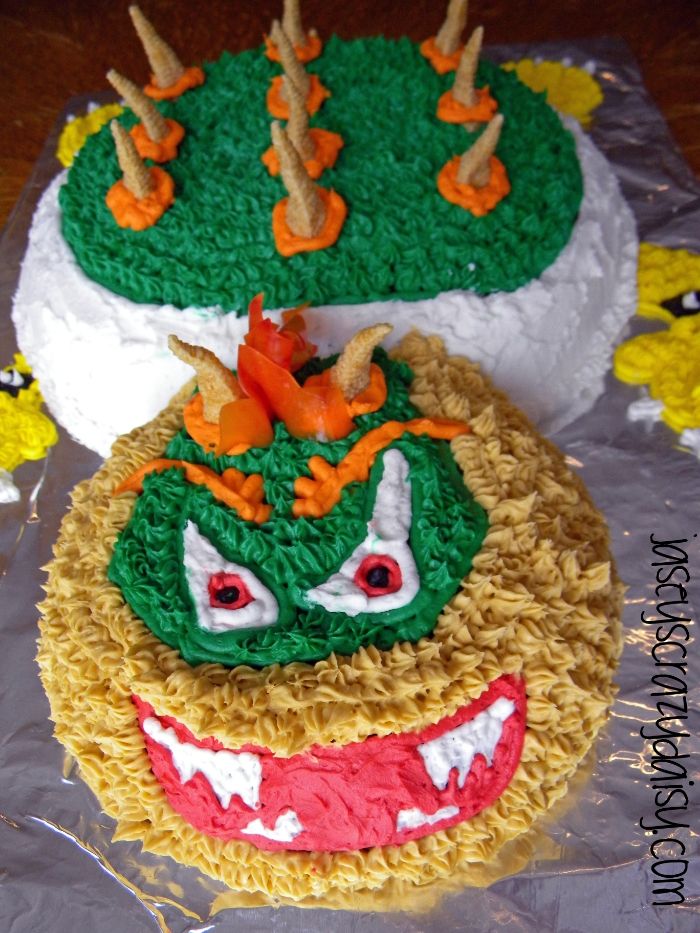
I also used this cake recipe to make my son's birthday cake. Any guesses who it might be?

And last, we have a winner! The winner of the At My Grandmother's Knee cookbook is Kadie, who said, "I love cookbooks!! I am a transplant to the south and true southern recipes. My husband gets so excited when I find one and they turn out. Oh, and his favorite cake is Red Velvet so you see I really need this book! Thanks for the giveaway." Congrats! I hope you enjoy your new cookbook!

I'm sharing this yumminess at these parties!
Photobucket
Enter your email address:


Delivered by FeedBurner

Saturday, May 28, 2011

Holiday Coloring Pages

Find the latest series of holiday coloring pages for kids to print online.


Wednesday, May 25, 2011

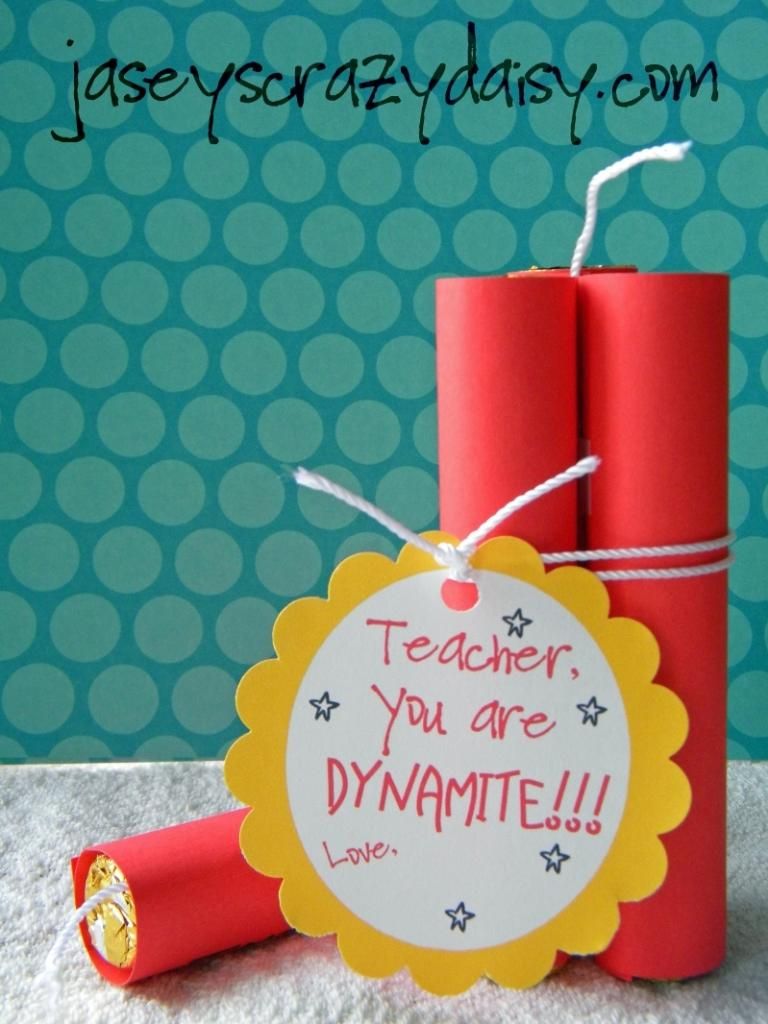
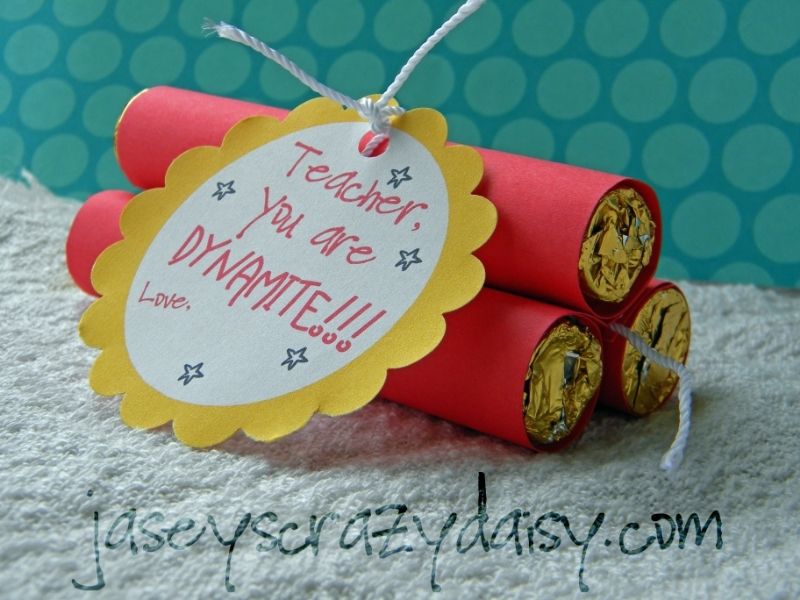
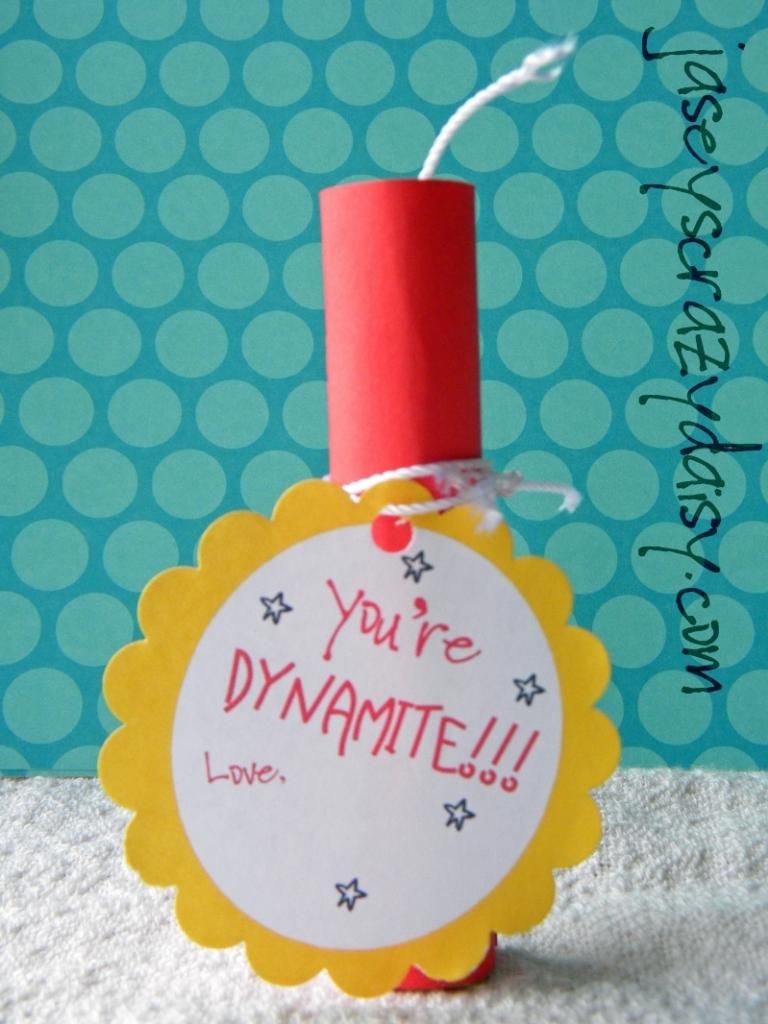
You're Dynamite {Teacher, Dad, and anyone else} Gifts with Printable Tag


I am totally excited about this gift idea! Why? Because my son is totally excited to give them out. I have tons a cute ideas, but some aren't necessarily the kind of ideas that make my son excited. It's difficult to find things that just aren't too girly. Even though this isn't pink with flowers or bows, I think girls might even like this as well. I have tags made for teachers, dads and grandpas, and some that aren't specific at all. I am going to use those for the boys on my soccer team. They are 6. They named themselves The Dynamites. Perfect!

You will need:
1. Red card stock (You will get 4 per 8x11.5" piece)
2. Pencil
3. Ruler
4. Cord, twine, pipe cleaners, or other semi-stiff rope-like material for the fuses and tying everything together
5. Rolos
6. Double-sided tape and or hot glue gun
7. White card stock or paper to print tags on

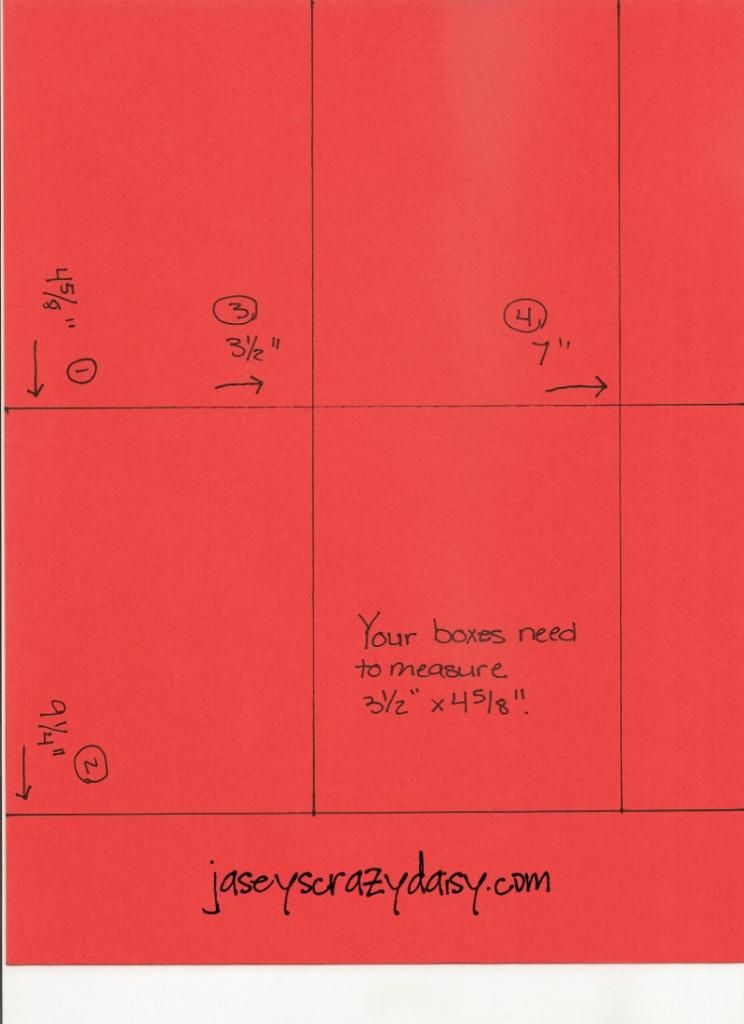
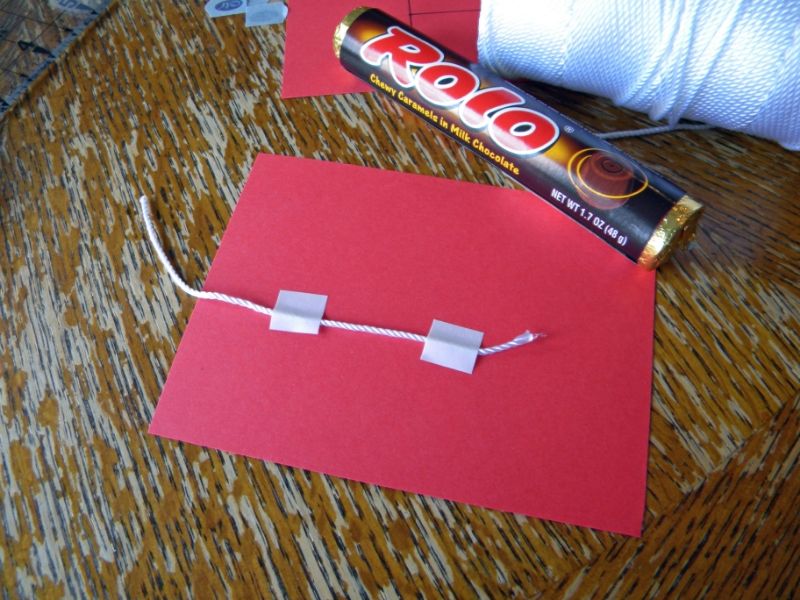
First you need to make your Rolo wraps. You need squares that are 3 1/2x4 5/8".  See below for how I measured. You will have 4 wrappers for every piece, so you can plan accordingly.


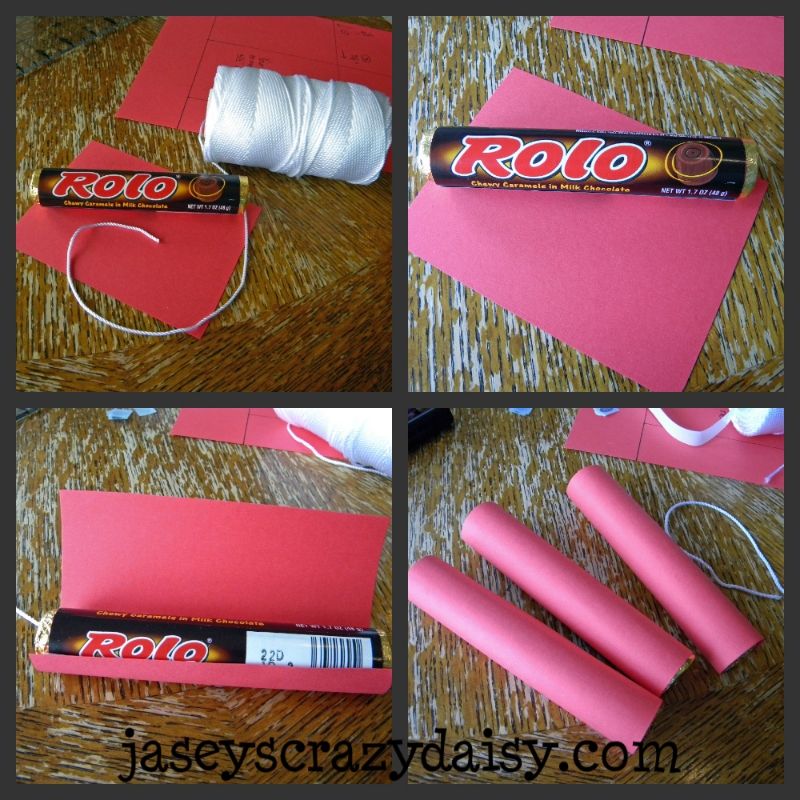
Next, wrap your Rolos. Use double-sided tape or hot glue. I tried both ways, and preferred using hot glue. Make three for one dynamite bundle.

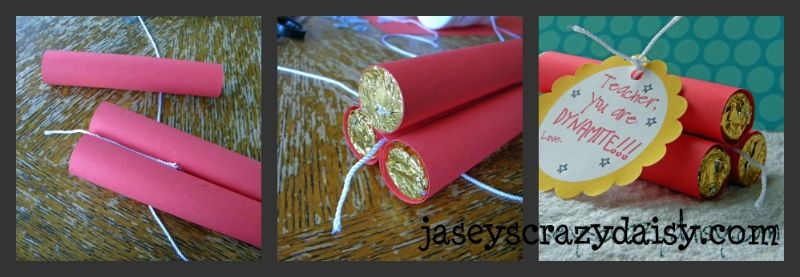
Then, glue two together with the seams hidden in the middle. Place the fuse on top. The fuse can be made of just about anything. Try to find something that will hold shape though, as ribbon would just flop over. This cord worked pretty well, but pipe cleaners would also work, or even twine. Glue third stick on top. Wrap with cord, tie, and attach tag. I cut my cord extra long and wrapped two or three times, just because I thought it looked more authentic.


If you would like to make single sticks, which I am doing for my soccer team (can't see moms thrilled with the boys receiving THREE bars of candy) just tape the fuse inside the wrapper before rolling it up.


Way too much fun!!! Totally reminds me of the Road Runner or Tom and Jerry! Would you like to use my tags? Here they are...
Dynamite Teacher Printable

Father's Day Tags can be found here.
Tags for every occasion can be found here.

Again, I used a 3-inch punch. But you could trace around a glass or even cut them into squares if you wanted. I left a couple for tags without specific labels on them on each sheet, just in case you needed one for an uncle, principal, or some other dynamite person.
Enjoy!
Photobucket
Enter your email address:


Delivered by FeedBurner

Monday, May 23, 2011

How Does Your {Fairy} Garden Grow?

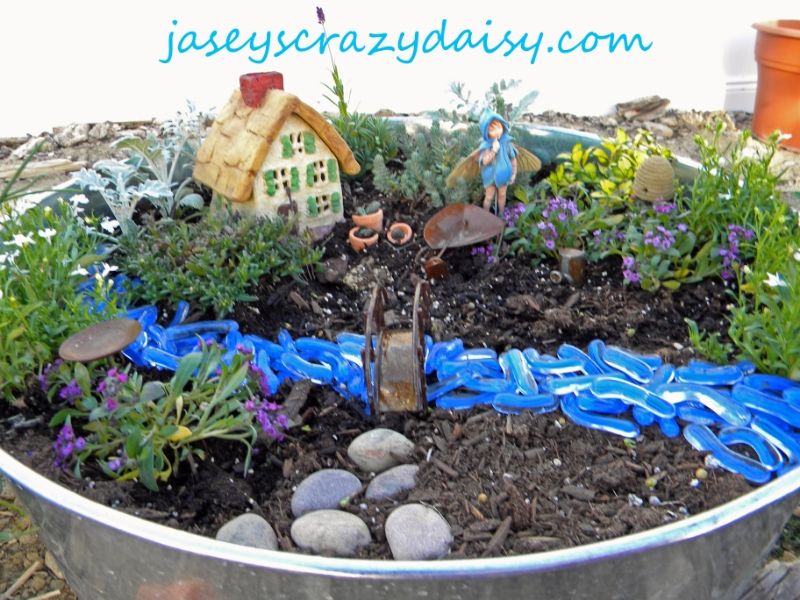
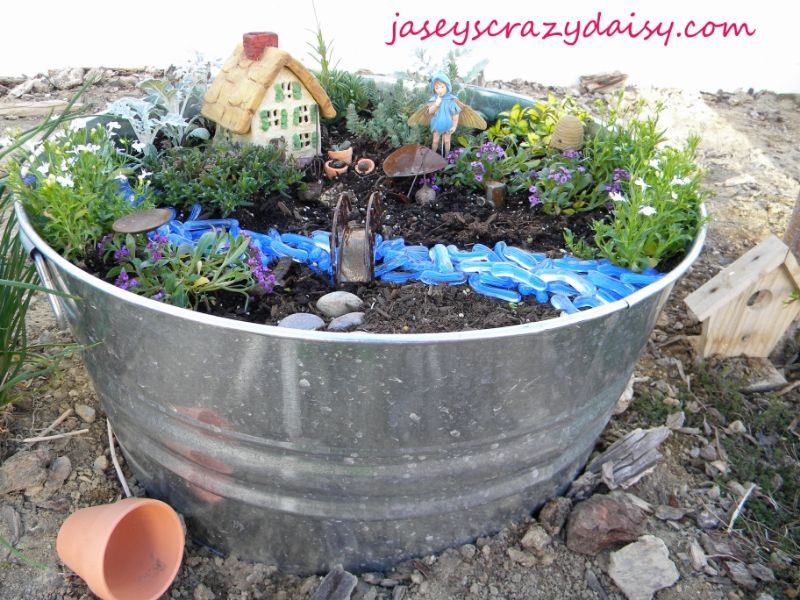
Do you have a fairy garden? We planted our this weekend. It adds so much charm to our yard. If you want to create a special place for the fairies in your garden, you probably need to know a few things:

1~ Fairies love flowers. They use them for all things and are even named for their favorites. They make beds out of them, hide in them, jump on them, and even use some to drink from. Use lots of different plants in your garden.
2~ Fairies like all things shiny, gems, glass, glitter, and mirrors. They love anything sparkly, so make sure to leave some pretty things  in your garden.
3~ Like all magical creatures, fairies love sweet things. We like to leave out crumbs of bread or cake with frosting or honey. Just a little goes a long way because fairies are not very big.
4~ Fairies love color almost as much as they love sparkles. They like bright pieces of fabric and ribbon or any other colorful things to decorate their spaces with. Make sure to add a splash of color sometimes, you will find the fairies may leave things in your garden as they add to the beautiful place you have made for them. We find gems and other new things all the time.
5~ Water, fairies need water.  You can create a small pond, or use a thimble or milk cap to leave some water out for them. 
6~ Fairies like fun music, but they don't like loud noises, so if you are outside hollering or fighting with your siblings, you will scare them away.
7~ If you don't believe in fairies, they won't come to your garden. They want to be celebrated and loved and won't waste their time where they are not treated well. 
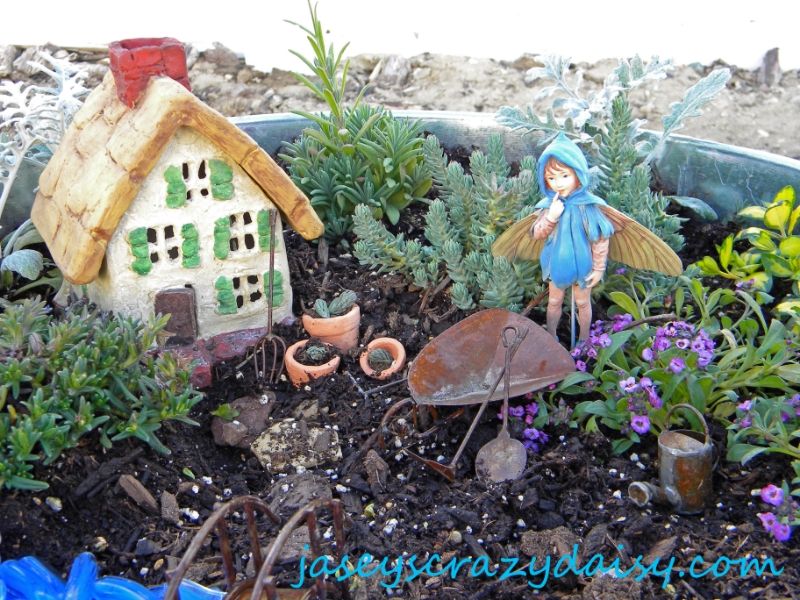
 We used some accessories that Grandma Daisy bought from our local nursery. I love the miniature gardening tools, beehive, and birdbath. My little man loves the boy fairy statue. My son wanted a river, so we used some blue glass gems from the dollar store. He collected rocks from the yard to make a stone path from the  house and across the bridge. Isn't it lovely!?!?
When you make your garden, find a container with a large surface area. This way you will have lots of space for all the fun things you wan to put in it. You could use an old wagon, washtub, or a planter shaped like a bowl. Make sure it has good drainage. We punched holes into the bottom of our washtub with nails and a hammer to make sure the water could drain well. Try to find plants with little flowers and leaves, and that don't grow too big, or you will outgrow your space. We used thyme, lobeilia, bacopa, and blue spruce seedum among others. Use your imagination when looking for plants. Look for small plants that might look like tress to fairies or for ground cover that will spread and look like a green meadow. Use your imagination, anything is possible!!!

Do you have a fairy garden? What things do you include? Do you have any tips? We'd love to know more~ if you would share your thoughts we would be grateful!

Participating in the Summertime Challenge at
Visit thecsiproject.com

I share my ideas at these parties..
Photobucket
Enter your email address:


Delivered by FeedBurner