Showing posts with label Breads. Show all posts

Friday, April 6, 2012

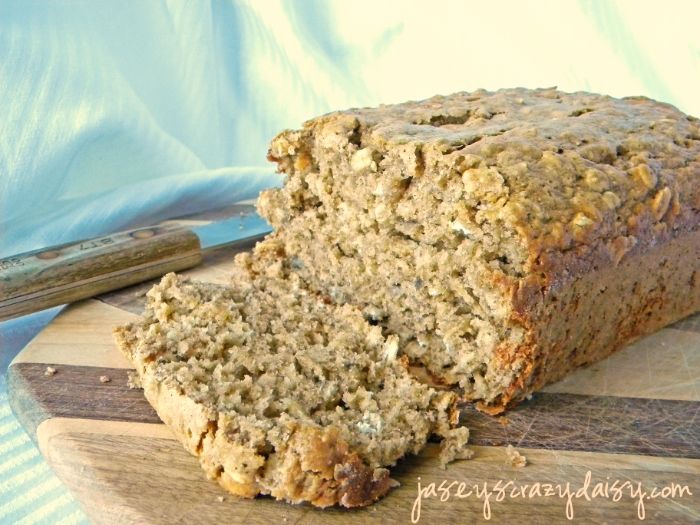
Banana Oatmeal Bread


Pin It

The sun is starting to shine a little more and more each day, trees are budding, and bulbs are spouting. Hooray! Spring is here. I cannot wait for warm weather and sunny afternoons with my boys, even if it means breaking out the shorts.... or dare I say bathing suits.  Which brings me to this recipe. I have already posted my most very favorite banana bread. It's the one Momma Daisy has always made and probably one of the most perfect comfort foods I can think of! So why post another? For several reasons. First, my kiddos have this weird allergy to the dairy protein as infants {they magically outgrow it around the age of 2}, and with our little Baby A on the way, I am on the quest to add some dairy free recipes to my collection. I also like to have a stash of healthier recipes (which you'd never know from the length of sweet things in my recipe box) to treat my family to. I stumbled across this recipe and was intrigued... bananas, oatmeal, and without dairy. However, I wanted to beef things up with some whole wheat flour, and didn't want to mess around with throwing any part of the eggs out, so I adapted the recipe to suit my needs. This isn't a super sweet bread, not that I minded, but most of all, my kids didn't seem to notice as they gobbled it down. I think it would be fabulous spread with Nutella, or dotted with chocolate chips, particularly because it's not overly sweet as is, but we enjoyed sliced warm and plain jane. Maybe next time. Supposedly, this bread freezes well when sliced and wrapped tightly into individual pieces. I haven't tried it yet, but intend make a loaf for my son's school lunches and will let you know how it works out.

Banana Oatmeal Bread
*Adapted from Joy of the Baker

1/2 cup whole wheat flour
3/4 cup all purpose flour
1/2 teaspoon salt
1/2 teaspoon baking soda
1/4 teaspoon baking powder
1/2 teaspoon cinnamon
1 cup uncooked old fashioned oats
2 medium eggs
3 large ripened bananas
3 teaspoons oil
1 teaspoon vanilla

Preheat oven to 350. Grease and flour a loaf pan, set aside. In a large bowl, stir together dry ingredients including oats and cinnamon.

In mixing bowl, beat eggs well. Add bananas one at a time and beat until smooth and mixed well. Add oil and vanilla and beat until mixed well. Add dry ingredients, in three additions, mixing until well incorporated.

Pour batter into pan and bake until loaf is firm to touch, 45-50 minutes. Remover from oven and cool in pan for 5 minutes. Turn out and cool on wire rack. Slice and enjoy.
Photobucket
Enter your email address:


Delivered by FeedBurner

Monday, June 27, 2011

Glazed Doughnut Muffins


I don't know about you, but brunch, is probably my most favorite meal. Ever. I think it's because you are  expected to eat the most delicious things, and call it a meal. You don't even have to wait for dessert! Now that's what I call perfection! Doughnuts and muffins seem like a pretty natural brunch food, don't you think? Combining the two only makes it better. Doughnuts + muffins = super delicious and easy and perfect. 

Glazed Doughnut Muffins
*Recipe by Crazy Daisy adapted slightly from The Bakery Spot

Muffin Batter
1/4 cup butter, softened (the other half of the stick will be used in the glaze)
1/4 cup canola oil
1/2 cup sugar
1/3 cup brown sugar
2 large eggs
1 1/2 teaspoons baking powder
1/4 teaspoon soda
1 - 1 1/4 teaspoon pumpkin pie spice
1/2 - 1 teaspoon cinnamon
3/4 teaspoon salt
1 teaspoon vanilla
2 2/3 cups flour
1 cup milk

Glaze
4 tablespoons butter, melted
1 cup powdered sugar
3/4 teaspoon vanilla
2 Tablespoons hot water

Preheat oven to 425 degrees. Lightly grease muffin tin, or use paper muffin cups.

Cream together butter, oil, and sugars until smooth. Add eggs, beat to combine. Stir in baking powder, baking soda, pumpkin pie spice, cinnamon, salt, and vanilla. stir in flour, alternating with milk. Begin and end with flour, and make sure everything is mixed well.

Fill muffins cups, until nearly full. (I used an ice cream scoop and then divided the extra batter between all the muffins.)

Bake for 14-17 minutes, our until pale golden brown and the toothpick comes out clean when inserted into the middle.

Prepare the glaze by mixing together the melted butter, powdered sugar, vanilla, and water, whisking until smooth.

Dip tops of muffins into the glaze and allow to harden. You can even double dip if you'd like.

Serve warm, for best results, but muffins will keep at room temperature, covered, for a day.

Next time I think I'll try almond instead of vanilla in the glaze. Mmmmmm! Enjoy!

PS - If you are thinking you've seen these before, I shared them over at Kel's place on Friday! If you haven't ever checked out Between the Lines, head over and say hello for me!
Photobucket
Enter your email address:


Delivered by FeedBurner

Thursday, June 9, 2011

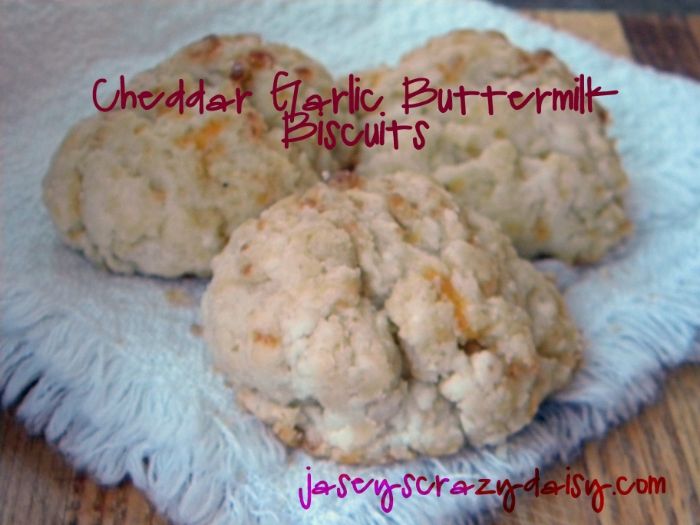
Cheddar Garlic Buttermilk Biscuits {My take on Red Lobster's Cheddar Biscuits}


I have a weakness for carbs. Adding buttermilk, garlic, and cheddar cheese certainly doesn't help matters. At all. I don't want to like them. But I do, I simply can't help it. Sometimes they just call my name and I just can't resist.  Especially when I know they are the perfect match for whatever I am serving for dinner. Or maybe they are dinner. They are what I want for dinner. Just kidding, sort of. Seriously, what's not to like, though? Tell me. Maybe you can help me learn to steer away from them. Until then, you will just have to suffer with me. This is my take on those famous Red Lobster Cheddar Biscuits. We don't have a Red Lobster in my little corner of Wyoming, so I had to figure out how to make my own. I adapted my recipe from this Top Secret Restaurant recipe. They were pretty close, but I certainly don't remember anything green adorning the biscuits in the restaurant. And good luck getting my kids to eat biscuits sprinkled with anything green. Come to think of it, I don't want my biscuits sprinkled with anything green either. I wanted a softer and moister biscuit, enter buttermilk. And cheddar. More cheddar, after all, isn't the cheese the star of this show?

Cheddar Garlic Buttermilk Biscuits
*Recipe by Crazy Daisy Adapted from here.

Biscuit Ingredients 2 1/2 cups Bisquick baking mix
3/4 cups cold buttermilk
4 Tablespoons cold butter, cubed (1/2 stick)
1/4 teaspoon garlic powder
1 3/4 cups sharp grated cheddar (sometimes I even use 2 cups)

Butter Glaze
2 Tablespoons butter, melted
1/2 teaspoon garlic powder

Preheat oven to 400 degrees.

Cut butter into Bisquick mix using a pastry cutter or large fork, until small chunks if butter remain the size of peas. Add cheese, buttermilk, and garlic. Mix by hand or with wooden spoon until just combined, don't over mix. Add a splash of buttermilk if mixture seems too dry, the batter will be super thick though, use just enough buttermilk to make everything stick together.

Drop biscuits, by 1/4 cup portions, onto an ungreased cookie sheet. An ice cream scoop works well.

Bake for 15-17 minutes or until the tops begin to turn golden brown.

Melt two Tablespoons of butter in a small bowl in the microwave. Add 1/2 teaspoon garlic powder and stir to combine. Brush on top of biscuits with a pastry brush, spreading the entire butter mix between all the biscuits. Makes @ one dozen biscuits.


Photobucket

Enter your email address:


Delivered by FeedBurner

Friday, December 10, 2010

Caramel Sticky Buns


These sticky buns were one of the very first things ever shared on Crazy Daisy. They are so amazing, and so easy, that they merit a repost now that I have a few more followers, who may just be looking for the perfect breakfast treat to serve during the holiday season! This is one of those recipes that truly takes me back! I have many childhood memories of mornings my family shared these special sticky buns when mom treated us with something extraordinary! Who could resist the taste of fresh baked bread especially when its dripping with rich sweet gooey caramel? Now, I love to make them as well, and a recipe like this is perfect for those times when you want to treat without fussing in the kitchen. Even though these sticky buns taste as if you spent hours kneading dough, and the caramel drizzle is ridiculously good, they are so very easy! Let’s just face it, sometimes the cook has more important things to do than slaving over sweetbread dough, especially, when no one will notice or even care that these babies landed in the middle of the table instead. Promise! Besides, there has to be time for unwrapping wrapping presents, eating baking cookies, and enjoying all the other holiday activities you have planned! I don't know about you, but I don't want to miss out on any of the holiday fun, and I don't have to with recipes as amazing as this one! Trust me, surprise your family one Saturday morning over their winter break, or better yet, surprise them Christmas morning!

Let's see, you will need:

Now, don't forget! The pudding has to be COOK & SERVE not instant. It looks like this:

And then you'll end up with this: (Yes, I know my pan is well-loved, but mom gave it to me so I prefer it to my prettier one.)

In the morning, the dough will have risen and puffed up like this:

And finally:

Breakfast doesn't get any better than this, I promise!!!


Caramel Sticky Buns

18 frozen dinner rolls (Rhodes work perfectly)
½ package (3.5 oz) butterscotch cook & serve pudding (NOT INSTANT)
1 stick butter
¾ cup brown sugar
chopped nuts – optional

Grease or spray a bundt pan with non-stick oil. Sprinkle with nuts (optional). Place frozen rolls in pan. Now, sprinkle HALF of the package of pudding over rolls. Make sure the pudding is NOT the instant kind! Melt butter and brown sugar together and pour over rolls. Sprinkle with a few more chopped nuts. Cover pan with greased foil and put a dishtowel over the foil. Place in a warm place overnight (the oven works great, as long as it is turned off). In the morning, bake at 325 degrees for ½ hour. Invert immediately onto a large plate.

Now, doubling this recipe works out great. Not only are there just enough rolls for two pans in one package, but you will be able to save the other half of the pudding from dusting you cupboards as you use it for the second pan. I usually make one with nuts and one without. That way everyone is happy!

I have also found that if you want to treat your kids after school, you can do all the prep work in the morning before you leave and bake them when the kiddos get home! Who wouldn't want to come home to a plate full of these?

I'm sharing this yumminess with
Join  us Saturdays at tatertotsandjello.com for the weekend wrap up    party!
Photobucket


Enter your email address:


Delivered by FeedBurner