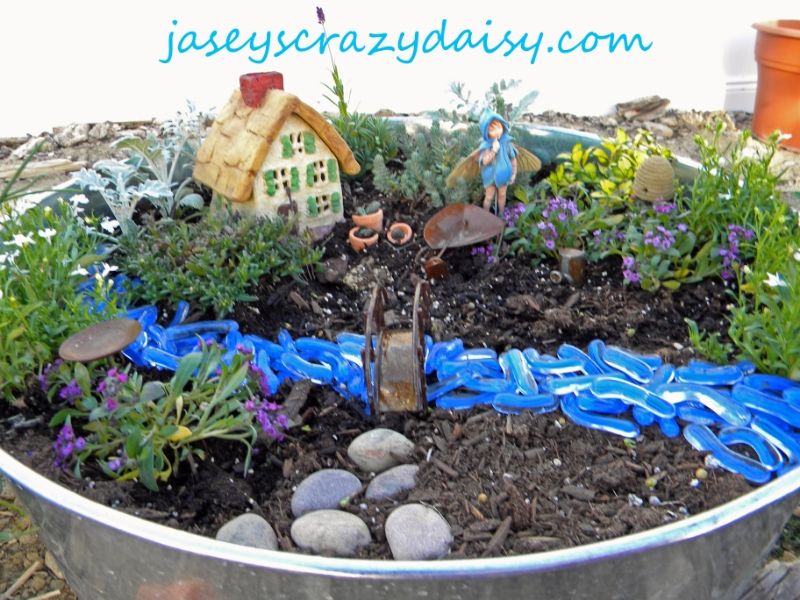
Do you have a fairy garden? We planted our this weekend. It adds so much charm to our yard. If you want to create a special place for the fairies in your garden, you probably need to know a few things:
1~ Fairies love flowers. They use them for all things and are even named for their favorites. They make beds out of them, hide in them, jump on them, and even use some to drink from. Use lots of different plants in your garden.
2~ Fairies like all things shiny, gems, glass, glitter, and mirrors. They love anything sparkly, so make sure to leave some pretty things in your garden.
3~ Like all magical creatures, fairies love sweet things. We like to leave out crumbs of bread or cake with frosting or honey. Just a little goes a long way because fairies are not very big.
4~ Fairies love color almost as much as they love sparkles. They like bright pieces of fabric and ribbon or any other colorful things to decorate their spaces with. Make sure to add a splash of color sometimes, you will find the fairies may leave things in your garden as they add to the beautiful place you have made for them. We find gems and other new things all the time.
5~ Water, fairies need water. You can create a small pond, or use a thimble or milk cap to leave some water out for them.
6~ Fairies like fun music, but they don't like loud noises, so if you are outside hollering or fighting with your siblings, you will scare them away.
7~ If you don't believe in fairies, they won't come to your garden. They want to be celebrated and loved and won't waste their time where they are not treated well.
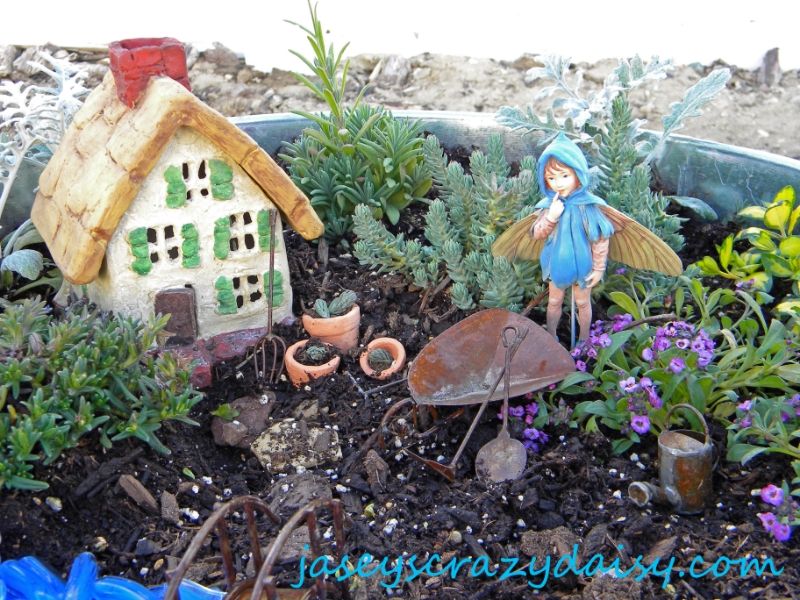
We used some accessories that Grandma Daisy bought from our local nursery. I love the miniature gardening tools, beehive, and birdbath. My little man loves the boy fairy statue. My son wanted a river, so we used some blue glass gems from the dollar store. He collected rocks from the yard to make a stone path from the house and across the bridge. Isn't it lovely!?!?
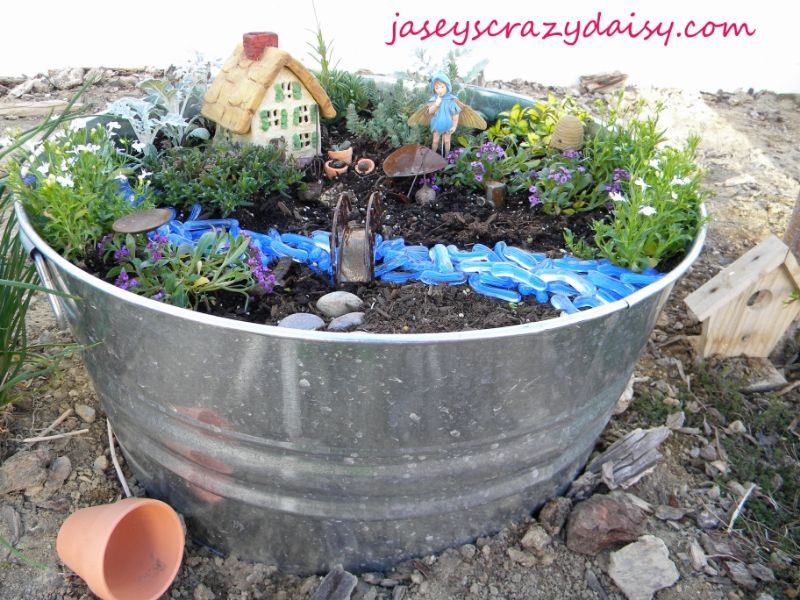
When you make your garden, find a container with a large surface area. This way you will have lots of space for all the fun things you wan to put in it. You could use an old wagon, washtub, or a planter shaped like a bowl. Make sure it has good drainage. We punched holes into the bottom of our washtub with nails and a hammer to make sure the water could drain well. Try to find plants with little flowers and leaves, and that don't grow too big, or you will outgrow your space. We used thyme, lobeilia, bacopa, and blue spruce seedum among others. Use your imagination when looking for plants. Look for small plants that might look like tress to fairies or for ground cover that will spread and look like a green meadow. Use your imagination, anything is possible!!!
Do you have a fairy garden? What things do you include? Do you have any tips? We'd love to know more~ if you would share your thoughts we would be grateful!
Participating in the Summertime Challenge at

I share my ideas at these parties..