Showing posts with label Recipes. Show all posts

Friday, April 6, 2012

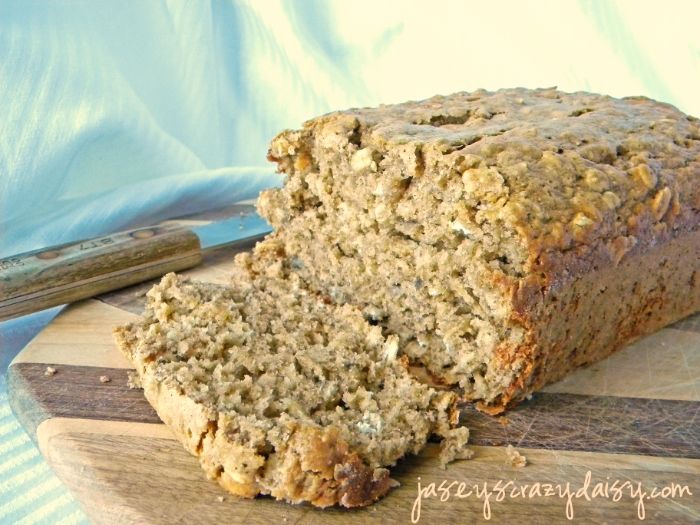
Banana Oatmeal Bread


Pin It

The sun is starting to shine a little more and more each day, trees are budding, and bulbs are spouting. Hooray! Spring is here. I cannot wait for warm weather and sunny afternoons with my boys, even if it means breaking out the shorts.... or dare I say bathing suits.  Which brings me to this recipe. I have already posted my most very favorite banana bread. It's the one Momma Daisy has always made and probably one of the most perfect comfort foods I can think of! So why post another? For several reasons. First, my kiddos have this weird allergy to the dairy protein as infants {they magically outgrow it around the age of 2}, and with our little Baby A on the way, I am on the quest to add some dairy free recipes to my collection. I also like to have a stash of healthier recipes (which you'd never know from the length of sweet things in my recipe box) to treat my family to. I stumbled across this recipe and was intrigued... bananas, oatmeal, and without dairy. However, I wanted to beef things up with some whole wheat flour, and didn't want to mess around with throwing any part of the eggs out, so I adapted the recipe to suit my needs. This isn't a super sweet bread, not that I minded, but most of all, my kids didn't seem to notice as they gobbled it down. I think it would be fabulous spread with Nutella, or dotted with chocolate chips, particularly because it's not overly sweet as is, but we enjoyed sliced warm and plain jane. Maybe next time. Supposedly, this bread freezes well when sliced and wrapped tightly into individual pieces. I haven't tried it yet, but intend make a loaf for my son's school lunches and will let you know how it works out.

Banana Oatmeal Bread
*Adapted from Joy of the Baker

1/2 cup whole wheat flour
3/4 cup all purpose flour
1/2 teaspoon salt
1/2 teaspoon baking soda
1/4 teaspoon baking powder
1/2 teaspoon cinnamon
1 cup uncooked old fashioned oats
2 medium eggs
3 large ripened bananas
3 teaspoons oil
1 teaspoon vanilla

Preheat oven to 350. Grease and flour a loaf pan, set aside. In a large bowl, stir together dry ingredients including oats and cinnamon.

In mixing bowl, beat eggs well. Add bananas one at a time and beat until smooth and mixed well. Add oil and vanilla and beat until mixed well. Add dry ingredients, in three additions, mixing until well incorporated.

Pour batter into pan and bake until loaf is firm to touch, 45-50 minutes. Remover from oven and cool in pan for 5 minutes. Turn out and cool on wire rack. Slice and enjoy.
Photobucket
Enter your email address:


Delivered by FeedBurner

Monday, March 12, 2012

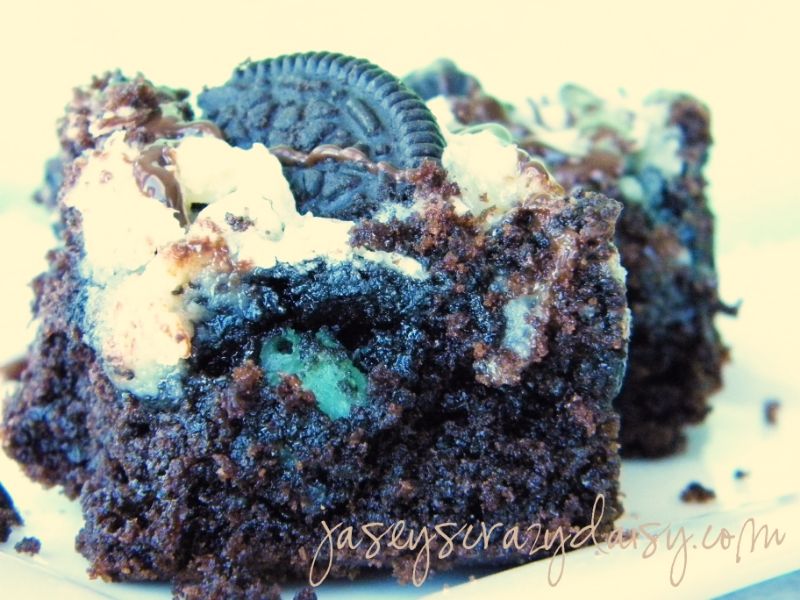
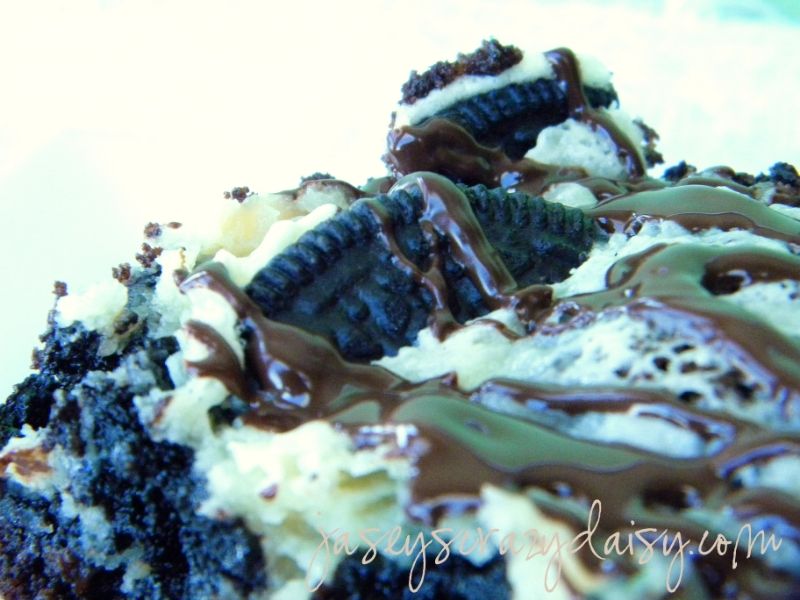
Shamrock Bars {AKA Mint Cookies and Cream Cheesecake Bars}

Pin It
I'm not sure what you feed the leprechauns in your world, but these went over pretty well in mine. It seems like those little green fellows favor anything minty, and with one layer of cookies and cream cheesecake and another of chocolate fudgie goodness, how could you go wrong? If mint isn't your cup of tea, simply use your favorite Oreo substitute. You are sure to find a winning combination.

Shamrock Bars {AKA Mint Cookies and Cream Cheesecake Bars}
*Recipe by Jasey's Crazy Daisy, Adapted from Cookies and Cups White Chocolate Butter Bars

1/2 cup cold butter
1 box devil's food chocolate cake
2 eggs
1 (8 oz.) block of cream cheese, softened
2 cups powdered sugar
2 eggs
2 teaspoons vanilla extract
20 Mint Oreos, chopped into fourths,  15 for for the cheesecake layer, 5 for the topping
1/2 cup chocolate chips

Preheat oven to 325. Spray a 9x13-inch pan with cooking spray. In mixing bowl, combine dry cake mix and butter. Beat on medium until crumbly. Add eggs and beat until smooth. Spread mixture in prepared pan. Sprinkle 15 Mint Oreos, chopped into fourths, evenly over bottom layer. In another mixing bowl, beat cream cheese and powdered sugar until smooth. Add eggs and vanilla and mix until combined. Pour evenly over chopped Oreos. Make sure to pour as evenly as possible across the crust. It may not look like there is enough, but the batter will expand upon baking. If you need to, use a spoon to scoop batter from thicker spots to those that seem a little thin. Sprinkle reserved cookie piece over the top of bars. Pop in oven and bake for about 30 minutes or until center is set. Remove from oven. Set aside. Place chocolate chips into a zip-loc baggie and put into microwave for 20 second intervals. Squish the bag with your fingers to mix and smooth the chocolate between intervals. When melted smooth, snip a tiny piece off of the corner of the bag and drizzle over bars. Cool until set, the fridge can hasten this process. Cut and enjoy!!!

I think I'll have another. Thank goodness they are so easy to make!

Speaking of leprechauns, have you started thinking about how you might catch one this year? There's still time if you hurry. Maybe this is the year we'll get our hands on all that lucky gold!
Photobucket
Enter your email address:


Delivered by FeedBurner

Tuesday, March 6, 2012

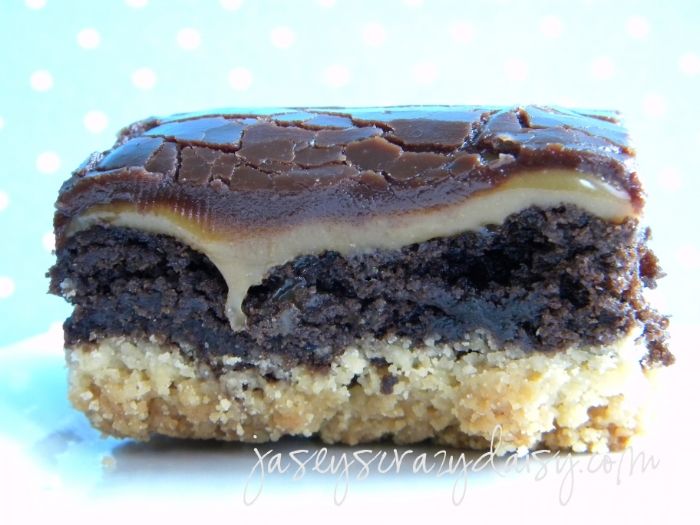
Twix Brownies {Who'd have thought Twix could get any better?}


Pin It
Brownies, again?!?! Yes, I know I have a problem! I cannot help myself. But really, I have been thinking about this particular brownie for quite some time now. You ask if there was anything wrong with Twix candy bars before they met the brownie. Not really, and yet somehow taking the creamy caramel filling, crunchy cookie base, and delicious chocolate topping and combining them with a rich moist brownie layer some how transforms both desserts into one super decadent treat. Try them. I'm dying to know if you think I'm right!

Twix Brownies
*Recipe by Jasey's Crazy Daisy
Crust Layer
1 (12.8 oz.) package of Simply Sandies Shortbread Cookies
6 Tablespoons butter

Brownie Layer
1 box of brownie mix
Ingredients called for in directions on back of box
1/4 cup hot fudge ice cream topping

Caramel Layer
1 (14 oz.) bag of caramels
2 Tablespoons heavy cream

Chocolate Topping
1 (11.5 oz.) bag milk chocolate chips
2 Tablespoons butter
1/4 cup heavy cream

*Note - If you don't have any cream on hand, and don't want to purchase for such a small amount, just use milk. Things will still turn out deliciously. I bet no one even notices, unless you tell them.

Grease bottom of 9x13-inch baking pan. For easier cutting, line the pan with foil first. Using a food processor, pulse cookies until they resemble sand. In a medium bowl, melt 6 Tablespoons butter. Add cookie crumbs, stirring until all crumbs are moist. Press into bottom of prepared pan.

Prepare brownie batter as directed on the back of the box, mixing 1/4 cup hot fudge ice cream topping into brownie batter (straight from the jar, unheated). Pour batter on top of cookie crust and bake as directed. If baking at a high altitude, don't forget to follow special instructions. Cool.

Place caramels and cream in a saucepan and cook over medium-low heat until caramels are melted smooth and creamy, stirring constantly. Pour over cooled brownies. Try to spread the caramel evenly across the brownie surface while pouring to make spreading easier. Let cool until set. You can quicken this by sticking the brownies in the freezer for about 15 minutes.

Melt chocolate, butter, and cream together in a saucepan over medium-low heat, stirring occasionally until melted and creamy. Pour over cooled caramel layer. Again, cover as much of the brownies as possible while pouring to make spreading easier. Cool. If you are in a hurry pop them in the fridge for a bit. Cut and enjoy.

Truthfully, I'm not sure I'm over brownies yet. Tell me, what's your favorite brownie like?
Photobucket
Enter your email address:


Delivered by FeedBurner

Friday, March 2, 2012

Chewy Mint Chocolate Cocoa Crispy Treats

Pin It
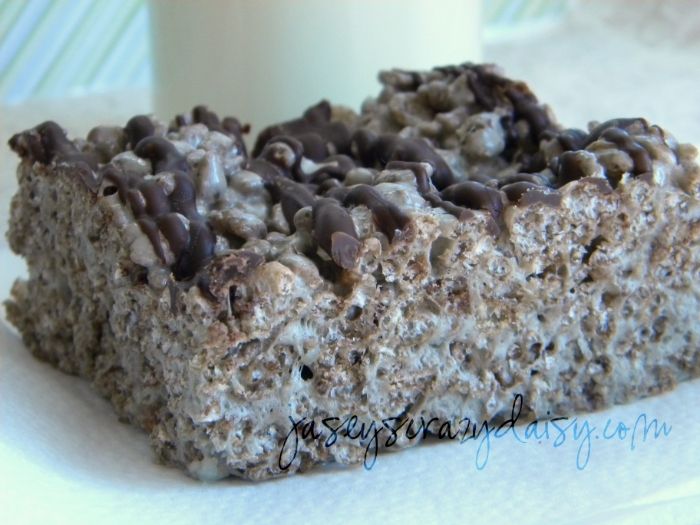
Mint chocolate anything is always one of my favorites. Since this flavor combination seem to be everywhere this time of year, I thought I would share one of my favorite mint chocolatey treats with you. Rice Krispie Treats, meet mint and chocolate. Not only would they be festive topped with shamrock sprinkles or an extra drizzle of green candy melts for St. Patrick's Day, they are a perfectly easy treat for anytime just as they are.

Chewy Mint Chocolate Cocoa Crispy Treats
*Recipe  by Jasey's Crazy Daisy

4 1/2 Tablespoons butter
2 (8 oz.) bags of Jet-Puffed Chocolate Mint Marshmallows
6 cups Cocoa Krispies
1/3 cup Andes baking chips

Grease or butter a 8X8 pan. Pour Cocoa Krispies into a large bowl. In another large microwave-safe bowl, melt marshmallows and butter for 60 seconds. Stir. Repeat until mixture is melted and mixed together. Pour over Cocoa Krispies. Stir, using a wooden spoon, until mixed well. Keep mixing until all the crumbs are incorporated. Pour into prepared pan and press to spread evenly. I find it helps to spray my fingers, or a wooden spoon with cooking spray to press the mixture without sticking. Set aside. Place Andes baking chips in a zip-loc baggie. Place in microwave for 20 seconds. Take out and knead to mix. Repeat until mint chocolate is melted. Cut off a small piece of the corner of the bag and drizzle bars with mint chocolate. I usually place them in the fridge to hurry the process (but if you leave them too long, you will have to let them sit out to soften before cutting). Once chocolate has set, cut into bars and enjoy.

*Note - If you omit the Andes mint chocolate drizzle, the mint flavor that results from the marshmallows is very subtle. The drizzle completes the minty taste of these treats perfectly.  Next time I make these, I may even try to mix in some of the Andes baking chips just after the cereal has been stirred into the marshmallow mixture, and has cooled just a bit, before spreading the treats in my pan. Yum!

Now to wrap up a little business by announcing a winner! If you are tuned into my facebook page, you already know who won this cookbook.
If not, our winner is,

I love all of your ideas! My favorite cake is german chocolate cake! The photos you post of your cakes bring back so many memories of my grandma who used to be a cake decorator for many years!
Amanda

Congrats, Amanda, enjoy your new cakebook! What's your favorite mint chocolate treat?
Photobucket
Enter your email address:


Delivered by FeedBurner

Wednesday, February 29, 2012

Happy Birthday Dr. Seuss (Green Eggs and Ham Candy Pretzel Treats}


Pin It
Friday, March 2, is Dr. Seuss' birthday! By chance, my son was assigned to bring snacks to school and wanted to keep with his tradition of bringing something festive to celebrate his favorite author's special day (he still thinks he's the cat with the tall hat). I had seen these once made with yellow M&M's for April Fools Day, and thought they would be perfect made in green as Green Eggs and Ham. We had a great time making these together (which I love). He is thrilled with the way they turned out and can't wait to share them tomorrow. They are quick and easy and great for last minute treats!!!

Green Eggs and Ham Candy Pretzel Treats

1 pound almond bark
Peanut butter M&M's, larger bag
Stick pretzels

Cover baking sheet with wax paper. Spray with cooking spray.  Place pretzels in pairs spaced evenly across the wax paper. I would aim for 30 pairs, since we ended up with about 30 treats. Separate about 30 green M&M's from the rest of the bag and place in a bowl. Set aside. Melt almond bark as directed. Using a tablespoon, pour almond bark over pretzel pairs. Swirl with the spoon a little to help it puddle in an egg shape. Place M&M upside down in the center (they don't have to be upside down, but I'm a little crazy about details sometimes).  Place baking sheets in the refrigerator until the treats set up. Enjoy!

*Note - you don't have to use baking sheets, and can place the wax paper directly on top of your table. BUT they will set much more quickly and be a little more difficult for sampling fingers to find in the fridge. Trust me, I know.
Photobucket
Enter your email address:


Delivered by FeedBurner

Friday, February 24, 2012

Coconut Pineapple Cake


Pin It
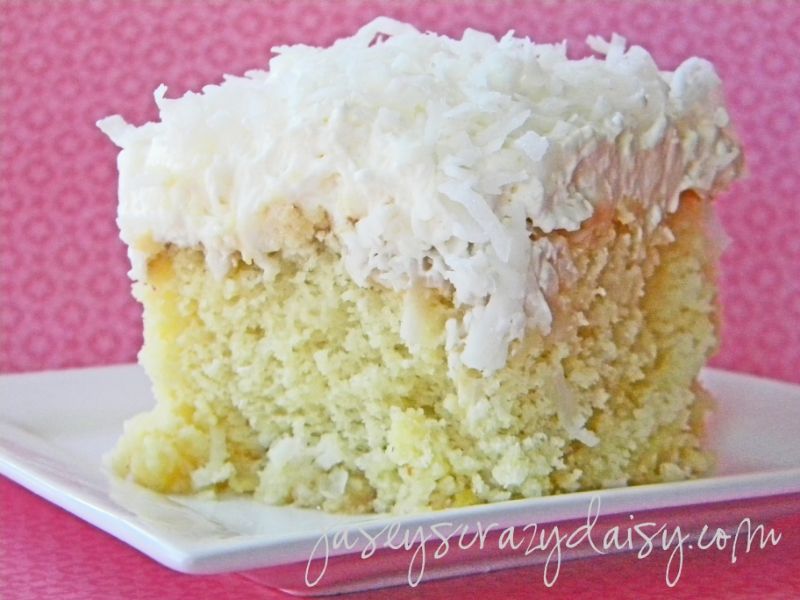
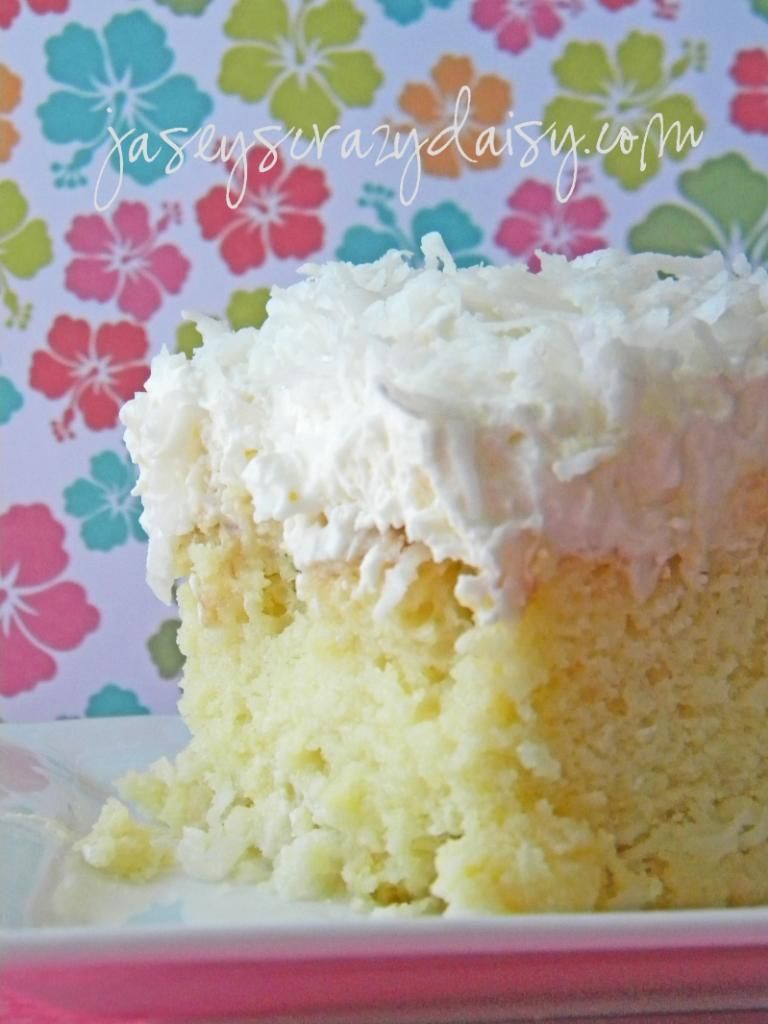
It's party time! Two years ago, I started writing this blog on a whim. I had no idea what I was doing or where this little journey would lead to. Not only did I met some amazing friends out Bloggersville, I have learned so much along the way. I cringe at some of the pictures in my earlier posts, but it is fun to see how they have transformed as my skills have improved  and I have developed my own unique style. What does all this have to do with cake? Since it's the month of JCD's Blogiversary, I thought we needed a recipe worthy of celebrating with. And this one is totally deserving. One of my grandfather's favorites, it's a tender coconut cake, dotted with just the right amount of coconut and pineapple, soaked with a slightly sweet creamy pineapple coconut glaze for moistness, and frosted with real sweetened whipped cream. Not only do I love it's flavors, I love how versatile it is. As a layer cake, it is impressive, however, for less formal occasions, I simply bake it in a 9x13 cake pan, and call it good. Still pretty and oh-so-yummy, but without all the fuss.

Coconut Pineapple Cake
*Recipe by Jasey's Crazy Daisy

Cake
1 light colored Super Moist or pudding included cake mix, white, yellow, even golden butter, your preference
3 eggs
1  (14 oz.) can coconut milk, not cream of coconut
1/2 cup flaked coconut
1 (8 oz.) can of crushed pineapple, drained, juice reserved for glaze

Glaze
1 1/2 cups of milk, or less depending on pineapple juice
reserved pineapple juice
1/2 cup sugar
1/2 cup coconut

Frosting
1 pint heavy whipping cream
1/3 cup sugar
1/2 teaspoon vanilla (use 1 teaspoon if you like more)
coconut for dusting

Prepare pans. If using two 9-inch circle pans, grease them, add a layer of traced parchment paper, then grease and flour. If using a 9x13-inch pan, spay the bottom with cooking spray. Sometimes, I even divide the batter into two 8-inch square baking pans, keep one for my family and making the other in a disposable pan,  send it off to another deserving family. This works perfect for times when I am sending dinner to a new mom, or a grieving family, or even when I just want to surprise my grandpa.

In a large bowl, beat cake mix, eggs, and coconut milk with mixer on low speed for 30 seconds. Beat on medium speed for 2 minutes, scraping occasionally. Stir in coconut and pineapple. Pour into pans. Bake as directed per pan size on box. Don't over bake, I take it out when a few moist crumbs stick to a toothpick. Cool 15 minutes.

While cake is cooling, add enough milk to reserved pineapple juice to make 1 1/2 cups. Combine pineapple-milk mixture, sugar, and 1/2 cup coconut in a saucepan. Bring to a boil, reduce heat, and simmer for 1 minute. Poke holes into cake using a fork, straw, or even a kabob stick. Carefully spoon evenly over warm cake allowing liquid to soak into holes. Pop cake into the fridge to cool completely.

Beat heavy whipping cream, 1/3 cup sugar, and 1/2 teaspoon vanilla until soft peaks form. (If making a layer cake, you may want to beat it just a little extra so that sticks to the sides of the cake. I also spread a little of this prepared cream between layers). Frost cake with prepared whipped cream. Cover cake with remaining coconut.  Keep (and store) in refrigerator until ready to serve. Beautiful!


Enjoy today and if you love cake, who doesn't, I have one of these cookbooks up for grabs. Find out more about the giveaway by clicking here.

Photobucket
Enter your email address:


Delivered by FeedBurner

Monday, February 20, 2012

Vegan Red Velvet Cupcakes {and Cake Ladies: Celebrating a Southern Tradition Cookbook Giveaway}

***Giveaway is closed, but you can still check out these amazing cupcakes!***

Aren't these cupcakes beautiful? I have a wonderful treat for you today! There's a brand new cookbook,  Cake Ladies: Celebrating a Southern Tradition, out dedicated to southern cake ladies, their specialty cakes (21 signature recipes) and their love for bringing sweetness into life's most memorable moments. Each profile provides beautiful photographs of the women, their recipes, and the communities that depend on them in their "lives in cake." Seriously, I have a home filled with cookbooks, and I swoon over this one. I have read every page, many times, trying to decide which cake I want to make first. Not only do these Vegan Red Velvet Cupcakes look tempting, but the Pineapple Upside Down Cake, Vanilla Pound Cake, Mississippi Mud Cake, and the Italian Creme Cake look heavenly. I'm leaning towards the Italian Creme Cake.... I'll let you know how it turns out! 


Vegan Red Velvet Cupcakes
This vegan, low-fat variation of the classic Southern recipe gets its beautiful color from beets rather than red food coloring. The Cupcake Fairies are interested in offering healthier food to their community, and vegan baking is naturally low in cholesterol and saturated fats.
PREP TIME: 20 minutes (includes peeling, grating, and pureeing beets)
BAKING TIME: 25 minutes
COOLING TIME: 20 minutes
DECORATING TIME: 15 minutes

YOU WILL NEED
FOR THE CAKE:
2 cups soy milk
2 teaspoons apple cider vinegar
2½ cups all-purpose flour
2 cups sugar
¼ cup natural cocoa powder
1 teaspoon baking powder
1 teaspoon baking soda
1 teaspoon salt
½ cup vegetable oil
2 tablespoons pure vanilla extract
2 tablespoons unsweetened applesauce
2 large red beets, about 12 ounces, peeled, shredded, and pureed (you should have about 2 cups of beet puree)
FOR THE ICING:
1 cup vegan margarine (a nonhydrogenated brand is best), at room temperature
1 cup vegan cream cheese, at room temperature
2 tablespoons pure vanilla extract
8 cups powdered sugar
Preheat the oven to 350°F. Line two 12-cup muffin tins with paper cupcake liners.

MIX THE BATTER
Combine the soymilk and the vinegar in a large mixing bowl, and set aside to curdle. In a separate bowl, sift the flour, sugar, cocoa powder, baking powder, baking soda, and salt. After the soymilk mixture has curdled, add the vegetable oil, vanilla, and applesauce to it, and stir. Pour the wet ingredients into the dry ingredients, and mix with a hand mixer until no lumps remain. Fold the pureed beets into the batter by hand with a rub­ber spatula until just combined.

BAKE THE CUPCAKES
Fill the lined muffin pans until each cup is three-fourths full of batter. Depend­ing on the size of your cupcake pans, this recipe should make 2 to 2½ dozen cupcakes. Bake cupcakes for 25 minutes, or until a toothpick inserted in the center of a cupcake comes out clean. Set aside to cool. Once cool enough to handle, transfer the cupcakes to a rack, line six compartments of one of the pans with paper liners, fill, and bake the remaining batter.

MAKE THE ICING
Combine the vegan margarine and vegan cream cheese and beat until thoroughly mixed and creamy. Add vanilla and beat until combined. Add the powdered sugar, 2 cups at a time, and incorporate into the creamed mixture. Once all the sugar has been added, scrape down the bowl and beat for 2 minutes at medium speed.

ICE THE CUPCAKES
Place the cooled cupcakes on a serving tray.
METHOD I:
Using a spatula or a butter knife, spread 2 rounded tablespoons of icing onto the top of each cooled cupcake, swirling to cover the surface of the cupcake.
METHOD II:
Place an icing tip inside a pastry bag. Fill the pastry bag half full of icing. Squeez­ing from the top of the bag, force the icing through the tip onto the top of the cupcakes, swirling the icing around the top of each cupcake.
Serve at room temperature, and refrigerate any leftovers. Vegan Red Velvet Cupcakes will keep for up to four days, refrigerated.

Vegan Baking - A vegan diet includes no animal prod­ucts, such as meat, dairy, eggs, or even honey. Some people are vegan because of health concerns, while others adopt a vegan lifestyle out of a concern for animals. Still others are vegan due to the reduced environmental impact of a plant-based diet. Many resources exist for vegan baking, most notably the excellent book Vegan Cupcakes Take Over the World, by Isa Chandra Moskowitz and Terry Hope Romero. 

Reprinted with permission from Cake Ladies: Celebrating a Southern Tradition © 2011 by Jodi Rhoden, Lark Crafts, an imprint of Sterling Publishing Co., Inc.

Guess what? As if it could get any better, one copy is up for grabs for one of you lucky JCD readers!!!! 


To enter, all you have to do is leave me a comment under this post telling me what your very favorite cake is. This giveaway is only open to JCD followers, so if you haven't already clicked follow, make sure to do so now.

This giveaway opens immediately and ends at midnight on February 27, 2012. A winner will be randomly selected and has 48 hours to claim their prize or another winner will be drawn.

*Disclaimer - I was provided a cookbook for review, but all opinions remain my own. No money was compensated.
Pin It

Photobucket
Enter your email address:


Delivered by FeedBurner

Friday, February 17, 2012

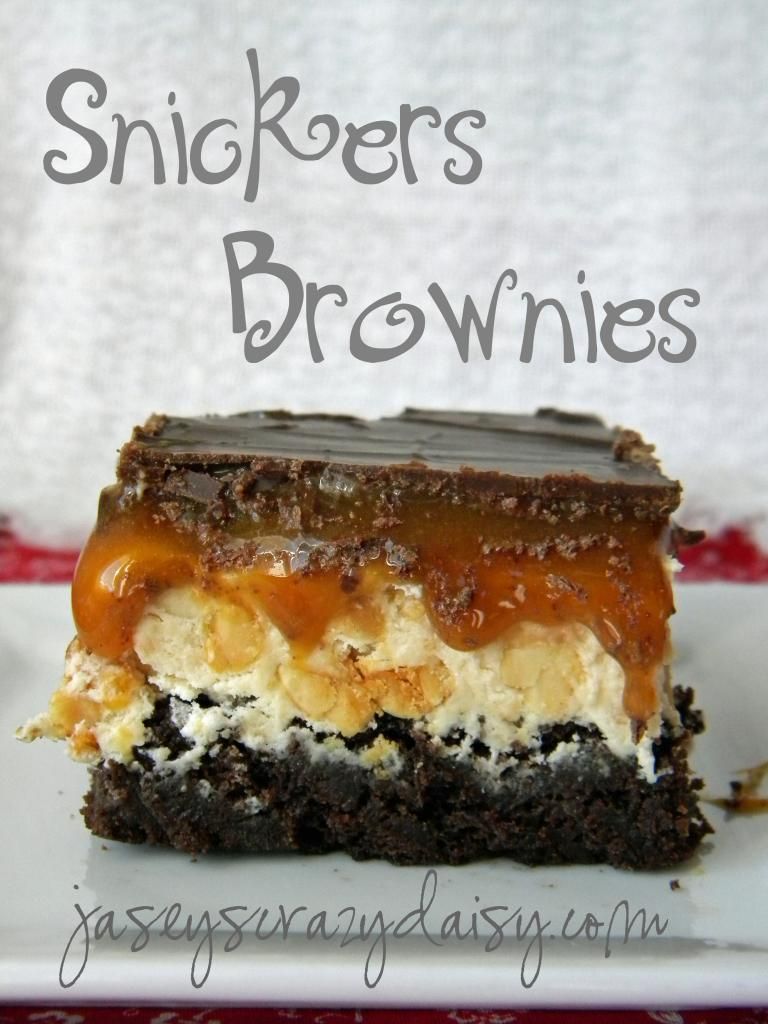
Snickers Brownies


Brownies, obviously I have a thing for brownies. Or, rather for taking my favorite treats and twisting them into brownies. This time brownies meet Snickers, complete with, peanut nougat center, caramel, and chocolate candy bar topping. Go ahead and make them now, you can thank me later.

Snickers Brownies
Brownie Layer
1 box of brownie mix, I prefer Betty Crocker's Fudge or Dark Chocolate mixes
Ingredients called for on box
1/4 cup hot fudge topping, unheated, straight from the jar

Nougat Layer *Adapted from How Sweet It Is
1/4 cup unsalted butter
1 cup granulated sugar
1/4 cup evaporated milk
2 (7 oz.) jars marshmallow creme (@1 1/2 cups)
1/4 cup peanut butter
1 1/2 cups salted peanuts, roughly chopped
1 teaspoon vanilla

Caramel Layer
1 (17 oz.) jar of caramel, preferably Mrs. Richardson's Butterscotch Caramel

Candy Bar Topping
1 1/4 cups chocolate chips
1/4 cup peanut butter.

Prepare brownie batter according to package directions for a 9x13-inch pan, adding 1/4 cup hot fudge ice cream topping, unheated and straight from the jar to the batter. Make sure to follow the high altitude directions if you live at high altitude. Cool completely.


Melt butter in a saucepan over medium heat. Add sugar and milk, stirring until dissolved. Bring to a boil. Add in the marshmallow creme (I didn't measure, because how exactly do you measure that sticky fluff? I used one complete 7 oz. jar and most of the second jar), peanut butter, and vanilla stirring until smooth. Turn off heat and fold in peanuts. Pour evenly over cooled brownies. Use a spatula to help spread the mixture. Cool. I stick the brownies in the freezer for about 15 minutes.


Scoop caramel topping into a heavy bottomed saucepan and heat over low until caramel is soft and easy to stir.  Pour the caramel over the nougat layer. Make sure to pour it evenly across the nougat covering as much as the surface as you can. This makes it easier to spread the caramel with a spatula. Let cool. Again, I usually stick this in the freezer for about 15 minutes. Scoop caramel topping into a heavy bottomed saucepan and heat over low until caramel is soft and east to stir rather than mess with hot.

Melt chocolate chips and peanut butter together in a saucepan over low heat, stirring occasionally, until smooth.  Pour over nougat layer and cool completely. I usually stick them in the fridge until the chocolate is set. They chocolate gets pretty soft when left out, so I like to store these in the fridge and let them set out for a few minutes before cutting them. You want the chocolate to be cool enough to be set, but warmed up just a bit so that they are soft enough to cut more easily. Enjoy!


PS - For those of you have noticed my absence, I wanted to apologize for the crazy long time it's been since I've last posted. I am in the middle of what I'll call a nine month marathon. Basically all food has tasted gross and some days water tastes like raw fish. I am now about a week away from entering the third trimester, and have never been as thrilled as I am to say I have gained about three pounds. To sum it up, I have felt pretty icky and haven't dared trust myself to post anything food related because nothing tastes good. On the up side, I am now having moments of wellness where things taste ok and I can eat without feeling green. I am so very excited to meet this little one who loves to somersault and already seems so full of life. Thanks again for your continued support. I look forward to sharing many more fun project ideas and tasty treats in time to come.
Photobucket
Enter your email address:


Delivered by FeedBurner

Monday, November 7, 2011

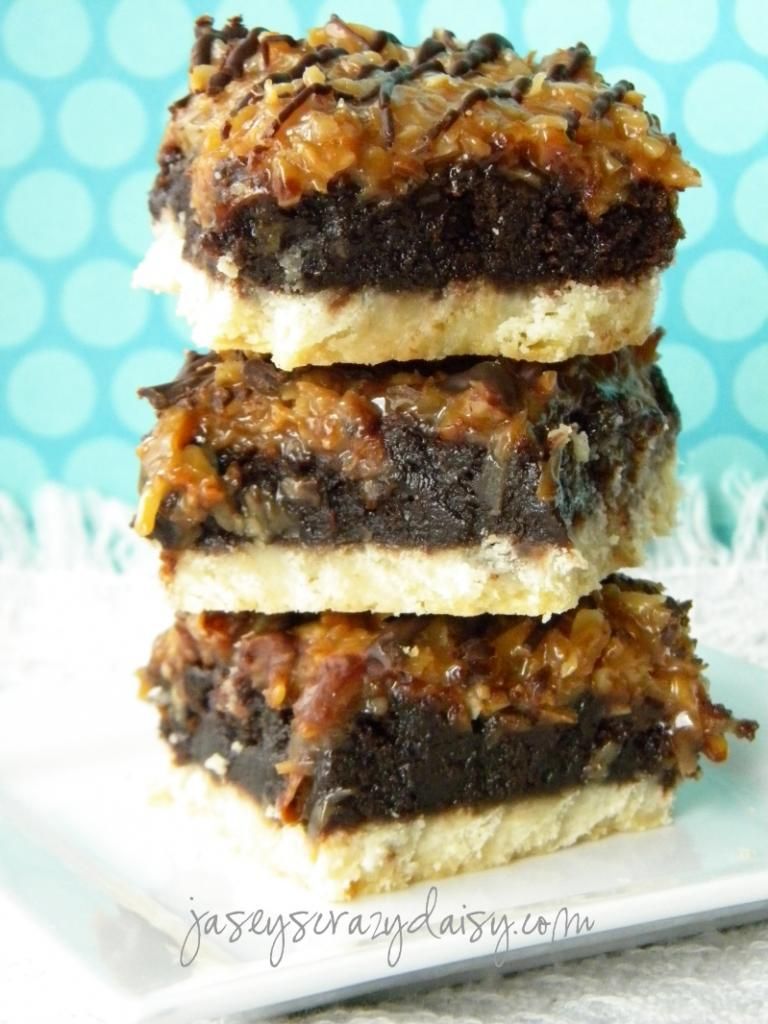
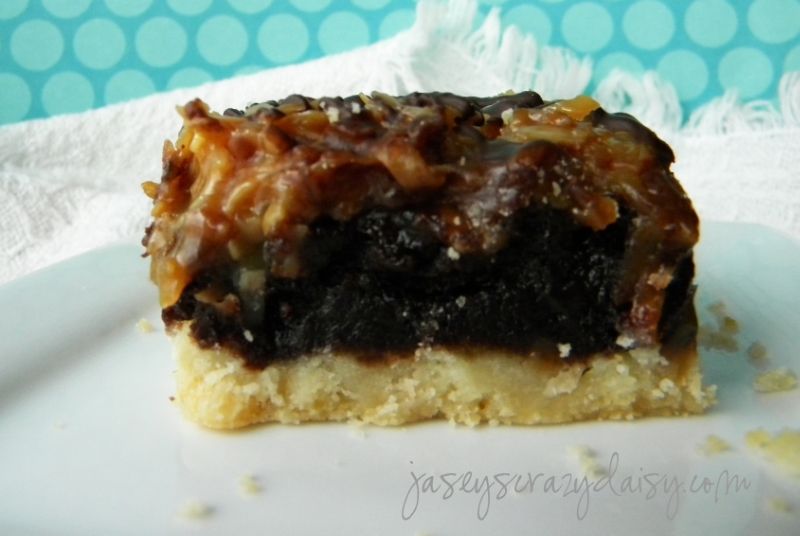
Samoa Brownie Cookie Bars


These are so yummy.... they're kind of like those Girl Scout Samoa Cookies, with their shortbread cookie crust, gooey coconut caramel topping and chocolate drizzle, but these naughty little bars sneak in a delightful layer of brownies. Almost like German Chocolate Cake, without the nuts, plus the cookie crust. Whatever you want to call them, these were sooooo good that I had to whisk them out of my house and into the hands of my friends to spread their joyful tastiness, and eliminate the temptation, and what surely would have ended with guilt, of eating the entire batch myself. Yep, I think I would have done it. Thank goodness for friends who are always up for sampling brownie creations, saving me from, well, myself.

Samoa Brownie Cookie Bars
*Recipe By Jasey's Crazy Daisy

Shortbread Crust: (adapted from A Montana Table's Huckleberry Cobbler Crust)
*12 Tablespoons unsalted butter (1 1/2 sticks), cold and cut into cubes
3/4 cups powdered sugar
1 1/2 cups all-purpose flour
*1/2 teaspoon salt

*If you don't have unsalted butter, use salted butter, and leave out the 1/2 teaspoon salt.

Brownie Layer:
1 package brownie mix, I prefer Betty Crocker's Fudge Brownies or Dark Chocolate Brownies

Water, oil, and eggs called for in the directions on the brownie box
1/4 cup hot fudge ice cream topping, straight from the jar, unheated

Coconut Caramel Layer:
3 cups toasted coconut,
1 (17 oz.) jar caramel topping, Mrs. Richardson's Butterscotch Caramel is the only brand I use


Chocolate Drizzle:
1/2 cup chocolate chips

Directions:

Preheat oven to 300. Cover baking sheet with parchment paper. Spread coconut evenly over baking sheet. Bake for about 20 minutes, stirring every 5 minutes to make sure coconut browns evenly. Set aside to cool.

Preheat oven to 350. Combine all crust ingredients and cut with pastry knife, or mix with mixer until coarse pea-sized lumps form. Press evenly over the bottom of a 9 x 13-inch glass baking dish. Bake until lightly browned.

Meanwhile, prepare brownie batter according to package directions, adding 1/4 cup hot fudge ice cream topping, unheated and straight from the jar. Make sure to follow the high altitude directions if you live at high altitude. Pour over shortbread crust and bake as directed, until a toothpick comes out nearly clean with only a few crumbs remaining.

When brownies are almost finished, scoop caramel topping into a heavy bottomed saucepan and heat over low until caramel is soft and easy to stir. Add toasted coconut and stir gently until evenly mixed. If brownies are not quite finished, keep this warm, stirring occasionally. Keeping the coconut caramel mixture warm will help it to spread evenly without tearing brownies apart.

Pour coconut caramel mixture over brownies and gently spread evenly over the top. 

Place chocolate chips into a zip-loc baggie and put into microwave for 20 second intervals. Squish the bag with your fingers to mix and smooth the chocolate between intervals. When melted smooth, snip a tiny piece off of the corner of the bag and drizzle over bars. Cool.

I let these cool for a bit, probably half an hour, and then put them if the refrigerator to finish setting, after sneaking a taste, that is. They are super yummy warm, but cut much more neatly if you wait for them to set. 

I think I will be making quite a few batches of these to use as Christmas gifts. I think they might be my new favorite treat. They might even make an appearance at Thanksgiving. What's on your Christmas baking list?


Photobucket
Enter your email address:


Delivered by FeedBurner

Monday, October 31, 2011

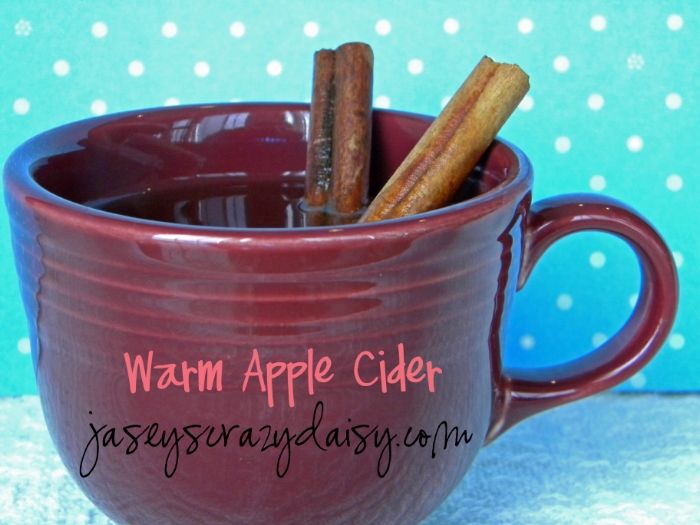
Warm Apple Cider {One Of My Most Favorite Recipes EVER!!!}


A warm cup of this cider is probably the one thing I look most forward to this time of the year, which is actually saying a lot because I love fall flavors.  One of the reasons I love this cider so much is because it is part of our family tradition. Mom always had a batch brewing on Halloween, and now my kiddos and our friends and family enjoy it at our house. I love to keep a big batch warm on Halloween so that when our trick-o-treating friends need a break, they can come in, sit a spell, and enjoy a warm mug of cider. I don't reserve it for Halloween though! I love to serve it on Thanksgiving and Christmas Eve. Besides tradition, this cider is spiced just right and isn't packed with caffeine or any extra sugar, but you'd never know it's missing from a taste. Sometimes I make a batch, let it cool, and pour it back into it's original juice container to store in the fridge. This way, it's only a  minute or so in the microwave to perfect cider whenever we want it.

Warm Apple Cider
*Recipe By Crazy Daisy

1 gallon apple juice, cranberry is pretty yummy too
5 cinnamon sticks*
9 whole cloves
9 whole allspice
cheesecloth, optional

 *Note~ if you purchase cinnamon sticks from the baking isle in glass jars or metal tins, you will need 5 cinnamon sticks. However, you can also find bags of cinnamon sticks in the ethnic cooking section. These cinnamon sticks are ginormous and way way cheaper so I have started using them! If you do use the sticks that come in the bag, I find that using three works perfectly. Since they are so big, 5 makes it a little too strong. Also, if you don't want to mess around with making a spice packet, you don't have to - you can let your spices float around on the bottom and either strain it, or carefully ladle around them. You just have to make sure you don't leave any spices floating in the bottom of someone's mug because you don't want anyone to choke!

First, you need to make a spice packet. To do this, unroll your cheesecloth so that it lays flat. It should still be folded into 3-4 layers. Cut off a rectangle big enough to wrap around your cinnamon sticks. Also, cut a 1 to 1 1/2 inch strip to use as a tie. Place spices into the center of cheesecloth and wrap in to a bundle. Tie strip securely around packet. Place spice packet on the bottom of a large soup kettle. Pour juice over packet into kettle. Bring to a boil, then simmer for about half an hour or until cider is spiced to taste. Remove spice packet. Ladle into mugs and enjoy! If you have any leftovers, let them cool completely and use a funnel to pour cider back into your original juice container. Store in refrigerator and microwave by the mug as needed. 

I have also used my crock pot to serve this cider. You can either make as directed above and pour it into a crock pot, set it to warm or low, and keep a ladle and some mugs handy for serving or you can place the spice packet into the crock pot, pour your juice over the top and heat until spiced to taste, remove the spice packet, turn to warm or low and enjoy!

For a Caramel Apple Cider place a caramel into the bottom of your mug, pour your hot cider on top, and stir to melt or add a teaspoon of caramel ice cream topping (I love Mrs. Richardson's Butterscotch Caramel). Yummy!

I hope you will enjoy this recipe as much as we do. It really is one of our favorites. I plan to share how I use it for gifts in a couple of weeks, complete with a free printable!
Photobucket
Enter your email address:


Delivered by FeedBurner

Wednesday, October 19, 2011

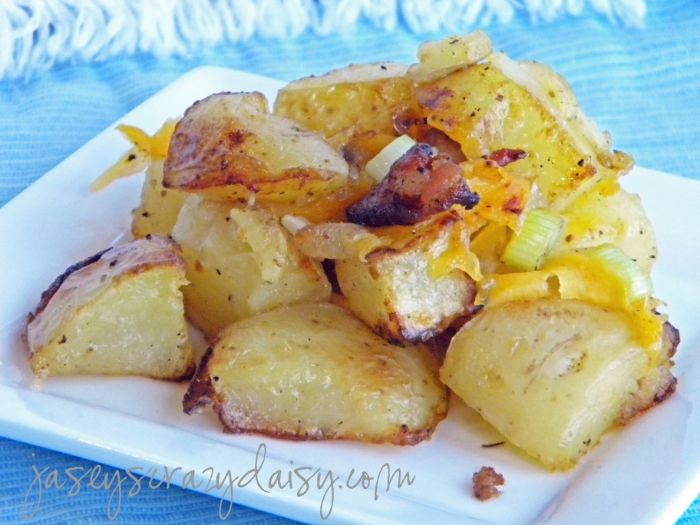
Cheesy Bacon Roasted Potatoes


I have an addiction. To potatoes. Specifically Dickey's Baked Potato Casserole. I have been working on my own copycat version, and I am almost happy with it. But one day I didn't feel like mashed potatoes, I wanted roasted potatoes. Enter these Cheesy Bacon Roasted Potatoes. They are packed with the same flavors of  the potato casserole, minus the mashing, maybe a little butter, and probably sour cream and even cream cheese to top it off (super healthy, I know). I think I have a new addiction. To these potatoes. Let me introduce you to them.

Cheesy Bacon Roasted Potatoes
*Recipe by Crazy Daisy

3-5 lbs potatoes, red or yukon, rinsed and cut into 1-inch chunks, enough to spread over the surface of the pan (sometimes it takes all 5 pounds, sometimes not)
1 package bacon chopped into 1/2-inch slices
1/2 onion, chopped
5 cloves garlic, minced or grated
3 Tablespoons olive oil
1 teaspoon pepper
1/2 teaspoon kosher salt
10 green onions, sliced
1/2 to 1 cup shredded cheese, use as much as you'd like ( I like Cheddar, or Colby Jack)

*Note - You may want to add more salt after tasting the potatoes are finished. You never know how much salt the bacon is going to add, so I start with less knowing I can always add more.

Preheat oven to 450. Cover a Texas sheet cake pan with foil and spray with cooking spray. Spread potatoes evenly in pan. Sprinkle bacon, onion, and grated garlic evenly over the top of the potatoes. Drizzle with olive oil. Sprinkle with pepper and salt. Use a wooden spoon, or your hands, to mix everything together until well coated. Make sure everything is spread out evenly when you are finished. Place pan in oven and cook for 15 minutes. Stir. Cook another fifteen minutes. Stir again. Meanwhile, slice green onions. If the potatoes look like they are starting to brown, sprinkle onions over potatoes and cook for another fifteen minutes. If everything is not browned and crispy to your liking, cook for another 10-15 minutes or until done. Make sure to keep stirring between cooking intervals. This keeps everything browning evenly. I try to put the green onions on for the last 10-15 minutes only, this way they are sort of crisp tender and don't loose their flavor. When your potatoes are finished, take them out of the oven and sprinkle with cheese. Let the cheese melt and serve. Enjoy!

What are your favorite kind of potatoes?
Photobucket
Enter your email address:


Delivered by FeedBurner

Friday, October 7, 2011

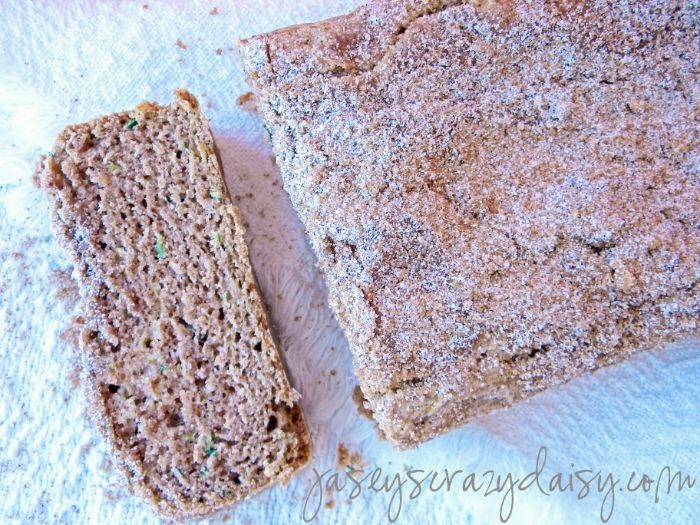
Cinnamon Crackle Zucchini Bread


While fall is still in the air, and you may still find zucchini in your kitchens, I thought I would share another one of my favorite zucchini recipes with you. I received a loaf of this bread as a gift once and had to have the recipe. Thanks, Genny! Since, I have adjusted the method, amount of sugar, and added a yummy crackle topping. I love how the sweet yummy spices pair with the crunchy cinnamon crackle topping. Plus, I love how you end up with two loaves, one to keep and one to share. Give it a try, I don't think it will disappoint.

Cinnamon Crackle Zucchini Bread
Recipe by Crazy Daisy adapted from Genny Schaffner

3 cups flour
1 teaspoon salt
1 teaspoon baking soda
3 1/2 teaspoons cinnamon
1 teaspoon allspice
3 eggs
1 cup oil
1 1/2 cups sugar (you can add or subtract 1/2 cup depending on how sweet you like things)
2 cups grated zucchini
3 teaspoons vanilla

Cinnamon Crackle Topping
2 Tablespoons white sugar
2 Tablespoons brown sugar
1/2 teaspoon cinnamon

Preheat oven to 325. Grease and flour two 9x5 loaf pans. In medium bow, whisk together flour, salt, baking soda, cinnamon, and allspice. Set aside. In mixing bowl, cream together eggs, oil, and sugar. Add zucchini and vanilla and stir well.  Slowly, stir in the dry ingredients and mix until everything is just wet and incorporated. Pour evenly into prepared pans. Bake for one hour, or until bread springs back when touched lightly, or a toothpick comes out mostly clean when inserted in the center of the bread. Let cool on wire rack for 10 minutes and then remove from pan to finish cooling. While yummy warm, I think this bread is actually better cooled and even better the next day.
Photobucket
Very Good Recipe Tags: Quick Breads, Zucchini, Fall Flavors
Enter your email address:


Delivered by FeedBurner

Wednesday, September 21, 2011

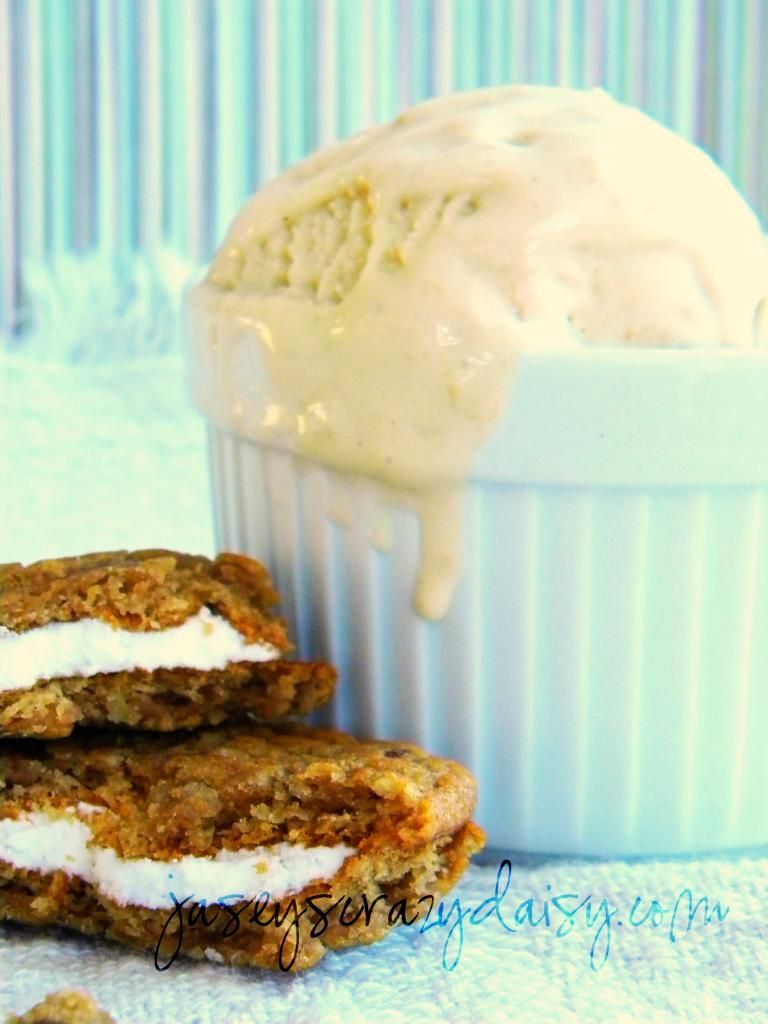
Oatmeal Cookie Gelato


While fall is in the air, our afternoons have actually still been pretty nice. We haven't even put our shorts away! Perfect time to add some fall baking flavors to gelato! Oatmeal Cookie is one of the flavors my son and I added to our  gelato collection this summer. I don't know which he likes better, this flavor or the Cake Batter Gelato? Really, I don't think you could go wrong with either.

Oatmeal Cookie Gelato
*Recipe by Crazy Daisy

2 cups milk, whole is best, but I used 2% and it was still super creamy
1 cup heavy cream
4 large egg yolks
2/3 cup sugar
1 teaspoon vanilla
2/3 cup Oatmeal Cookie Mix, not prepared, looks like this
In a heavy-bottom saucepan, combine the milk and cream. Place over medium-low heat and cook, stirring occasionally so a skin doesn't form, until tiny bubbles start to form around the edges and the mixture reaches a temperature of 170 degrees.

Meanwhile, in a heat-proof bowl, whisk the egg yolks until smooth. Gradually whisk in the sugar until the mixture is incorporated, thick, and pale yellow. This next part part is important and keeps you from having scrambled eggs in your gelato - it is called tempering the eggs. Take the mixture off of the heat. Using a ladle, scoop some of the hot milk mixture (after it gets the bubbles) and pour it into the eggs and whisk. Do this one more time, make sure to whisk well so the eggs don't have a chance to cook into scrambled eggs. Now slowly pour the egg mixture into the rest of the hot milk mixture, in the saucepan, whisking until incorporated. Pour in cake mix and vanilla and whisk again until well mixed. Return to heat and cook on low. Cook, stirring constantly with a wooden spoon until the custard is thick enough to coat the back of the spoon and/or it reaches a temperature of 185. Do not let it boil. 

Pour the mixture through a fine-mesh strainer into a clean freezer-safe bowl. Add cookie mix and stir until mixed evenly. Let cool, stirring about every 5 minutes. Once, mixture reaches about room temperature, cover with plastic wrap - gently pressing it down until it touches mixture to prevent a skin from forming. Refrigerate for at least four hours, but overnight is best. Pour mixture into container of ice cream machine and churn as directed. Transfer to airtight container and refrigerate for two hours before serving. Let gelato set out for 10-15 minutes before serving. 

Hope you are finding time in all the fall craziness to enjoy those last few sunny afternoons. Enjoy!
Photobucket
Very Good Recipe Tags: Gelato, Desserts
Enter your email address:


Delivered by FeedBurner

Wednesday, September 14, 2011

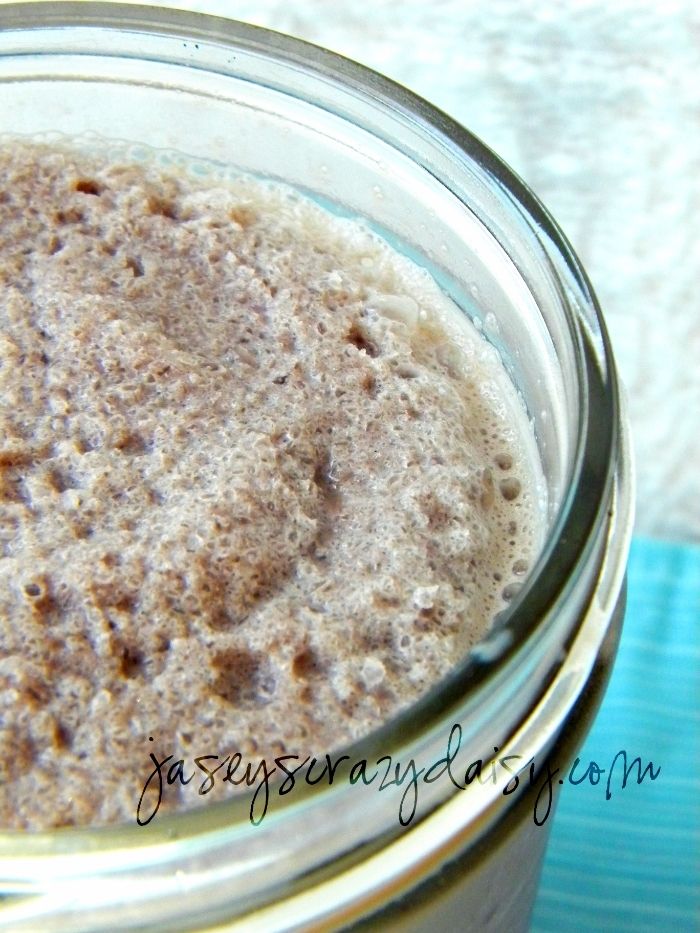
Mocha Coconut Creme Frappucchino {and Keurig Review}


Have you ever heard of a Keurig? I hadn't until recently. Let me count the ways I love it... No measuring. No soggy coffee grounds. No messy coffee pot. No waste. Delicious yumminess in minutes. 200 plus varieties to choose from, including teas, cocoas, and even apple cider. I believe the list goes on, but what more do you really need to know? They come in different colors. They are even kind of cute...
*Image from keurig.com


This is the MINI Keurig Plus. In under two minutes, you can have your favorite beverage, warm or iced, and even chose from three different sizes. There are even bigger, faster brewers, if that's more your style. With so many K-cup varieties, there is something for everyone in your family. My husband loves the coffee and chai tea and I love spoiling him with a travel mug in the morning, especially since it is so easy. The kiddos love the apple cider and cocoa. My six year old loves using it to make is favorite noodle soup. He pours his noodles in the bowl. Brews plain water over his noodles. Lets it sit just a minute and enjoys. I really like the iced half tea half lemonade and dark hot chocolate. You might remember from these brownies that I have an obsession for Starbucks Mocha Coconut Creme Frappuccinos. Well, I used my Keurig to create my own homemade version. So yummy!

Coconut Creme Frappuccino {Homemade Starbucks}
*Recipe by Crazy Daisy

Keurig K-cup, choose your favorite bold flavor ( about 5.25 oz.)
2 Tablespoons chocolate syrup
1/2 cup Coconut Creme Creamer
1-2 cups of ice, depending on your preference
whipped cream, optional of course

Using your K-cup, select the small (5.25 oz.) setting and brew into a mug. Chill until cold. Sometimes I do
this the night before, sometimes I pop it into the freezer for 15-30 minutes to hurry it along. Pour your cold coffee, chocolate syrup, and coconut cream creamer into your blender pitcher. Add ice and blend until you reach your desired consistency. I like mine slushy so I add 2 cups of ice and blend well. Super yummy!

If you have a second, stop by Keurig's facebook page and say hello for me! I'm sure they'd love to know what your favorite is!

*I received a MINI Keurig Plus for review, however, all opinions are my own. No monetary compensation was given.
Photobucket
Very Good Recipe Tags: Coffee, Beverages
Enter your email address:


Delivered by FeedBurner

Friday, September 9, 2011

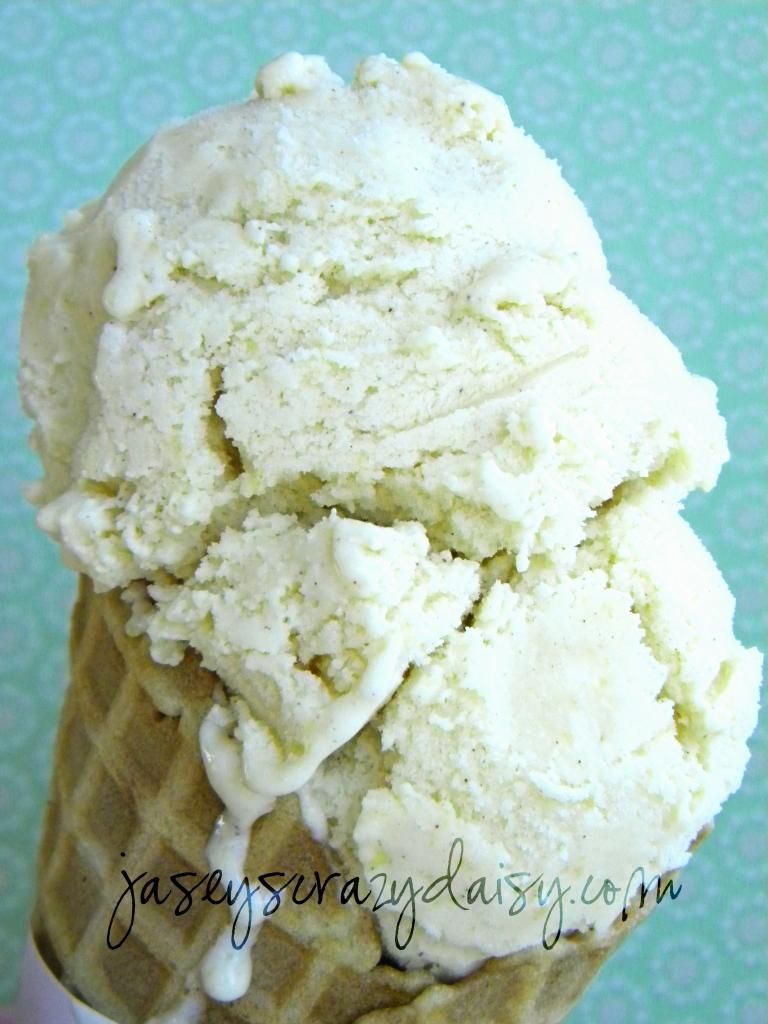
Peach Cobbler Gelato


I love this time of the year, mostly because of the flavors. Crops are ready, and not only do we find our kitchens loaded with peaches, zucchini, tomatoes, and other fabulous and fresh yummies, we can start thinking about pumpkin! Who doesn't love pumpkin? For today though, thanks to our Facebook friends, we are going with peach! Usually, I make peach cobbler, but it has still been warm enough to entertain frozen treats, our favorite being homemade gelato. I've got a few more flavors to share with you {one in the freezer waiting to be photographed}, but with all those juicy ripe peaches out there, this is perfect for the here and now! Now you don't have to wonder what happens when cobbler marries gelato.

Peach Cobbler Gelato
*Recipe by Jasey's Crazy Daisy

2 cups milk, whole is best
1 cup heavy cream
4 large egg yolks
2/3 cup sugar, divided
3 peaches, {@ 2 cups peeled and chopped}
1/2 teaspoon vanilla
1/2 teaspoon cinnamon
1/2 lemon, juiced

In a heavy-bottom saucepan, combine the milk and cream. Place over medium-low heat and cook, stirring occasionally so a skin doesn't form, until tiny bubbles start to form around the edges and the mixture reaches a temperature of 170 degrees.

Meanwhile, in a heat-proof bowl, whisk the egg yolks until smooth. Gradually whisk in the 1/3 cup sugar until the mixture is incorporated, thick, and pale yellow. This next part part is important and keeps you from having scrambled eggs in your gelato - it is called tempering the eggs. Take the mixture off of the heat. Using a ladle, scoop some of the hot milk mixture (after it gets the bubbles) and pour it into the eggs and whisk. Do this one more time, make sure to whisk well so the eggs don't have a chance to cook into scrambled eggs. Now slowly pour the egg mixture into the rest of the hot milk mixture, in the saucepan, whisking until incorporated. Return to heat and cook on low. Cook, stirring constantly with a wooden spoon until the custard is thick enough to coat the back of the spoon and/or it reaches a temperature of 185. Do not let it boil. 

Pour the mixture through a fine-mesh strainer into a clean freezer-safe bowl. Let cool, stirring about every 5 minutes. Once, mixture reaches about room temperature, cover with plastic wrap - gently pressing it down until it touches the mixture to prevent a skin from forming.

Meanwhile, in a food processor, pulse peaches, cinnamon, vanilla, 1/3 cup sugar, and lemon juice until pureed. You will add the peach mixture to the custard mixture after it has cooled. You can either fill your sink with ice and place the custard bowl in an ice bath to quicken the process, or put it in the fridge and wait. Once the custard is cool, stir in the peach puree. Then refrigerate.

Refrigerate for at least four hours, but overnight is best. Pour mixture into container of ice cream machine and churn as directed. Transfer to airtight container and refrigerate for two hours before serving. Let gelato set out for 10-15 minutes before serving.

What to post next? More gelato? The yummiest potatoes ever? My favorite zucchini bread?

Photobucket
Very Good Recipe Tags: Gelato, Desserts
Enter your email address:


Delivered by FeedBurner