Showing posts with label DIY Projects. Show all posts

Monday, May 23, 2011

How Does Your {Fairy} Garden Grow?

Do you have a fairy garden? We planted our this weekend. It adds so much charm to our yard. If you want to create a special place for the fairies in your garden, you probably need to know a few things:

1~ Fairies love flowers. They use them for all things and are even named for their favorites. They make beds out of them, hide in them, jump on them, and even use some to drink from. Use lots of different plants in your garden.
2~ Fairies like all things shiny, gems, glass, glitter, and mirrors. They love anything sparkly, so make sure to leave some pretty things  in your garden.
3~ Like all magical creatures, fairies love sweet things. We like to leave out crumbs of bread or cake with frosting or honey. Just a little goes a long way because fairies are not very big.
4~ Fairies love color almost as much as they love sparkles. They like bright pieces of fabric and ribbon or any other colorful things to decorate their spaces with. Make sure to add a splash of color sometimes, you will find the fairies may leave things in your garden as they add to the beautiful place you have made for them. We find gems and other new things all the time.
5~ Water, fairies need water.  You can create a small pond, or use a thimble or milk cap to leave some water out for them. 
6~ Fairies like fun music, but they don't like loud noises, so if you are outside hollering or fighting with your siblings, you will scare them away.
7~ If you don't believe in fairies, they won't come to your garden. They want to be celebrated and loved and won't waste their time where they are not treated well. 
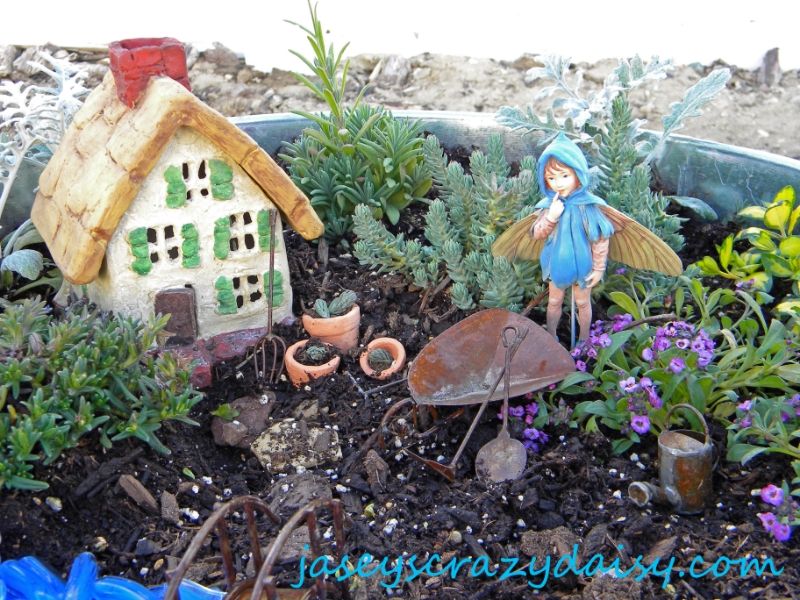
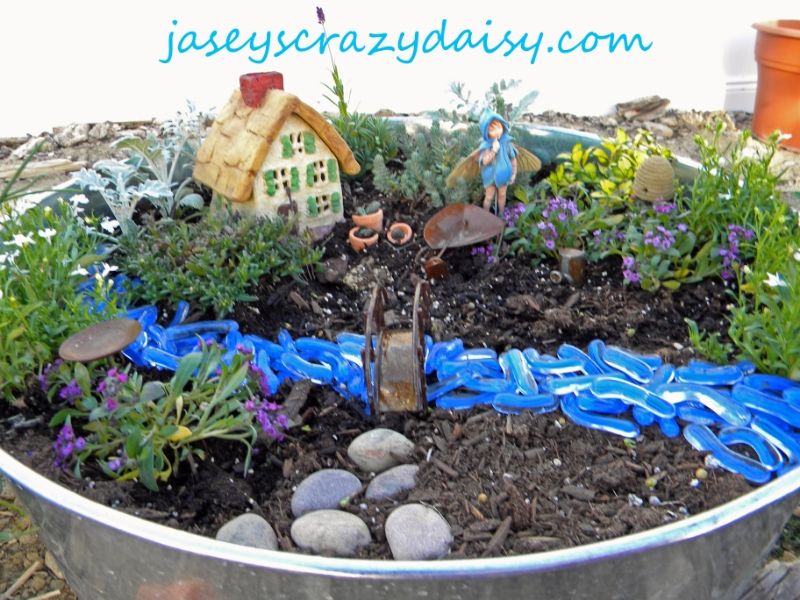
 We used some accessories that Grandma Daisy bought from our local nursery. I love the miniature gardening tools, beehive, and birdbath. My little man loves the boy fairy statue. My son wanted a river, so we used some blue glass gems from the dollar store. He collected rocks from the yard to make a stone path from the  house and across the bridge. Isn't it lovely!?!?
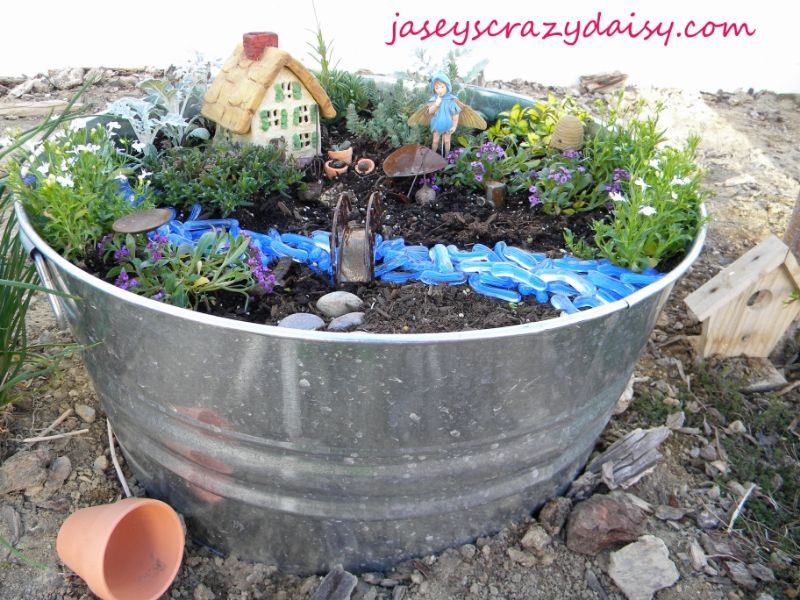
When you make your garden, find a container with a large surface area. This way you will have lots of space for all the fun things you wan to put in it. You could use an old wagon, washtub, or a planter shaped like a bowl. Make sure it has good drainage. We punched holes into the bottom of our washtub with nails and a hammer to make sure the water could drain well. Try to find plants with little flowers and leaves, and that don't grow too big, or you will outgrow your space. We used thyme, lobeilia, bacopa, and blue spruce seedum among others. Use your imagination when looking for plants. Look for small plants that might look like tress to fairies or for ground cover that will spread and look like a green meadow. Use your imagination, anything is possible!!!

Do you have a fairy garden? What things do you include? Do you have any tips? We'd love to know more~ if you would share your thoughts we would be grateful!

Participating in the Summertime Challenge at
Visit thecsiproject.com

I share my ideas at these parties..

Photobucket
Enter your email address:


Delivered by FeedBurner

Tuesday, May 10, 2011

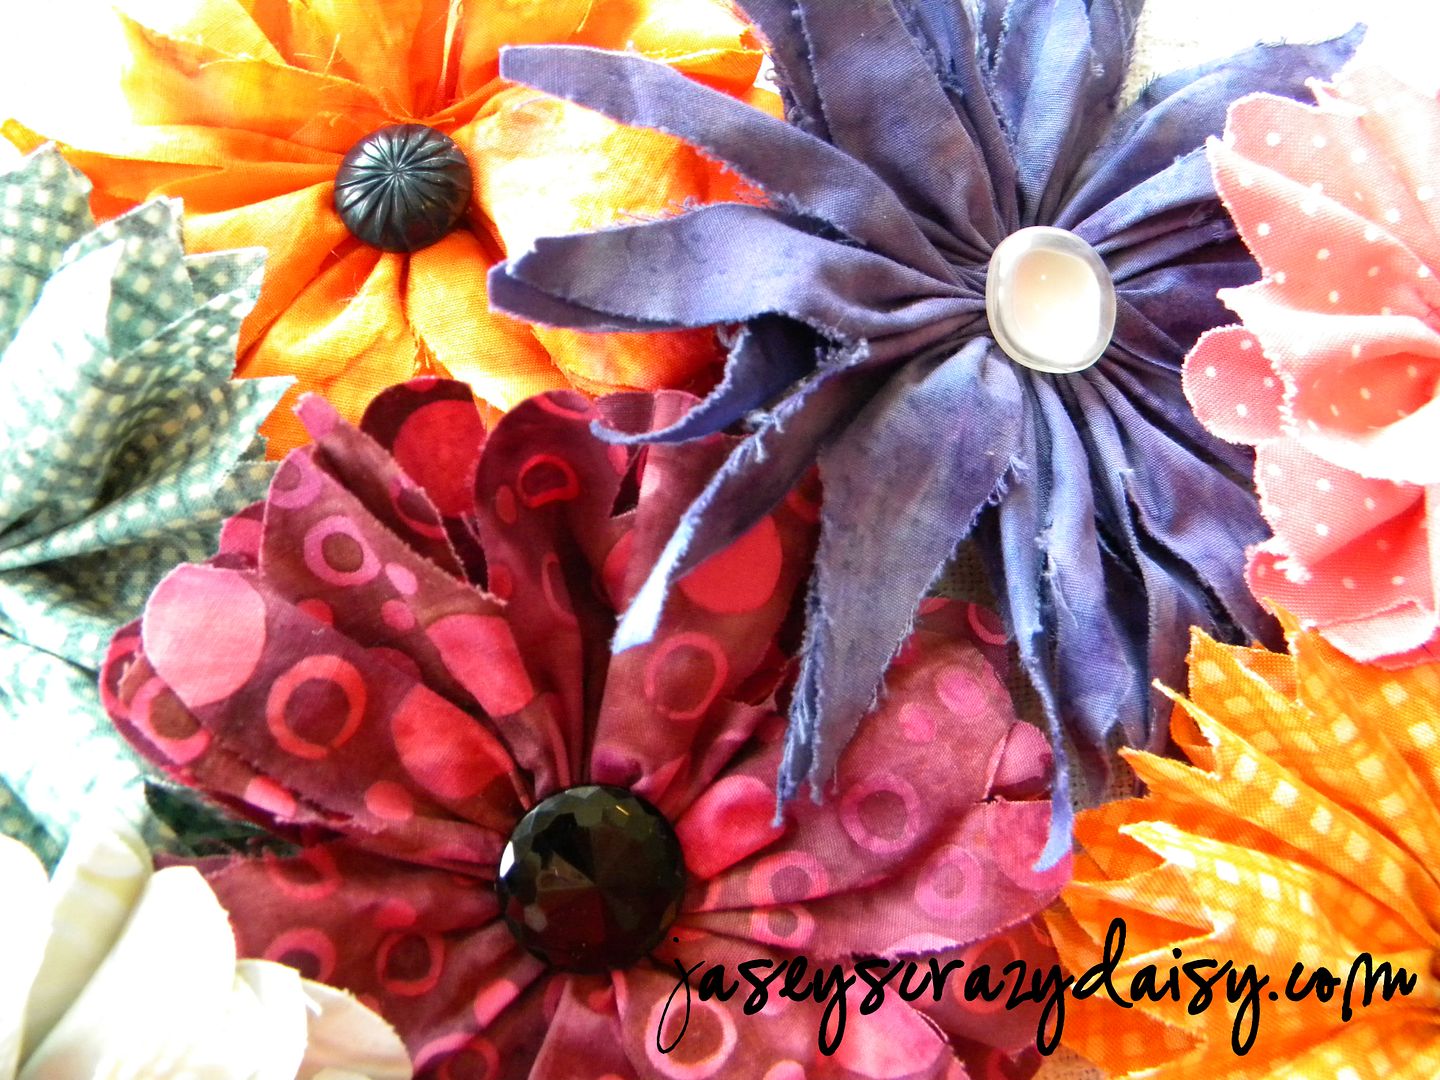
Fabric Flower Tutorial {You asked, and now you finally get to learn how!}


A little over a year ago, I started this blog on a whim, not exactly sure where it was going, or if anyone would ever look at it {thanks, everyone, for being a part of Crazy Daisy, which simply would not be without you}. These flowers were posted in those early days.


I had the confidence to share them, but not to tell how to make them. You asked, but I didn't think I really knew how to write a great tutorial. However, in this year I have learned a lot,  found some focus and direction, grown a little confidence, and am finally sharing the how! So, if you are still interested, here you go. Thanks for hanging in there and being so patient as I journey through this adventure.

You will need:

*Fabric
*Scissors (you may want to use a rotary cutter and cutting mat, if you have them)
*Needle
*Thread
*Fabric Glue
*Buttons or other embellishments
*Broach Clips, Alligator Clips, Headbands, or whatever you wish to use your flowers for

Method:

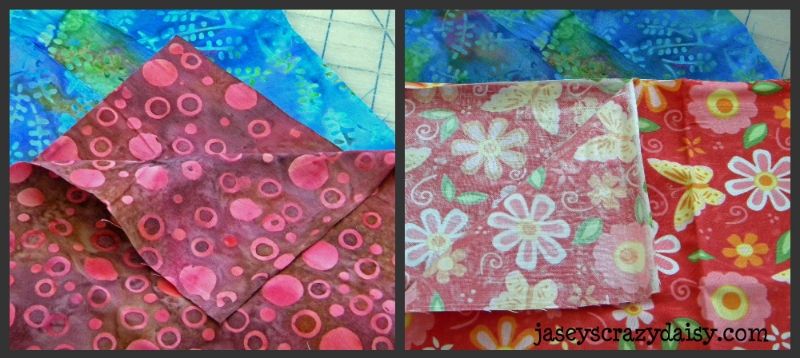
1. Fabric. Think about your fabric. In my opinion, batiks work best because both sides of the fabric are colored which means if your flower is wispy or has movement, there will never be a discolored ugly side peeking through. You can use regular fabrics, but I would reserve them for flowers with shallow cuts so that the petals won't have room to flip or twist showing the wrong side of the fabric.

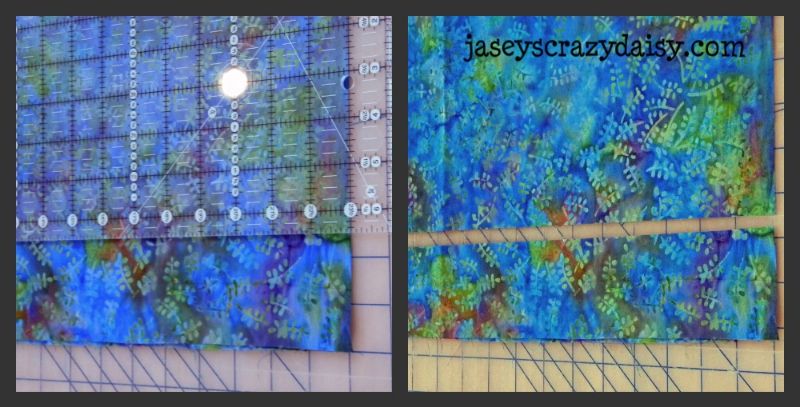
2. Width. Think about how big you want your finished flower to be. Cut a strip, the width of the fabric, half as wide as you want your flower to be. For example, if you want a flower to be about 5 inches in diameter, cut a 2 1/2 inch strip the width of the fabric. Sometimes when my flowers are smaller, I don't need the entire strip, and sometimes when they are larger, I actually use two strips, layering the flowers for extra fullness. It just depends on how full you want your finished product to be. After you play with it a little, you will get a feel for what works best for you.

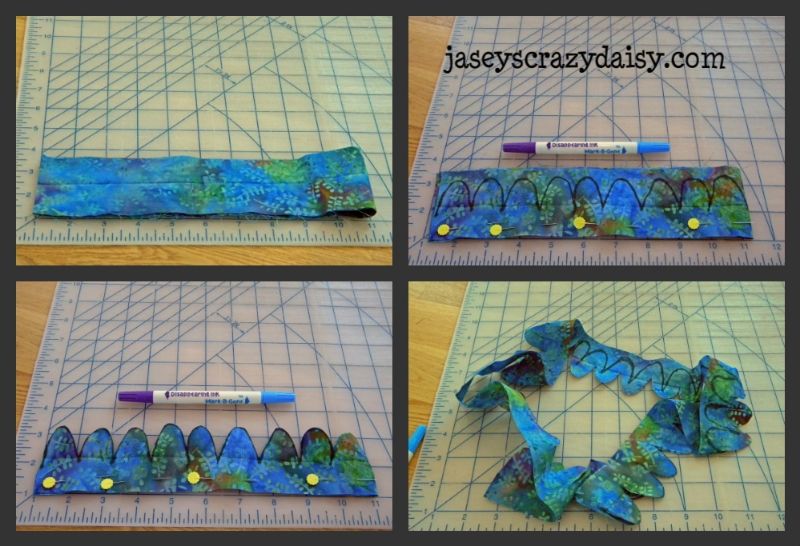
3. Petals. Get creative. This is where you design the type of flower you want. Fold your strip in half, carefully lining edges. You can just cut, or draw your pattern first using a sewing marker (the ink disappears with water). Make sure your pattern, specifically your petals, end at the folds and not somewhere in the middle or you will have some funky two-headed petals in your flowers.

You will be able to change the kind of flower you make, by altering the way you cut your fabric. Here are some examples. The sky's the limit!

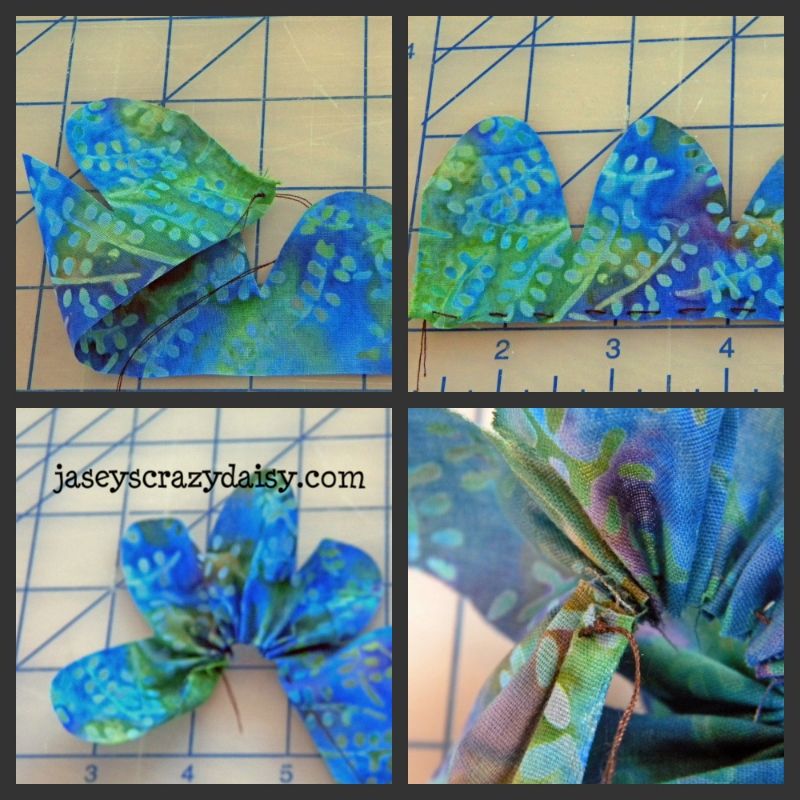
4. Gather. Thread needle. Tie a knot in the end. Push the needle through the end of your strip, the knot will keep it from slipping though. Keeping pretty close to the straight edge, push the needle back and forth through the fabric until you reach the other end, gathering the fabric as you go. When you reach the end of the strip, knot the thread so things don't unravel as you finish up.

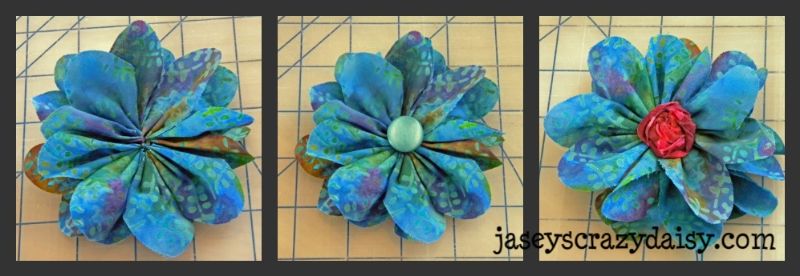
5. Shape. Your flower will naturally curl. Using that curl, shape your flower by curling it into a circle. Use fabric glue, or stitch your flower into place. You may either leave your flower as is, or add a button or other embellishment in the center. Again, glue or stitch as preferred.

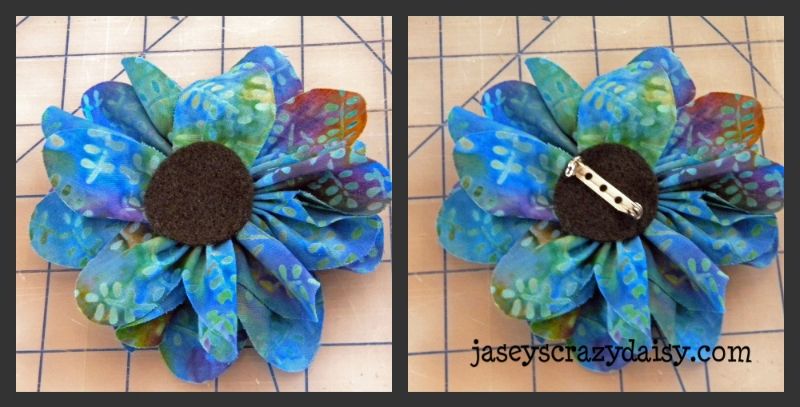
7. Finish. Cut a small circle of felt and glue on the back over the center to hide your stitches or glue mess and to anchor things down. You can attach a broach clip, headband, or alligator clip, depending on how you want to use your flowers. You could even glue or stitch them directly onto a bag or other project.

Was this tutorial helpful? If you have any questions, let me know. Hopefully, you can follow my directions. I would love to know how you plan on using your flowers and even seeing your finished projects. Leave me a comment, or even a link sharing your ideas. Enjoy your new flowers!

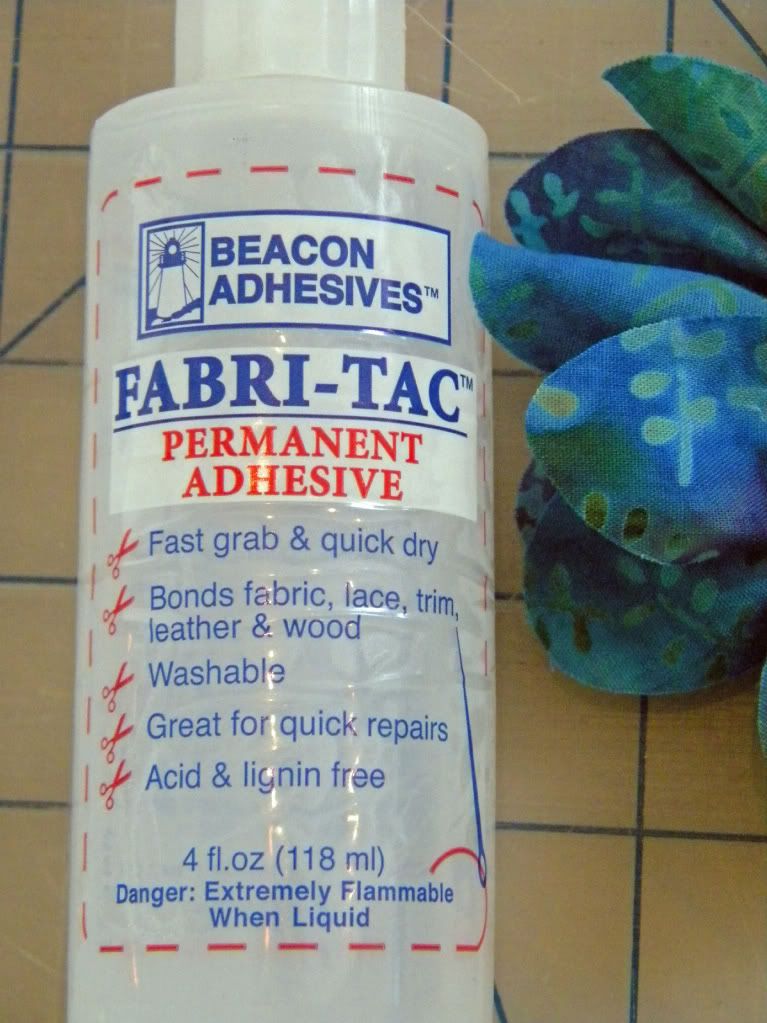
PS - This is the kind of glue that I like to use.

Participating in the Summertime challenge at
Visit thecsiproject.com
I share my ideas with these parties!

Photobucket
Enter your email address:


Delivered by FeedBurner

Wednesday, March 23, 2011

Would You Like To Make Speckled Easter Eggs? {Tutorial No. 1}


The Bunny's already hopping around preparing for his big day! He's filled his basket with all sorts of Easter treats, chocolate bunnies, jelly beans, little trinkets and toys, and of course, colorful eggs. He's going to be so jealous when he sees these~ aren't they fabulous!?! I saw them in Phyllis Hoffman's Celebrate magazine, (no link available) and had to try making them myself. Basically, I followed their directions, but I found some tips along the way that made the process a little easier, and a lot less messy. Here's what you'll need to do {again, sorry I don't have step-by-step pictures, but that whole lefty thing just doesn't work very well when trying to take pictures with a camera made for righties while using colored dye and vegetable oil at the same time. What can I say, I feared for my camera's life... }:
Procedure
 First, boil your eggs as normal. Drain and cool. When you are ready to start coloring your eggs, line your working space with paper towels. Mix your dye as directed on the package and ADD about 1 tablespoon of vegetable oil to each container of dye. Using a spoon or fork, swirl the dye and dip the egg into the color. Gently lift it in and out a few times to disperse the dye. Let it sit until you are happy with the coloring and remove it from the dye, holding it over the cup for a moment to let the excess liquid drip off. Set your egg on the paper towels to dry. My eggs didn't ever look completely dry so I waited until the color had set, and either rolled the eggs around on the paper towels, or wiped them off with one, to get rid of the extra oil. Now, repeat with as many colors as you want. Your eggs should end up looking like these...


Happy Egg Coloring! 
If you're loving these eggs, 
you don't want to miss whats coming up! 
Click here for more Easter egg fun...


This project is participating in
Visit thecsiproject.com
I'm sharing this idea with {click here}


Photobucket


Funky Junk's Sat Nite Special


Weekend Bloggy Reading


UndertheTableandDreaming


Photobucket
Enter your email address:


Delivered by FeedBurner

Thursday, August 5, 2010

Felt Playhouse - CSI Project Repost


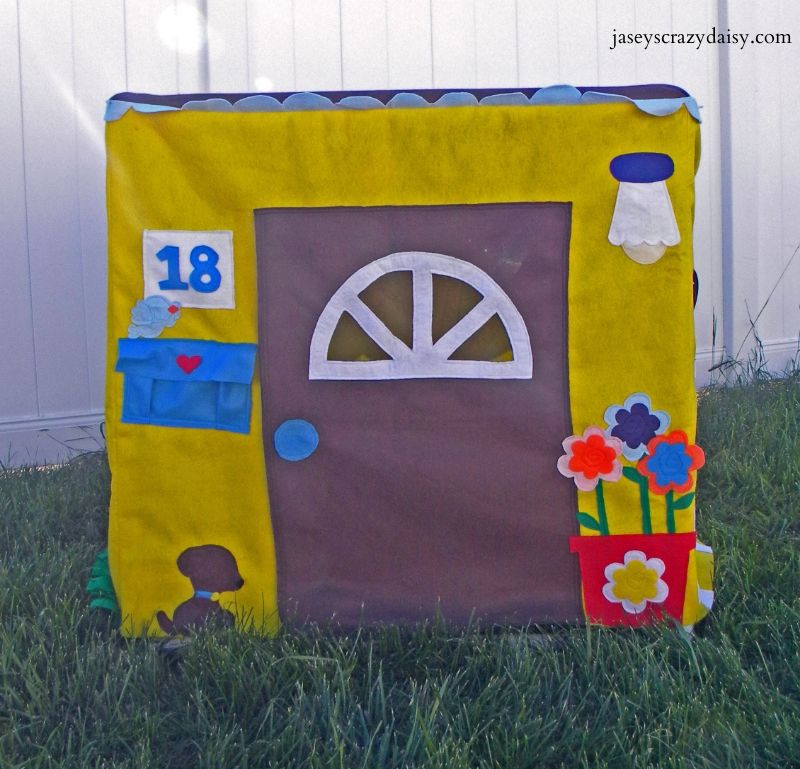
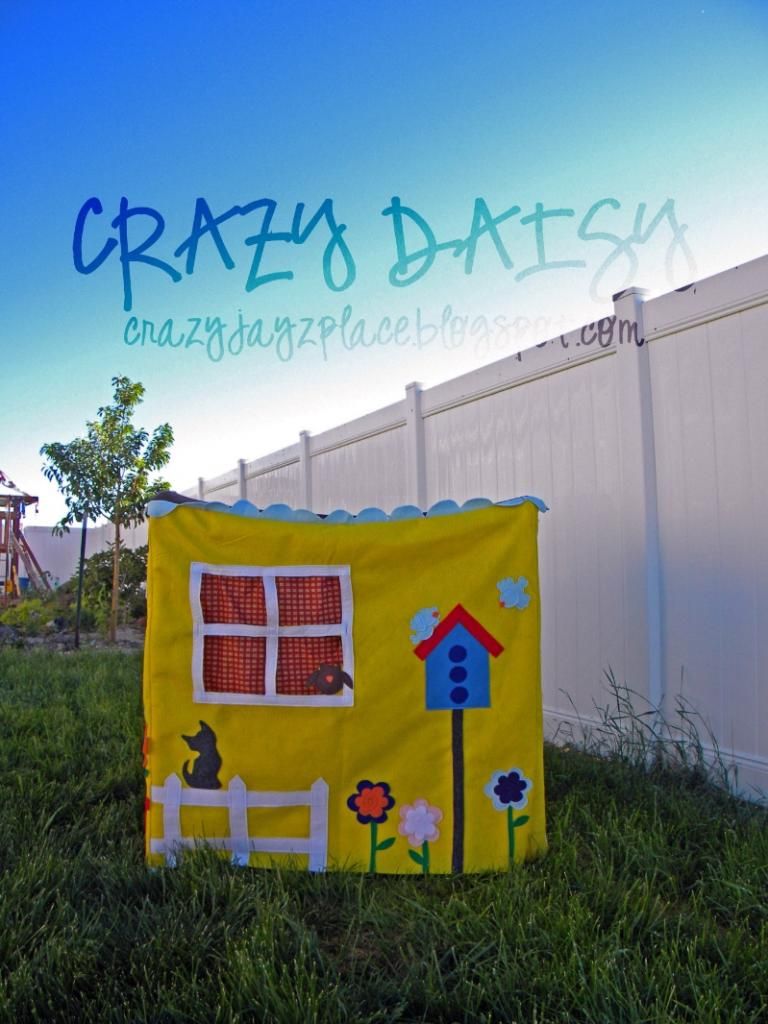
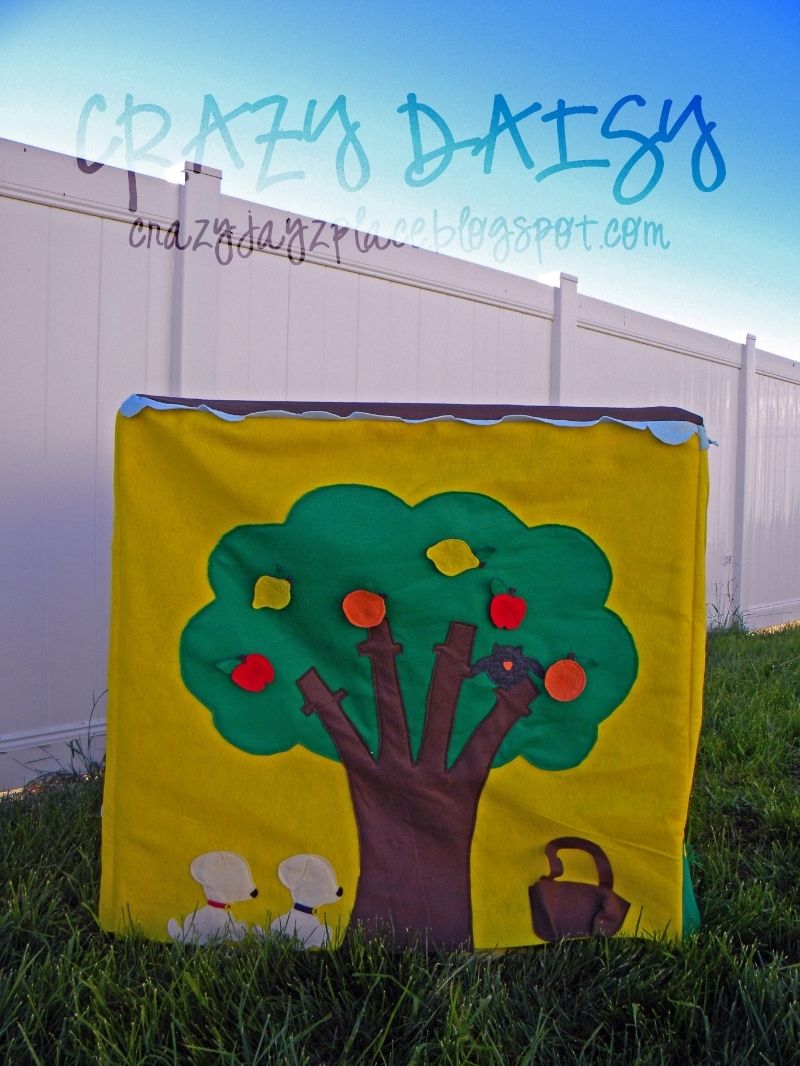
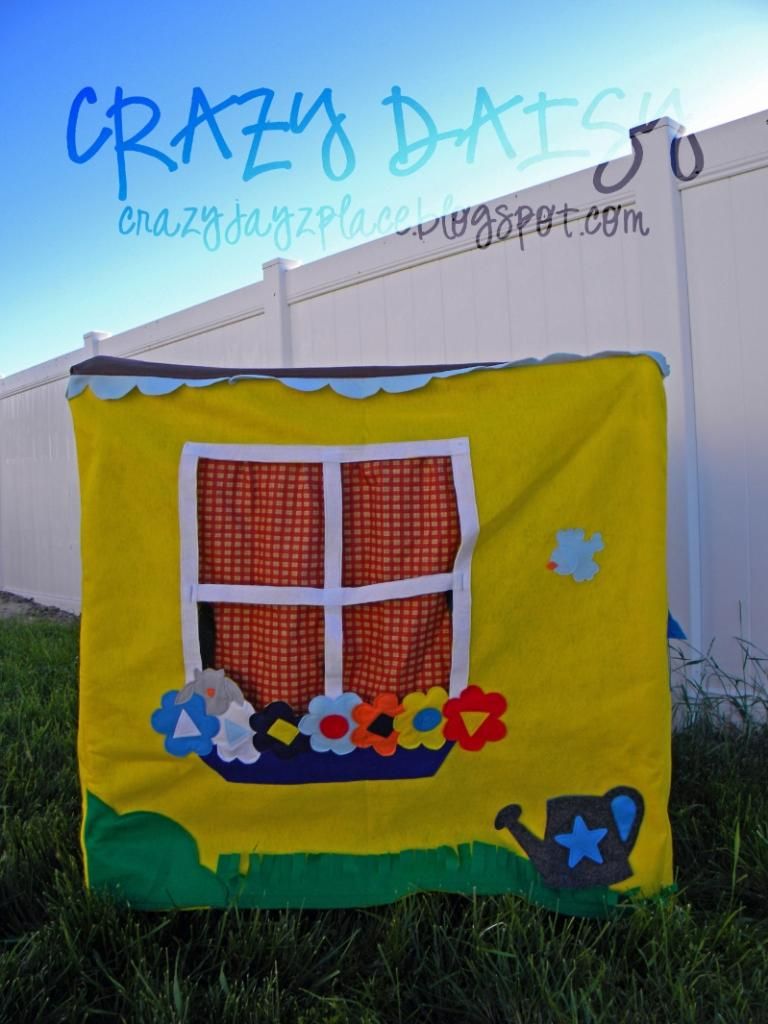
I have been waiting and waiting to share this with everyone! Not too long ago, I found the neatest little etsy shop, Imaginative Play Toys, that specializes in fabric felt playhouses! Way too cool! They  are made to slip right over a card table (or a PVC pipe frame, if you would rather build one) and are totally portable! There is a theme for every child! You can choose from a cupcakery, petshop, bluebird cottage, train station, post office, animal sanctuary, contstruction site, fire station, and much more! Seriously, you've got to check the store out to see all the themes! They have even added patterns and playhouse kits to their inventory, which was perfect for me because I was willing to sacrifice a little, maybe a lot, of time to save some money. I purchased a cottage kit, complete with pattern, fabric, thread, and iron-on adhesive, because I knew I wouldn't be able to find all of the necessary materials in my little corner of Wyoming. I was able to choose all the colors and the pattern was easy to follow! AND it's finally finished!!! Bare with me, that darn wind would just not cooperate while I was snapping my pictures!


Have I mentioned these playhouses are interactive? Felt letters slide into the mailbox, the fruit can be picked off of the the tree and put into the basket, the watering can is removable, and the curtains tie open. How much fun is that?!?!

This project has be re-posted for participation in The CSI Project! Check it out!

I have been waiting and waiting to share this with everyone! Not too long ago, I found the neatest little etsy shop, Imaginative Play Toys, that specializes in fabric felt playhouses! Way too cool! They  are made to slip right over a card table (or a PVC pipe frame, if you would rather build one) and are totally portable! There is a theme for every child! You can choose from a cupcakery, petshop, bluebird cottage, train station, post office, animal sanctuary, contstruction site, fire station, and much more! Seriously, you've got to check the store out to see all the themes! They have even added patterns and playhouse kits to their inventory, which was perfect for me because I was willing to sacrifice a little, maybe a lot, of time to save some money. I purchased a cottage kit, complete with pattern, fabric, thread, and iron-on adhesive, because I knew I wouldn't be able to find all of the necessary materials in my little corner of Wyoming. I was able to choose all the colors and the pattern was easy to follow! AND it's finally finished!!! Bare with me, that darn wind would just not cooperate while I was snapping my pictures!


Have I mentioned these playhouses are interactive? Felt letters slide into the mailbox, the fruit can be picked off of the the tree and put into the basket, the watering can is removable, and the curtains tie open. How much fun is that? 

This project has been reposted for participation in The CSI Project and was awarded Jen's Pick! Check it out!
Visit thecsiproject.com

Visit thecsiproject.com

Photobucket
Enter your email address:


Delivered by FeedBurner

Tuesday, June 1, 2010

Sailboat Sandbox


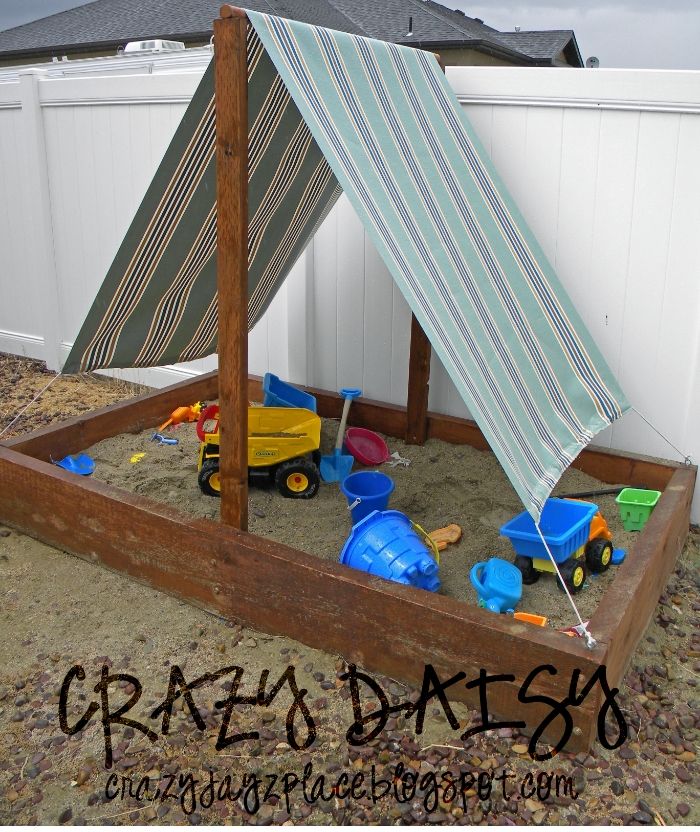
I used to daydream about the adventures my kiddos would have sailing the Sandy Seas in the sandboxes featured in catalogs like Pottery Barn Kids... until I made my own - or should I say, until I in-listed my amazing dad to help me build one. My inspiration came from this fabulous Sunset book


Backyards for Kids: Playhouses, Sandboxes, Tree Forts, Swing Sets, Sports Areas, and More

If you get a chance, you might want to check it out. It is full of fabulous ideas for turning your backyard into a little piece of heaven for your kids!

I don't have great step-by-step directions (we didn't exactly follow their instructions) or photos because, even though I just finished today, this project was started long before Crazy Daisy existed, but I can give you the basics. We used lumber my dad already had to make a box and stained it. Then we bolted two 2x4's so they were standing upright directly in the center of the boat (these would be used to support the sail). We measured and cut an old stair-railing to fit on top of the 2x4's and screwed it on. I went to Outdoorfabrics.com and ordered fabric for the sail. My fabric was 46-inches wide. Knowing the width of your fabric is probably one of the most important aspects of designing your project because if planned properly, the factory seams are left intact and no hemming is required. We made sure our sandbox was just wide enough to accommodate the fabric - no trimming, no hemming, no fraying - at least for the width. To figure out the right length to cut the sail, I measured from the top of the crossbar to about two feet above the box (60 inches for each side), added five inches to make it across-ed the top, and another 4 inches (once for each side) for the hem. To hem each side, I folded the edges in one inch and than again two inches. I sewed 1/4-inch seam on each side to make a channel for the rope to thread through. I screwed some metal eyelets into the sandbox corners and anchored the sail by tying each of the corners to an eyelet. That about sums it up! If you have any questions or need clarification, just leave a comment. I think it turned out pretty cute and my kiddos adore it. The fun part is, it was finished just in time to participate in The CSI Project Summertime Challenge.
Visit thecsiproject.com

This idea is shared with

Join us Saturdays at tatertotsandjello.com for the weekend wrap up party!


Funky Junk's Saturday Nite Special
Photobucket
PS - If you are interested in Backyards for Kids, you can find it here


Friday, May 14, 2010

Chair Planter Reveal!!!


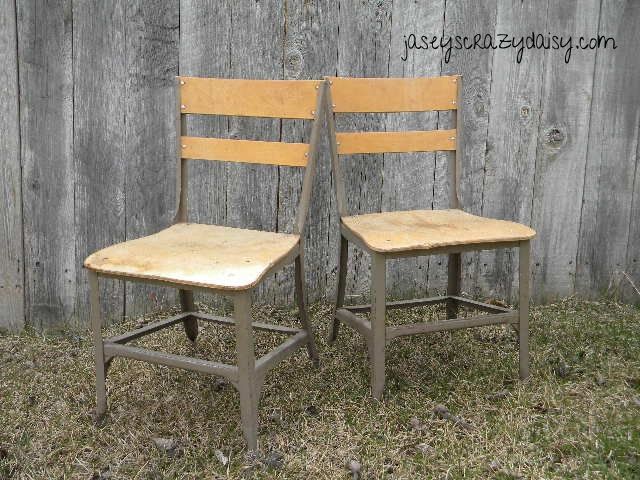
Remember these chairs from this post?


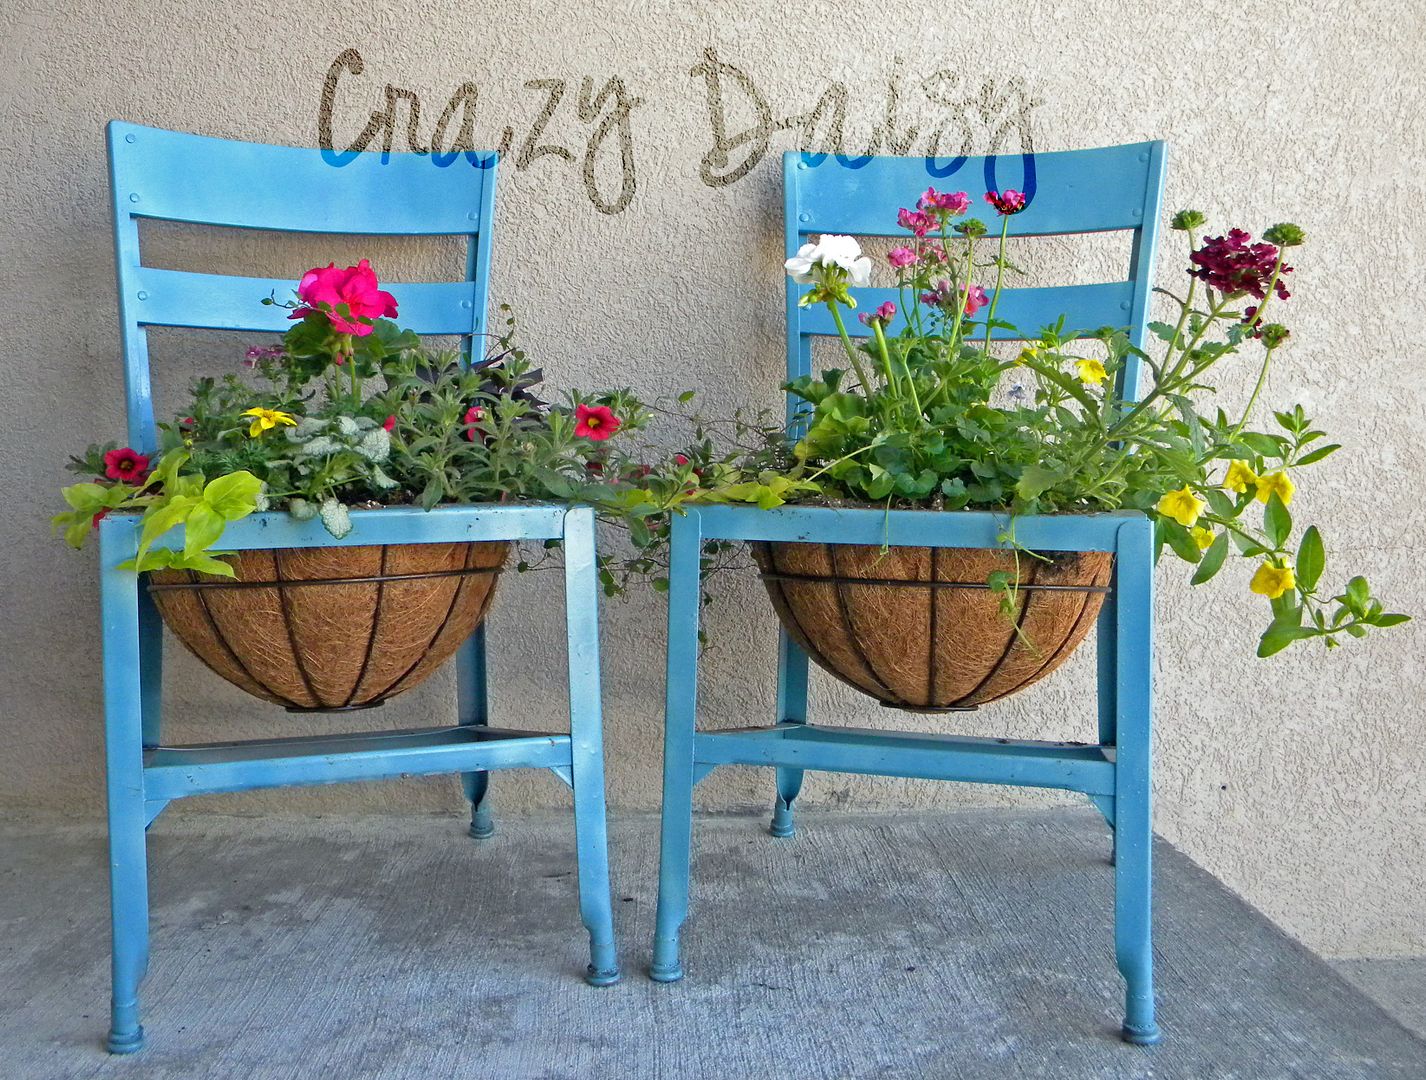
I bought them off of a neighbor for only $1 each! Can you believe it? Originally, I planned on refinishing them in bright colors with themes to match my boys' personalities. They hung out in my garage for at least a year until I decided that we really didn't have room for anymore pint-sized furniture. I was on the lookout for inspiration when I remembered the planters I had seen at our local nursery. They have the most beautiful things! I have always wanted one of their wheel barrow or chair planters. An idea was born! Why couldn't my old chairs be turned into something like that? 

I don't have the best tutorial pictures for this project because even though I started with a plan, as with most plans, things didn't happen exactly as I had imagined. But that's okay, I followed the path that best worked to make those old brown chairs into my pretty little planters- and that is all that really matters. First I had to figure out how I was going to attach the basket. After considering cutting a hole into the middle of the seat, I opted for taking the entire seat off. This worked for me because I was able to find wire hanging baskets, at Wal-mart, that actually fit inside the chair pretty well. I enlisted my dad's help for drilling through the rivets that held the wooden seat on. I was surprised at how easy dismantling the chairs was.  

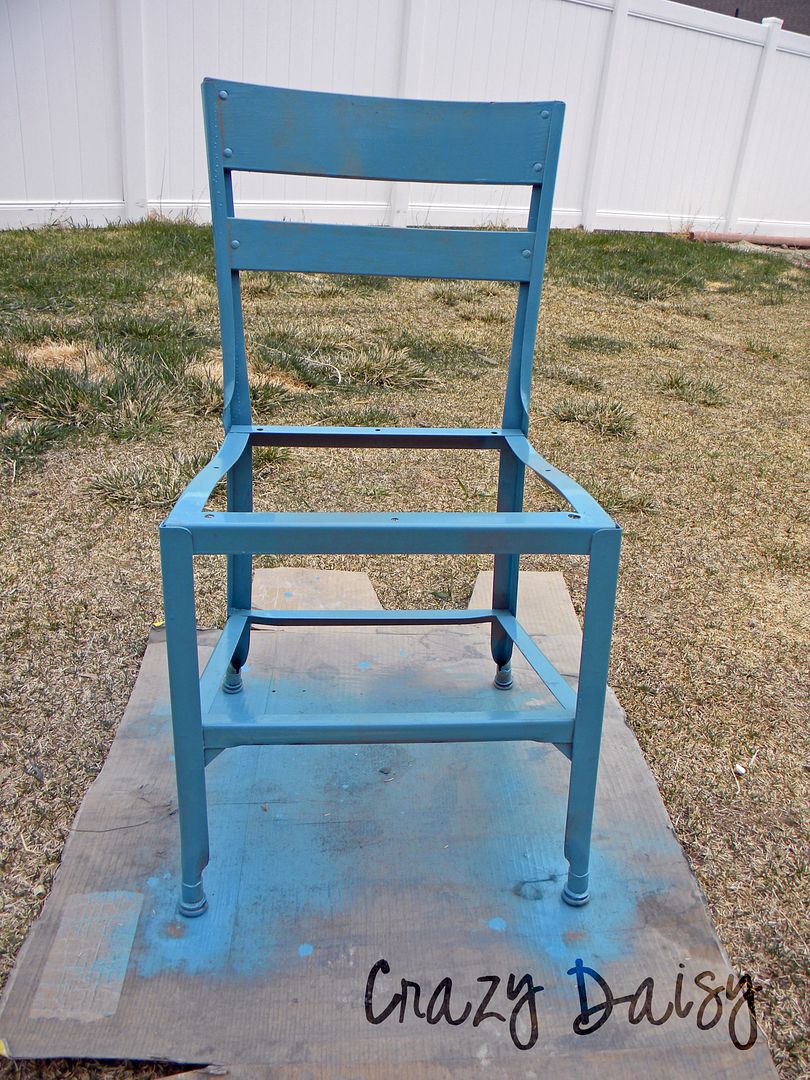
Paint. I thought this would be the easiest part. Wrong! I in-visioned a creamy distressed look. My intentions were to paint the chairs blue, only to cover it with a creamy white and then sand the chairs in some places to let the blue peek through. 


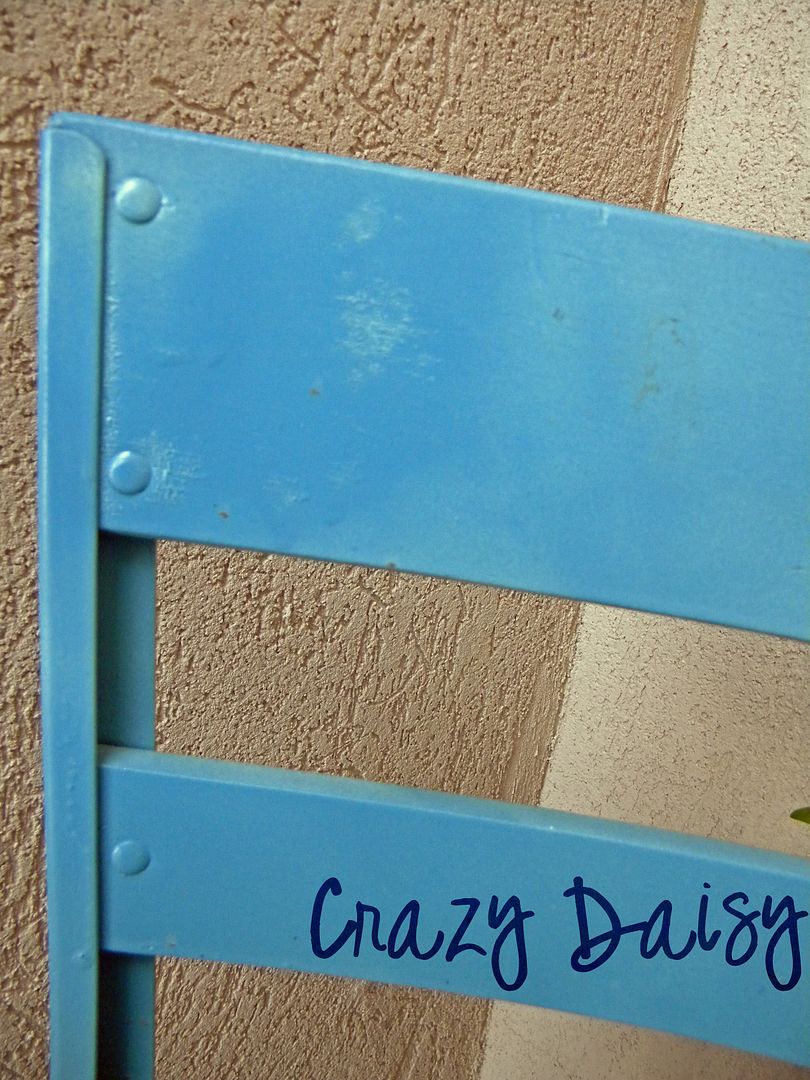
However, once I saw the blue, I fell in love with the beautiful color - but I still wanted a distressed look. I took the cream color and lightly spayed over the blue paint. It was totally splotchy and speckled and really uneven. But I was hoping it would give me a worn look. Then I sprayed blue right over the top of it. It ended up looking like this.


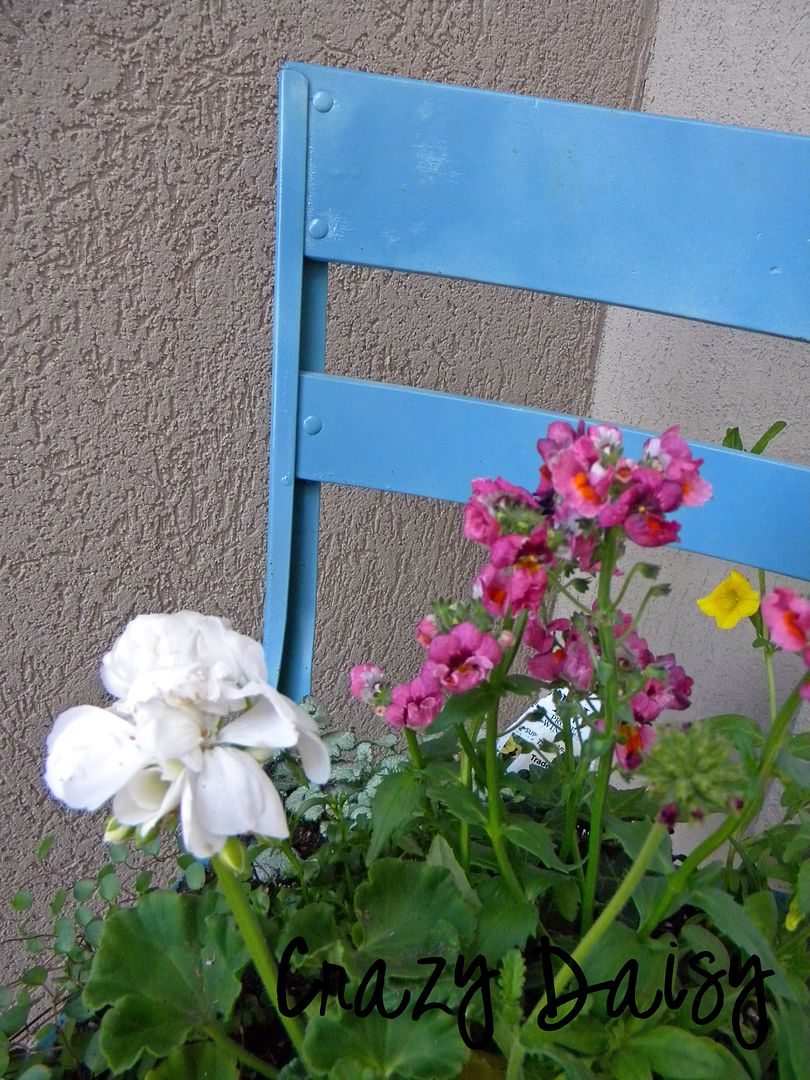
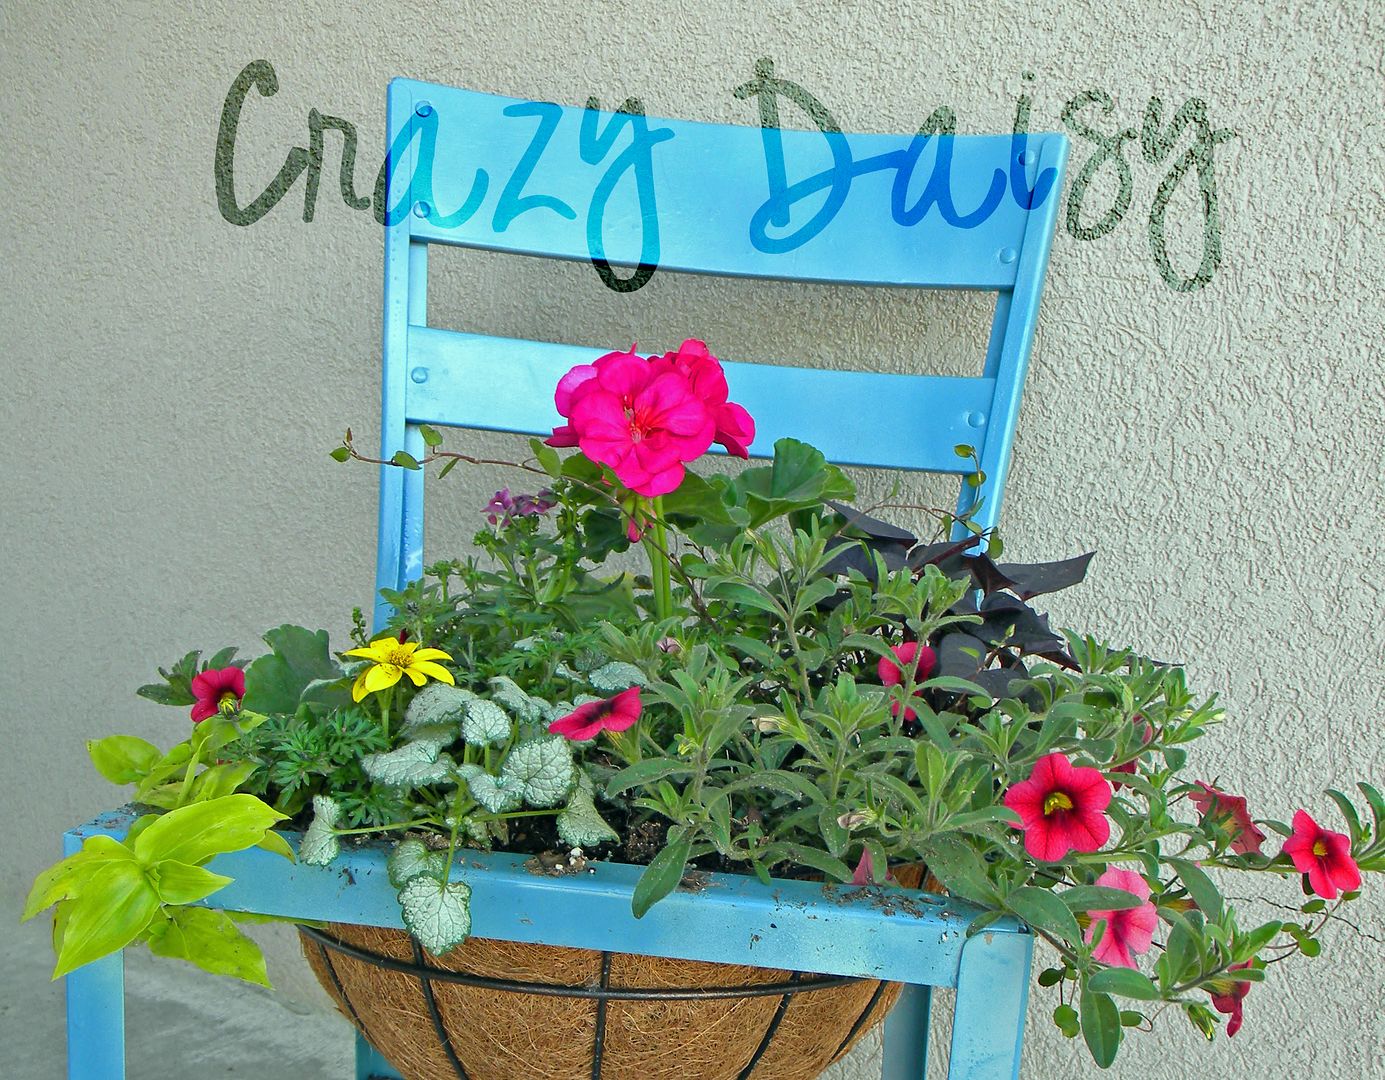
After the paint had dried, I pushed the baskets through the bottom and wired them to the chairs. A couple coconut liners and some flowers and just look at how they turned out!


 I have always loved the idea of transforming everyday objects into extraordinary things that are rare and unique only to me and I am tickled with how these turned out! I can't wait for the flowers to grow a little and cascade down the chairs!

This project participating in...
Visit thecsiproject.com

I'm sharing this idea with


Transformation Thursday