Showing posts with label Bars. Show all posts

Monday, March 12, 2012

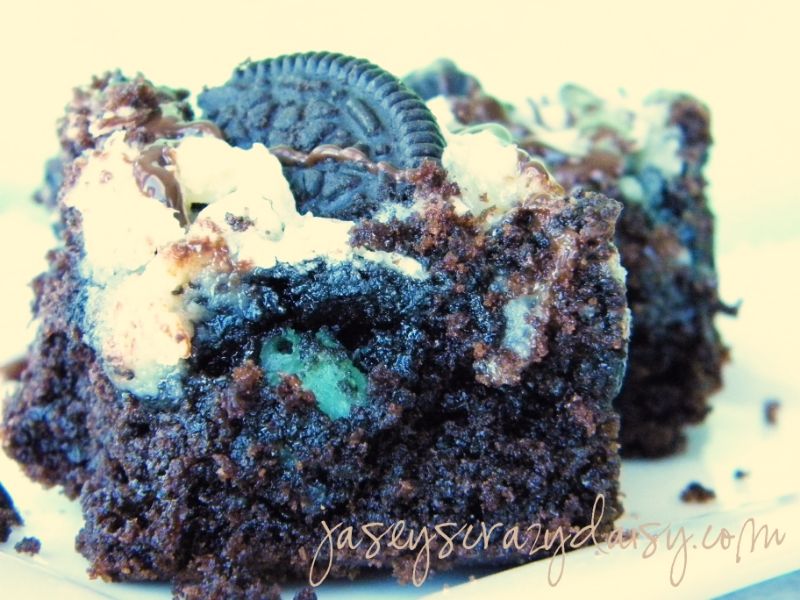
Shamrock Bars {AKA Mint Cookies and Cream Cheesecake Bars}

Pin It
I'm not sure what you feed the leprechauns in your world, but these went over pretty well in mine. It seems like those little green fellows favor anything minty, and with one layer of cookies and cream cheesecake and another of chocolate fudgie goodness, how could you go wrong? If mint isn't your cup of tea, simply use your favorite Oreo substitute. You are sure to find a winning combination.

Shamrock Bars {AKA Mint Cookies and Cream Cheesecake Bars}
*Recipe by Jasey's Crazy Daisy, Adapted from Cookies and Cups White Chocolate Butter Bars

1/2 cup cold butter
1 box devil's food chocolate cake
2 eggs
1 (8 oz.) block of cream cheese, softened
2 cups powdered sugar
2 eggs
2 teaspoons vanilla extract
20 Mint Oreos, chopped into fourths,  15 for for the cheesecake layer, 5 for the topping
1/2 cup chocolate chips

Preheat oven to 325. Spray a 9x13-inch pan with cooking spray. In mixing bowl, combine dry cake mix and butter. Beat on medium until crumbly. Add eggs and beat until smooth. Spread mixture in prepared pan. Sprinkle 15 Mint Oreos, chopped into fourths, evenly over bottom layer. In another mixing bowl, beat cream cheese and powdered sugar until smooth. Add eggs and vanilla and mix until combined. Pour evenly over chopped Oreos. Make sure to pour as evenly as possible across the crust. It may not look like there is enough, but the batter will expand upon baking. If you need to, use a spoon to scoop batter from thicker spots to those that seem a little thin. Sprinkle reserved cookie piece over the top of bars. Pop in oven and bake for about 30 minutes or until center is set. Remove from oven. Set aside. Place chocolate chips into a zip-loc baggie and put into microwave for 20 second intervals. Squish the bag with your fingers to mix and smooth the chocolate between intervals. When melted smooth, snip a tiny piece off of the corner of the bag and drizzle over bars. Cool until set, the fridge can hasten this process. Cut and enjoy!!!
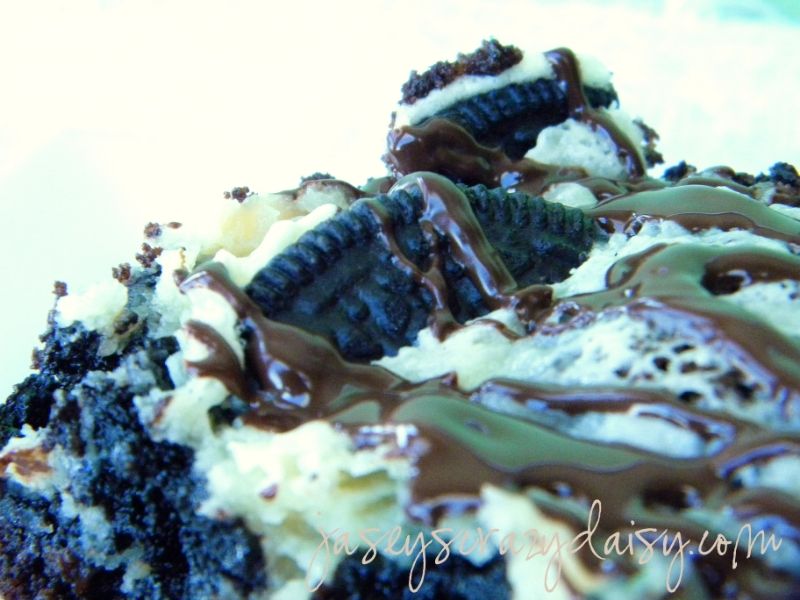
I think I'll have another. Thank goodness they are so easy to make!

Speaking of leprechauns, have you started thinking about how you might catch one this year? There's still time if you hurry. Maybe this is the year we'll get our hands on all that lucky gold!
Photobucket
Enter your email address:


Delivered by FeedBurner

Friday, March 2, 2012

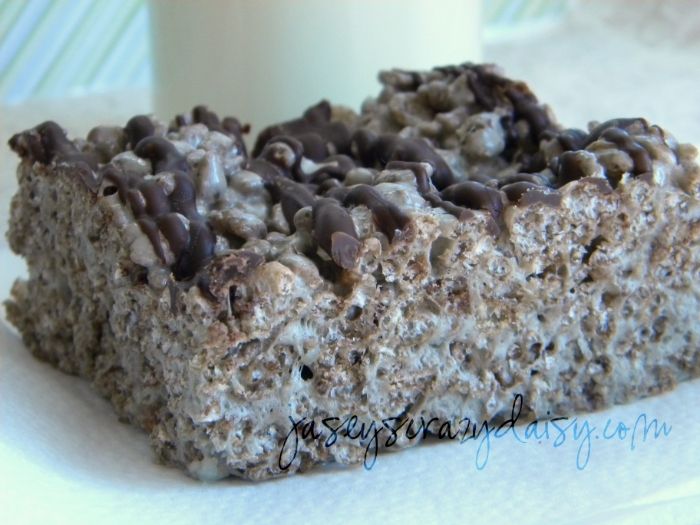
Chewy Mint Chocolate Cocoa Crispy Treats

Pin It
Mint chocolate anything is always one of my favorites. Since this flavor combination seem to be everywhere this time of year, I thought I would share one of my favorite mint chocolatey treats with you. Rice Krispie Treats, meet mint and chocolate. Not only would they be festive topped with shamrock sprinkles or an extra drizzle of green candy melts for St. Patrick's Day, they are a perfectly easy treat for anytime just as they are.

Chewy Mint Chocolate Cocoa Crispy Treats
*Recipe  by Jasey's Crazy Daisy

4 1/2 Tablespoons butter
2 (8 oz.) bags of Jet-Puffed Chocolate Mint Marshmallows
6 cups Cocoa Krispies
1/3 cup Andes baking chips

Grease or butter a 8X8 pan. Pour Cocoa Krispies into a large bowl. In another large microwave-safe bowl, melt marshmallows and butter for 60 seconds. Stir. Repeat until mixture is melted and mixed together. Pour over Cocoa Krispies. Stir, using a wooden spoon, until mixed well. Keep mixing until all the crumbs are incorporated. Pour into prepared pan and press to spread evenly. I find it helps to spray my fingers, or a wooden spoon with cooking spray to press the mixture without sticking. Set aside. Place Andes baking chips in a zip-loc baggie. Place in microwave for 20 seconds. Take out and knead to mix. Repeat until mint chocolate is melted. Cut off a small piece of the corner of the bag and drizzle bars with mint chocolate. I usually place them in the fridge to hurry the process (but if you leave them too long, you will have to let them sit out to soften before cutting). Once chocolate has set, cut into bars and enjoy.

*Note - If you omit the Andes mint chocolate drizzle, the mint flavor that results from the marshmallows is very subtle. The drizzle completes the minty taste of these treats perfectly.  Next time I make these, I may even try to mix in some of the Andes baking chips just after the cereal has been stirred into the marshmallow mixture, and has cooled just a bit, before spreading the treats in my pan. Yum!

Now to wrap up a little business by announcing a winner! If you are tuned into my facebook page, you already know who won this cookbook.
If not, our winner is,

I love all of your ideas! My favorite cake is german chocolate cake! The photos you post of your cakes bring back so many memories of my grandma who used to be a cake decorator for many years!
Amanda

Congrats, Amanda, enjoy your new cakebook! What's your favorite mint chocolate treat?
Photobucket
Enter your email address:


Delivered by FeedBurner

Monday, August 22, 2011

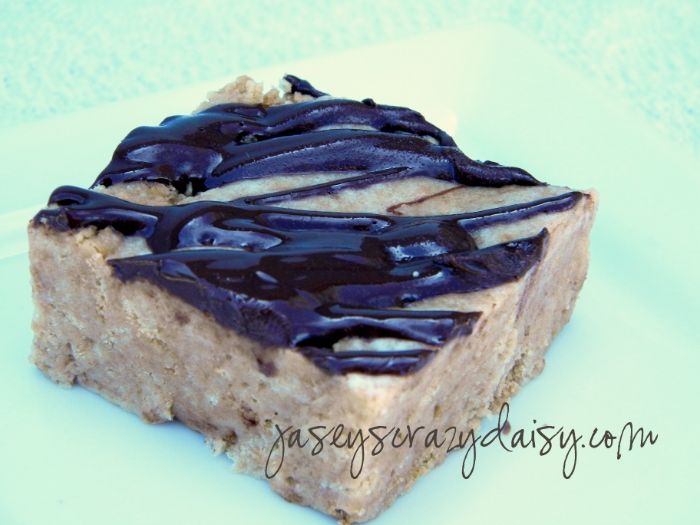
Chewy Chocolate Drizzled NutterButter Bars {No Bake}


I have been on a HUGE peanut butter kick, peanut butter and chocolate, that is. I just can't get enough. Remember this, cookies and cream no bake treat? Well, let me introduce you to it's peanut butter and chocolate cousin. They are made with NutterButter cookies instead of Oreos and drizzled with chocolate instead. I used dark chocolate, but use whatever makes you happy. Still no bake, still easy, still chocolatey and chewy, and still super yummy, ~but with a little peanut butter goodness added!

Chewy Chocolate Drizzled NutterButter Bars
*Recipe by Crazy Daisy

1 package of NutterButter Cookies
1 (10 oz.) bag of large marshmallows
4 Tablespoons butter, cut into cubes
1/3 cup chocolate chips, I used dark, but use what makes you happy

*Note~  double ingredients and use a 9x13 to serve a crowd.

Grease or butter a 8X8 pan. Place NutterButters in food processor and pulse into ground (you may have to work in batches). Pour NutterButter crumbs into a large bowl. In another large microwave-safe bowl, melt marshmallows and butter for 60 seconds. Stir. Repeat until mixture is melted and mixed together. Pour over NutterButters. Stir, using a wooden spoon, until mixed well. Mixture will become thick and hard to stir. Keep mixing until all the crumbs are incorporated. Pour into prepared pan and press to spread evenly. I find it helps to spray my fingers, or a wooden spoon with cooking spray to press the mixture without sticking. Set aside. Place chocolate chips in a zip-loc baggie. Place in microwave for 20 seconds. Take out and knead to mix. Repeat until chocolate is melted. Cut off a small piece of the corner of the bag and drizzle bars with chocolate. I usually place them in the fridge to hurry the process (but if you leave them too long, you will have to let them sit out to soften before cutting). Once chocolate has set, cut into bars and enjoy.

I'm off to enjoy the rest of the summer with my boys... two weeks left before my first grader is off to school everyday. He's so ready, his mom is not!!! We've got a whole bunch of fun things to squeeze in! I see more gelato in our future, and the pool, and some bike rides, picnics, and what ever else I can manage to throw in! How are you spending your last days of summer?
Photobucket
Enter your email address:


Delivered by FeedBurner

Monday, August 15, 2011

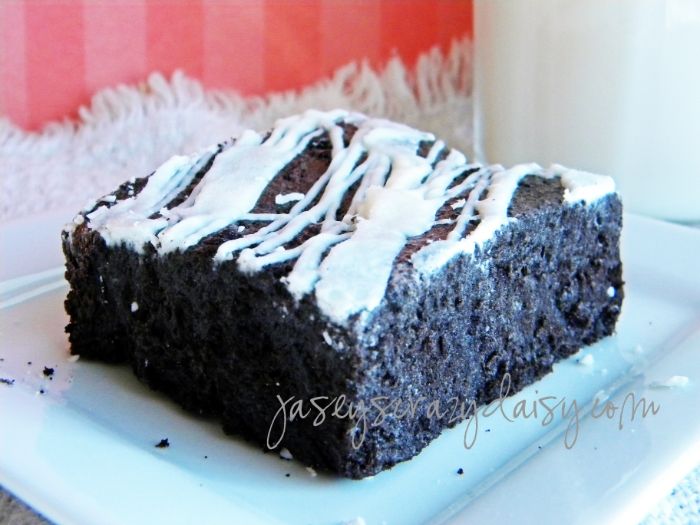
Chewy Oreo Bars {No Bake}


These have quickly became a favorite treat at my house. My kiddos request them frequently. Really, I'm not even sure what to call them. After glancing at the ingredients, you might think 'rice krispie treats' which is totally what I thought. However, while chewy, the end result is softer... almost like a brownie. I guess they lie somewhere in between the rice krispie treat and the brownie, like a yummy cross. Try them! Let me know what you think. I think you just might find a new treat to add to your list of favorites.

Chewy Oreo Bars
*Recipe adapted from Picky Palate

2 (16.6 oz) packages of Oreos
2 (10 oz.) bags of large marshmallows
1 stick butter, cut into cubes
1/2 cup white chocolate chips

*Note~ If you want to make a smaller batch, use a 8x8 pan and only half of the ingredients.

Grease or butter a 9x13 pan. Place Oreos in food processor and pulse into ground (you may have to work in batches). Pour Oreos into a large bowl. In another large microwave-safe bowl, melt marshmallows and butter for 60 seconds. Stir. Repeat until mixture is melted and mixed together. Pour over Oreos. Stir, using a wooden spoon, until mixed well. Mixture will become thick and hard to stir. Keep mixing until all the crumbs are incorporated. Pour into prepared pan and press to spread evenly. I find it helps to spray my fingers, or a wooden spoon with cooking spray to press the mixture without sticking. Set aside. Place white chocolate chips in a zip-loc baggie. Place in microwave for 20 seconds. Take out and knead to mix. Repeat until chocolate is melted. Cut off a small piece of the corner of the bag and drizzle bars with chocolate. I usually place them in the fridge to hurry the process (but if you leave them too long, you will have to let them sit out to soften before cutting). Once chocolate has set, cut into bars and enjoy.

What would you call these yummy cookies and cream treats? I'm open for suggestions...

PS - Have you heard of Pinterest? Find me here. What a beautiful place. Need an invite? Let me know and I will see what I can do!

PPS - If you like these treats, you make be interested in their Chocolate Drizzled NutterButter Bar cousins. Click here.
Photobucket
Enter your email address:


Delivered by FeedBurner

Monday, June 28, 2010

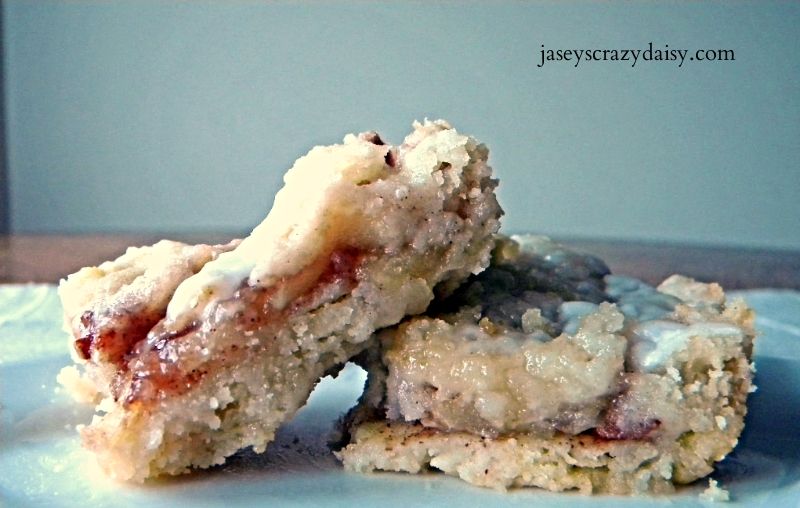
Apple Streusel Bars

*Recipe by Our Best Bites

I have a confession to make. I'm almost afraid to admit it because it might just sound un-American. Well, here goes, I really don't like apple pie!!!! I know, how can someone not like one of America's most classic desserts and still love the red, white, and blue? I thought it had to do with the texture of the baked apples until I tried this recipe for Apple Streusel Bars.... A-MAZ-ING!!! Our Best Bites has done it again! I may not be the genius behind this recipe, but I am smart enough to know it is worth passing on! We're talking the kind of good that I not only eat one, or two, or may be even three... I eat enough of them to figure out I that I have no self-control and have to pack them up and unload on some poor unsuspecting soul (better on their hips then mine!) I feel so relieved now that that is off of my chest... I feel all-American now that I can say I adore Apple Streusel and I have this fabulous recipe (that I make a little more than I should) to share with you. And just in the nick of time for flag day!

Apple Streusel Bars
* Recipe by Our Best Bites

Sweet Pastry:
2 c. flour
1/2 c. sugar
1/2 tsp. baking powder
1/2 tsp. salt
1 c. real butter, softened (no substitutions!)
1 egg, beaten
Apple Filling:
1/2 c. white sugar
1/4 c. flour
1 tsp. cinnamon
4 c. (about 3 medium) sliced, peeled baking apples (I've used Granny Smith in the past, although this time around I used Gala and they were fabulous)
Glaze:
2 c. powdered sugar
About 3 Tbsp. milk (whole milk is best)
1 tsp. almond extract


Method:
To prepare crust, mix flour, sugar, salt, and baking powder in a medium bowl. 
Cut in butter with a pastry blender or two knives until you have pea-sized crumbles. Gently mix in beaten egg.
Spray a 9x13 baking dish with non-stick cooking spray. Gently pat about 2/3 of the crumb mixture onto the bottom of the dish. Preheat oven to 350 and set aside.
To prepare apple filling, combine flour, sugar, and cinnamon and toss with apples.
Spread apples out on prepared crust. Sprinkle reserved crust mixture over apples evenly and bake in preheated oven for 40 minutes.
When finished, allow to cool completely.
To prepare glaze, whisk together powdered sugar, almond extract, and enough milk to achieve desired consistency.
Place glaze in a Ziploc bag and cut off a very small portion of one of the corners. (Or just use a fork). Drizzle glaze over cooled pastry and allow to harden (you can place it in the freezer to hurry things along). Cut into bars and serve.

Enjoy! Have a good 4th of July everyone!
Photobucket

Want more Crazy Daisy?
 Have it delivered straight to your inbox!!!
Enter your email address:


Delivered by FeedBurner

Friday, June 4, 2010

Tollhouse Cookie Pie Bars

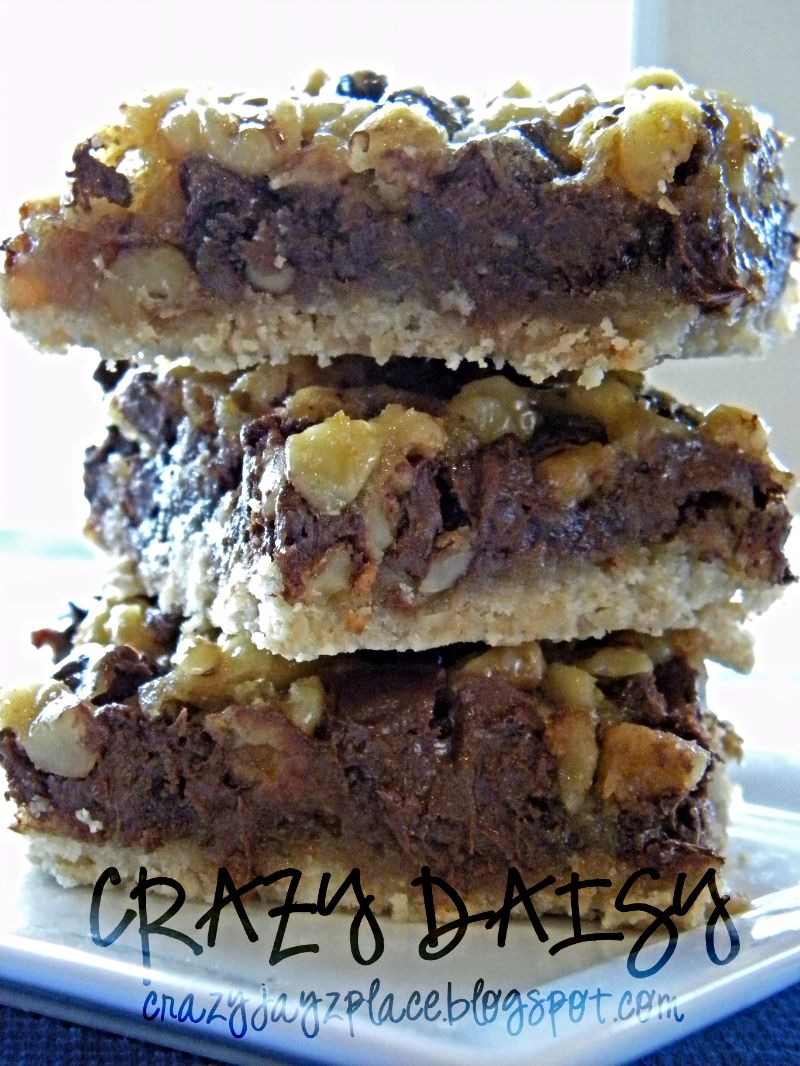
I thought I might share my brand new favorite treat...Tollhouse Cookie Pie Bars. I adore these sweet little delights! They start with a simple crust made with brown sugar and butter (need I say more?) and are topped with a nutty gooey chocolate layer.
I am convinced this is what heaven tastes like! Here's the recipe

Tollhouse Cookie Pie Bars
*adapted from Nestle's Chocolate Walnut Pie Bars

1 1/2 cups flour
1/2 cup butter (1 stick), softened
1/4 cup packed brown sugar
3 large eggs
3/4 cup light corn syrup
3/4 cup sugar
2 tablespoons butter, melted
1 teaspoon vanilla
1 (12-oz. pkg.) semi-sweet chocolate chips (@ 2 cups)
1 (8-oz. pkg.) chopped walnuts (@ 1 3/4 cups)

*Note - The recipe called for 1-1/2 cups nuts, which left only 1/4 cup left in the bag. Rather than waste them or leave them to get lost in my pantry, I simply add the entire bag.

Preheat oven to 350. Beat flour, butter, and brown sugar in a bowl until crumbly. Press onto bottom of greased 9x13-inch pan. Bake for 12-15 minutes or until lightly browned.

Meanwhile, beat sugar, eggs, corn syrup, sugar, melted butter, and vanilla together in a large bowl. Stir in semi-sweet chips and walnuts; pour over hot crust.

Bake at 350 for 25-30 minutes or until center is set (it may look a little puffy, but will settle into a wonderful gooey chocolate layer as it cools). Cool completely in pan on wire rack -if you can resist! Cut and enjoy! Seriously, these are my new fav! Give them a try and let me know what you think! I would love to know!

If you like cookie bars, here are some more yummy recipes to check out!!!

This recipe is being featured at Between the Lines today! Thanks, Kelly, for inviting me over- what an amazing place you have! Stop over and say hi if you have a chance!

I'm sharing this recipe with
Join us Saturdays at tatertotsandjello.com for the weekend wrap up party!


Photobucket

Friday, May 21, 2010

Frosted Cream Cheese Sugar Cookie Bars - High Altitude Directions


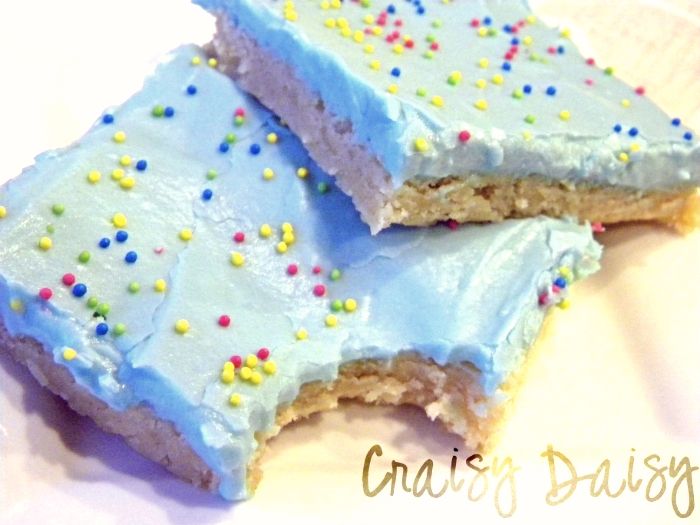
I don't know if you remember my Frosted Cream Cheese Sugar Cookies Bars, but they are super yummy! And I have said it before, you have to love all the yumminess of perfect and soft sugar cookies rolled into one sweet little bar! Simply fabulous -no fuss! I have edited the original post to include instructions for high altitude bakers! Nothing major, just a little extra flour, but it really helps the texture of the cookies. Without the change, my cookies were sometimes too soft and crumbled easily when picked up. This extra flour seems to do the trick though! Enjoy! Just follow this link for the updated version!
Photobucket


Thursday, May 6, 2010

Snickerdoodle Bars


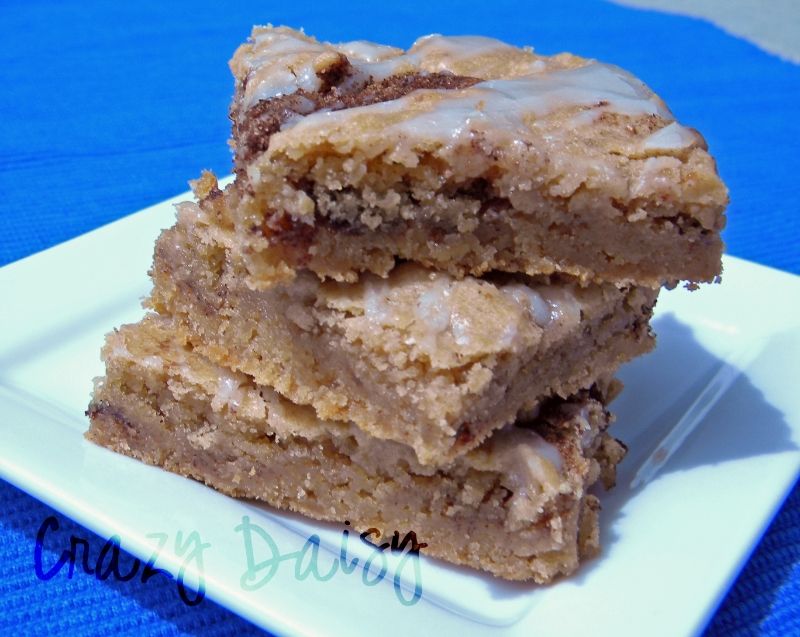
You just have to love Snickerdoodles! What's not to love - soft sugar cookies rolled in cinnamon and sugar! Recently, I found this version in one of my mom's cookbooks with all the Snickerdoodle goodness wrapped into a yummy glaze-drizzled bar. They are so very good and much faster to whip up than the original. Perfect for school lunches, summertime picnics, or even just to try this weekend!

Snickerdoodle Bars 

2 1/3 cups flour
1 1/4 teaspoons baking powder
1/2 teaspoon salt
3/4 cup butter or margarine, softened
1 1/4 cups granulated sugar
1/2 cup packed brown sugar
3 eggs
1 teaspoon vanilla

Cinnamon Filling
1 tablespoon granulated sugar
1 tablespoon cinnamon

Glaze

1 cup powdered sugar
1-2 tablespoons milk
1/4 teaspoon vanilla


Heat oven to 350. Spray or grease the bottom only of a 9x13-inch pan with cooking spray. Combine flour, baking powder, and salt in a small bowl and set aside.

Beat butter on high speed until creamy. Beat in sugars. Gradually beat in eggs and vanilla until combined. Add dry ingredients and beat on low speed until combined.

Spoon half the batter into the pan and spread evenly. Sprinkle with Cinnamon Filling evenly over batter. Dollop teaspoons of remaining batter evenly over Cinnamon Filling. Gaps are okay, they let the filling peek through leaving a fun marbled look.

Bake 20-25 minutes or until golden brown and a toothpick inserted in the center comes out clean. Cool completely, about 1 hour.

In a small bowl, stir glaze ingredients until smooth and thin enough to drizzle. Drizzle over bars. Cut and enjoy!


I am sharing with

Join us Saturdays at tatertotsandjello.com for the weekend wrap up party!


Beauty and Bedlam

Blessed with Grace

Photobucket