Showing posts with label Main Dishes. Show all posts

Friday, February 25, 2011

Buffalo Wing Bites


Recipes for stuffed pizza rolls, like these chicken-bacon ones, seem to be floating around. I don't think I have found a flavor combination that I haven't liked, but I haven't seen one like my Buffalo Wing Bites out there. Buffalo Wing anything is my hubbys favorite (thank goodness no one has put those flavors into dessert yet), and so I thought I might surprise him with something a little different - and very yummy! How could you go wrong with buffalo chicken and gooey cheese all wrapped in warm bread? And to top if off, homemade blue cheese dipping sauce, or ranch if you prefer. Did I say homemade, well nearly homemade, Hidden Valley packets are as close as it gets at my house. I figure it it's not broke, don't fix it!  These little dippers make a fun lunch or dinner served with celery sticks, or would be a fun appetizer or game-time food. Afterall, the best part of football is the food, right?

Buffalo Wing Bites
*Recipe By Crazy Daisy


1 package Hidden Valley Ranch dressing packet, divided
2 Tablespoons 100% grated Parmesan, the kind that comes in a green canister
1-2 Tablespoons butter, melted
3/4 cup milk
3/4 cup mayonnaise
2-3 oz blue cheese or Gorgonzola, optional
1 1/2 cups cooked shredded chicken (you need small pieces)
1/4 cup plus 2 Tablespoons Franks Buffalo Wing Sauce
1 1/2 cups shredded cheese, I used fine shredded Monterey Jack and Cheddar
1 roll refrigerated pizza dough, I prefer the thin crust because it is easier to roll out

Spray a pie plate, or dish of similar size with cooking spray.

In a small bowl, take 1 teaspoon of your ranch dressing mix and mix it with the 2 Tablespoons of Parmesan cheese and set aside.

In another bowl, stir the rest of your dressing mix with mayonnaise and milk. If you like blue cheese dressing, add about 2-3 oz. of blue cheese (depending on how strong you like it). Otherwise, leave it out to make ranch dressing. Place in refrigerator to chill and thicken.

In a medium bowl, mix together chicken and cheese. Add buffalo wing sauce and stir until everything is evenly coated.

Preheat oven, as directed on your pizza dough package.

Turn your pizza dough onto a lightly floured surface. Pat or roll until it's about  a 12"x13-ish" rectangle. Use your pizza cutter to slice the rectangle into 24 squares. Place about 1 teaspoon of the chicken mixture into the middle of each square. Pull corners together and pinch to seal. Then pinch the seams together to seal them as well. Place seam side down in your prepared pan. When all your Buffalo Wing Bites have been placed in your baking dish, brush them with the melted butter and then sprinkle your dressing-cheese mixture evenly over the top. Bake uncovered, as directed on your pizza dough package. They will be be nice and golden brown when they're ready. Serve warm with dressing and celery sticks. ENJOY!!!

When I have a big enough crowd, I like to make a double batch, using blue cheese for one of the dressing and leaving one plain as ranch. Yummo! If you double it, use 3/4 cup Franks Buffalo Sauce.

I'm sharing this yumminess with

Weekend Bloggy Reading


Photobucket
Enter your email address:


Delivered by FeedBurner

Friday, February 11, 2011

Chili Meat

I have been working on getting this recipe posted for quite some time now. It is my husband's favorite meal, hands down and I have been promising it to a friend for just about forever! This ones for you, Melissa! The problem getting it posted was that in the past, Momma Daisy usually made it, and it was one of those recipes that she just knew how to make without paying attention too much to measuring. So I had her tell me the basics, guessing on the measurments and sent off to conquer Chili Meat. After all, knowing how to make the husbands favorite meal is bound to come in handy.... I am sure we all can think of a few instances in which we've used food to bribe beg for forgiveness  treat our husbands.

When you make Chili Meat, you will need to consider your heat tolerance. Admittedly, I am a weenie! I do not enjoy spicy foods. So I may not be the best judge when it comes to this, but, I can tell you that making this dish with 5 chili peppers and two tablespoons of chili pepper liquid leave this dish just about a spicy as I can handle. I found that my lips tingled a little from the hot peppers. I enjoy it tamed down a little with only 1 tablespoon of hot chili pepper liquid and about 4 hot peppers (AND I MAKE SURE NONE OF THOSE BABIES END UP ON MY PLATE). If you like things on the spicier side, feel free to spice it up! You may have to play around a little to get it suited to your tastes, but it will be totally worth it!

Chili Meat
*Crazy Daisy Recipe adapted from Momma Daisy

3 lbs. hamburger
32 oz. chicken broth*
4 packages of McKormick Brown Gravy Mix
4-5 Hot Chili Peppers from a 16 oz. jar (usually found close to the pickles and roasted red peppers)
1-2 Tablespoons of the chili pepper liquid
2 onions
4 sweet peppers, assorted colors
3-4 tomatoes

Roll hamburger into 1-inch meatballs. In batches, brown meatballs in a dutch oven pot. Drain grease. Pour chicken broth into dutch oven. Stir in gravy packets, pepper juice, and peppers. Return meatballs to dutch oven. Bring to a boil, then cover and simmer for an hour. 

Meanwhile, clean and prepare veggies. Cut onions and tomatoes into wedges (about 8 wedges each). Peel the onions wedges apart a little.  Cut sweet peppers into 1-inch pieces. After meatballs have simmered, its time to add veggies to steam on top. Place the onions on top of the meat, top with sweet peppers, and place the tomatoes on top. Cover, and let simmer until veggies are crisp tender, probably about 10-15 minutes. Serve over steamed rice. Enjoy!

*This recipe has been updated to a more user friendly version. Some of the prep dishes have been eliminated. I also find using the entire 32 oz. carton works just as well, if not better, and I don't have any left to contend with. I like how it gives a little more broth, without losing any flavor. The only difference I notice, is the broth is a little thinner, which I like. If you don't want to change, go ahead and stay with the original 24 oz.

PS - If you ever want to print any recipes from Crazy Daisy, just use the green button below!
Photobucket

Monday, August 23, 2010

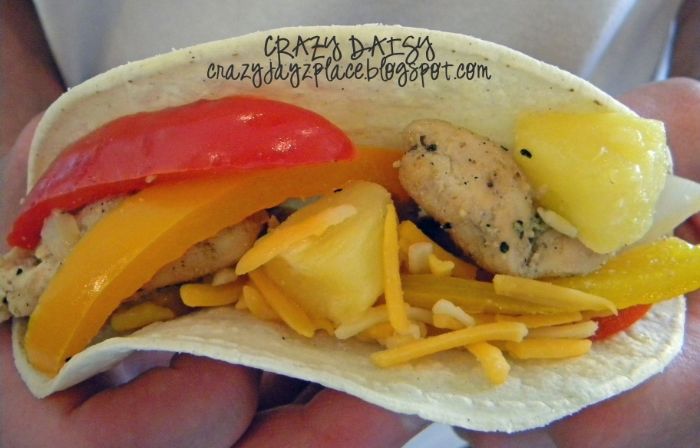
Pineapple Chicken Fajitas


While there is still time to fire up those grills, I thought I might share one of my most requested recipes!!  Not to worry if you don't have a grill, you can still make these - but it is so nice not to have to cook in the kitchen  during the warmer months. As a matter of fact, in the winter when my grill is piled under the snow, I still make these on the stove top in a skillet - but I imagine an inside grill or under the broiler word work just as well. Now, pineapple...in  fajitas, you ask?!?! Trust me! It adds a sweetness to the fajita that is oh-so-good! I really think you'll love it!

Pineapple Chicken Fajitas
*Recipe by Crazy Daisy

4 lbs boneless skinless chicken breasts, cut into strips
6 medium peppers (your choice of green, sweet red, yellow, and orange peppers) cut into strips
1 medium onion, sliced into thin wedges
4 tablespoons fajita seasoning (I use McCormick)
2 tablespoons honey
1-2 teaspoons garlic powder
1/2 teaspoon salt
1 (20 oz) can pineapple chunks, drained and juice reserved
couple drops of Louisiana Hot Sauce, or to taste, if you like heat, add more
shredded cheese, sour cream, and salsa for serving

*Note - this recipe can be halved easily. As is, it feeds 7-8 people. 

Drain and measure pineapple juice. Add water to make 1/2 cup. Add fajita seasoning, honey, garlic powder, salt, and a couple drops of Louisiana Hot Sauce, stir well. Pour into gallon-sized zip-loc bag. Add chicken, close bag and squish a little until mixed well and chicken is coated evenly. If you have time let marinate in refrigerator for up to 4 hours (but even 30 minutes helps). Using a grill pan, grill chicken over medium-high heat until juices run clear and chicken is browned. (My chicken didn't brown very well this time because I used a cookie sheet instead grill pan and the liquid didn't burn off quick enough for browning.) If you don't have a grill, heat a tablespoon of olive oil in a large skillet and cook over medium-high heat.

Meanwhile, for the veggies, either on the grill or in a skillet heated with 1 tablespoon of olive oil, cook peppers and onions for a few minutes.Add pineapple and cook until warmed through. We like our veggies warm and tender-crisp - but cook as you like.

Serve with warm tortillas, cheese, sour cream, and salsa.

This recipe is participating in the Summertime challenge at
Visit thecsiproject.com
Photobucket
Sharing this recipe with
Beauty and Bedlam


Tempt my Tummy Tuesdays
Don't want to miss anything, have Crazy Daisy delivered straight to your inbox!
Enter your email address:


Delivered by FeedBurner

Sunday, July 11, 2010

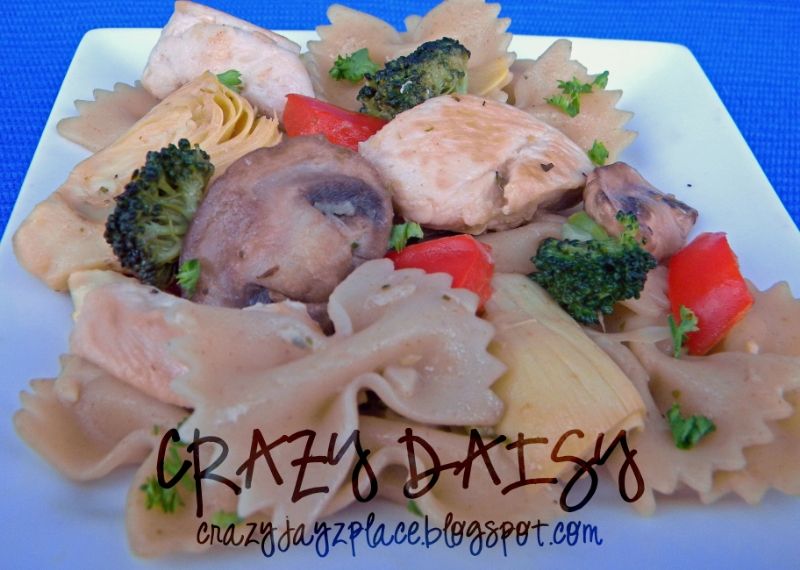
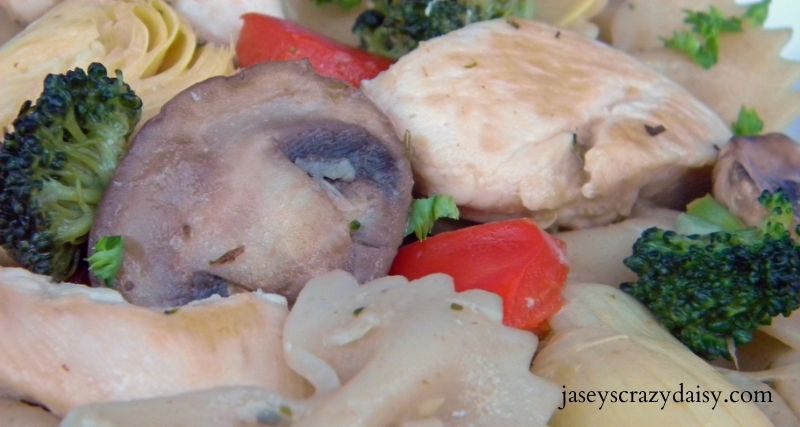
Chicken Artichoke Pasta


Pasta... who doesn't love pasta? I love it even more when I find a healthy pasta dish for my family to enjoy! This Chicken Artichoke Pasta is packed with veggies and  has a light oregano, garlic, sauce that adds yummy flavor. I use heart-healthy pasta and serve the Parmesan Cheese on the side so everyone hascontrol how much is added to their serving. Usually my family prefers shredded Parmesan, but with this dish, we preferred the canister version... I wonder what which will better suit your tastes?

Chicken Artichoke Pasta
* adapted from Taste of Home

6 oz. uncooked farfalle (bow-tie) pasta 
1 lb. boneless skinless chicken breasts, cut into thin strips
3 teaspoons olive oil, divided
1/2 cup fresh broccoli florets
1/2 cup sliced mushrooms
1/2 chopped red pepper (halved cherry tomatoes could be substituted)
2 garlic cloves, minced or grated
1 (14 oz.) can water-packed artichoke heats, rinsed, drained, and quartered
1/2 teaspoon salt
1/2 teaspoon dried oregano

2 teaspoons all-purpose flour
1/4 cup reduced-sodium chicken broth
1/3 cup white wine or reduced-sodium chicken broth
1 tablespoon minced fresh parsley
Parmesan Cheese


Cook pasta al dente, according to package directions. Meanwhile, in a large nonstick skillet coated with cooking spray, cook chicken in 2 teaspoons oil over medium heat until no longer pink. Remove and keep warm.

In the same skillet, cook and stir broccoli in remaining oil for 2 minutes. Stir in the mushrooms, red peppers, and garlic; cook 2 minutes longer. Add the artichokes, salt and oregano; heat through.

Combine the flour with broth and wine or additional broth until smooth; stir into the pan. Bring to a boil; cook and stir for 1-2 minutes or until thickened. Add parsley and reserved chicken.

Drain pasta; add to chicken mixture and toss to coat. Sprinkle with cheese. 

Healthy! Yummy! What more can you hope for?

Photobucket
Don't want to miss anything? Have Crazy Daisy delivered right to your inbox!
Enter your email address:


Delivered by FeedBurner

Friday, June 11, 2010

Orange Thai Beef Skewers

* Recipe by Our Best Bites


I'm back... just as promised! I wish I could take credit for this recipe, but I must give credit where credit is due - Our Best Bites. If you haven't checked out OBB, head over when you have some time (you'll be there awhile drooling over all of their amazing recipes!) These Orange Thai Beef Skewers are really good -everyone gobbled them down (even the kiddos)! They are perfect for the warm summer grilling days, which are my very favorite kind of days! 

Orange Thai Beef Skewers
*Recipe by Our Best Bites

1 orange
1/4 C soy sauce
1/4 C seasoned rice wine vinegar
1 T honey
1T sesame oil
1 t ground ginger
1 t coriander
4 cloves garlic
2-4 t Sriracha chili sauce*
1 1/2 lb flank steak

*Note - Sriracha is a really great hot chili sauce. It can easily be found in most grocery stores. Look in the Asian foods section. You can't miss it -it has a rooster on the bottle. If you have to substitute, you could add cayenne pepper, red pepper flakes, or plain hot sauce to the marinade.

Zest your orange and add all of the it to a bowl. Cut the orange in half and add all of the juice as well. You should have at least 1/4 C orange juice and anything more than that is just fine. Add  soy sauce, vinegar, honey, sesame oil, ginger, coriander, and garlic to the orange mixture. Then add Sriracha to your liking. Keep in mind, that the spice mellows once the skewers are cooked. I don't like things really very spicy at all and 2 teaspoons Sriracha is just about perfect for me. So if you like heat, I'd do more like 3-4 teaspoons of Sriracha. Whisk the marinade so everything is combined. 

Slice your flank steak across the grain into about 1/4" slices. Sometimes it can be helpful to throw your steak in the freezer for about 30 minutes before slicing. It is way easier to slice partially frozen.

Preheat grill when your ready to start cooking. Thread the strips of meat onto your skewers, just like you're stitching (don't forget to soak your skewers in water for 30 minutes if you are using wooden ones.) Place them on the grill. They cook really fast. Overcooked flank steak is tough and chewy, so don't over do it! They should only take about 3-4 minutes on each side. You'll want to flip them half way through. 

These cool even faster than they cook, so get the rest of your meal ready and set the table before you grill these just before serving so they are hot right off the grill!


I like to serve them with these Black Beans and Rice


Photobucket
PS - If you like food on a stick (who doesn't?) tonight we are having Curried Beef Kabobs - I will post them soon! I can hardly wait for dinner!

Sunday, April 18, 2010

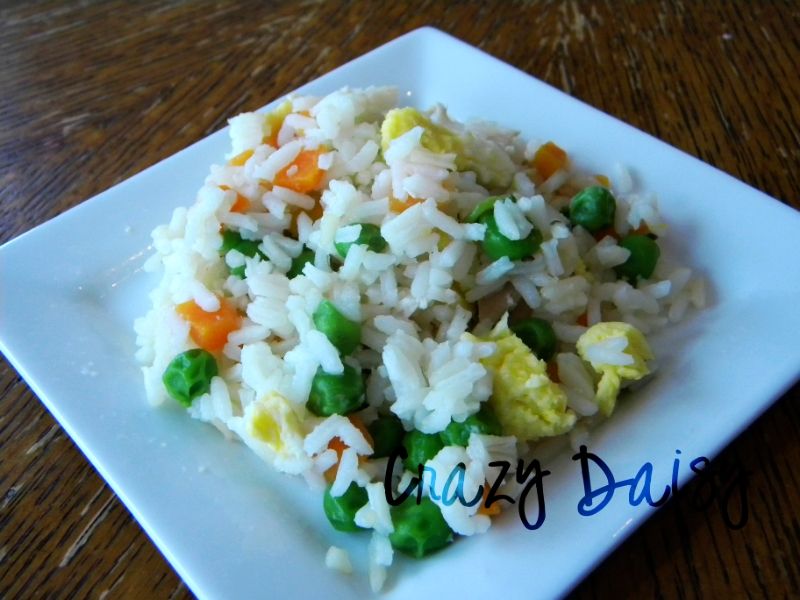
Chicken Fried Rice


Let's face it; some days we need meals that are quick and easy to prepare. This is one of those kind of recipes! It is quick, simple, and one of Mister Crazy's favorites! It starts with a rotesserie chicken - the one you pick up from the deli on your way home (although, I supppose any leftover chicken would work). Add a little rice and some veggies, maybe some scrambled eggs, and you are basically finished.
Chicken Fried Rice

1 rotesserie chicken - skin removed and meat pulled off
5 cups rice
5 cups water
24 oz frozen peas and carrots
4 tsp. chicken bouillon
3 or 4 eggs
soy sauce

*A little note - If you like, you may substitute chicken broth for the water and leave out the bouillon. Either option adds a little extra flavor, but if you skip them it's not a big deal.


Also, as written, this makes a ton. When I am not feeding extra people, I use about three cups of rice, three cups of water, 2 tsp. bouillon, and only 12 oz of frozen vegetables. It ends up a little meatier, which works great for my faimly's tastes. I suppose if you wanted to add more meat to the above, you could try, just be sure you have an extra extra large skillet.


Pour water and bouillon into skilled over high heat and bring to a boil. Add rice and frozen vegetables, bring heat to about medium and cover. Continue cooking, stirring occasionally.

Meanwhile, scramble eggs.

When rice and veggies are soft, add chicken and eggs. Cook, while stirring, until chicken is warmed through. Season with soy sauce, salt, and pepper to taste.

It's a great meal that comes together quickly on busy nights!

I'm sharing with

Blessed with Grace

TastyTuesday200pix Welcome to my new home   Tasty Tuesday

Lovely Yellow Ribbons
Photobucket

Monday, March 15, 2010

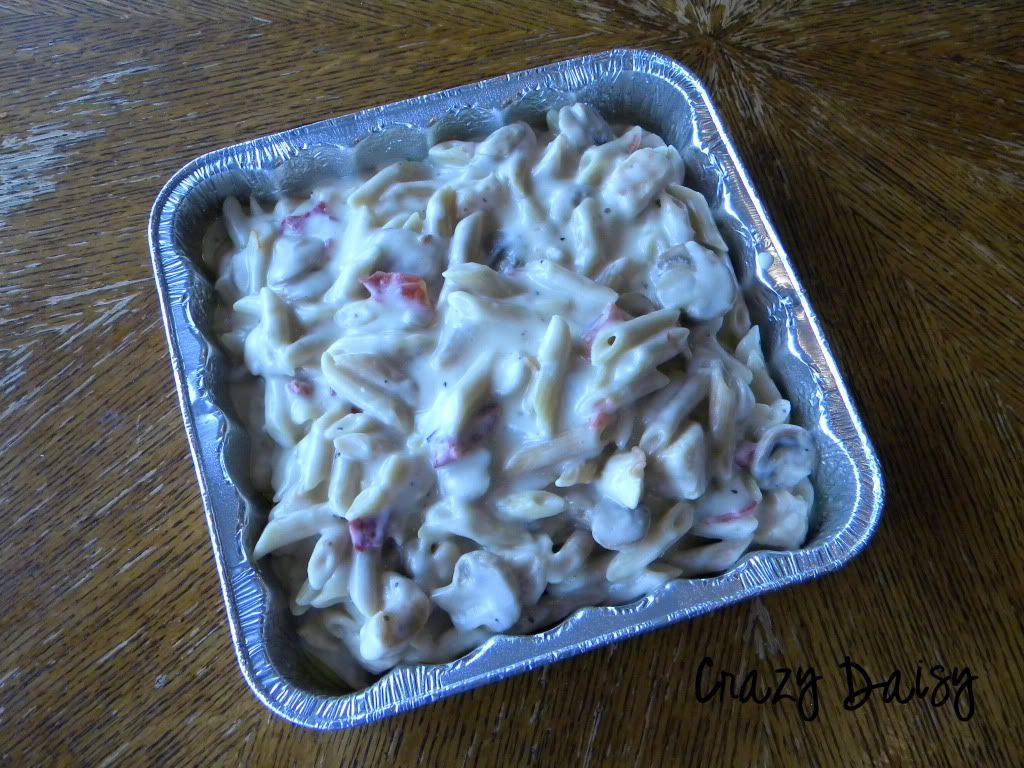
Roasted Red Pepper Chicken Penne

*adapted from Baked Cheesy Chicken Penne from Our Best Bites

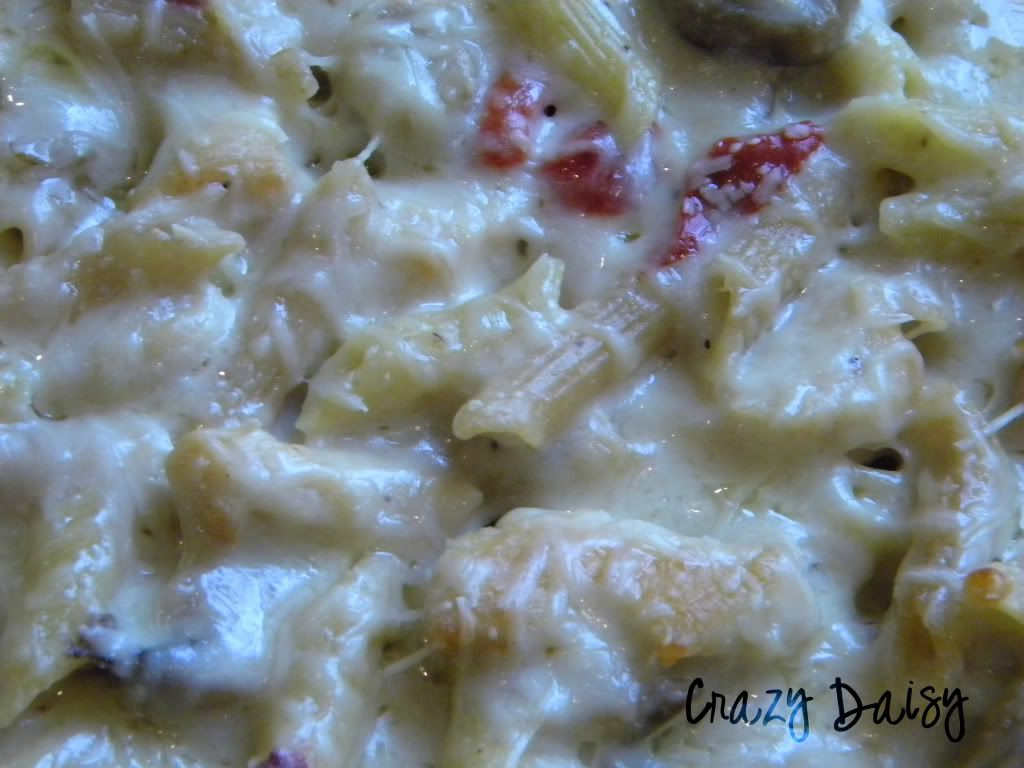
Cheese. Chicken. Mushrooms. Roasted red peppers. Pasta... Seriously, what's not to love? And this recipe makes enough for an extra meal that you can either share with elderly grandparents, your starving college student brother, or freeze for your own family to enjoy on another night. That's right, a freezer meal! Hooray!

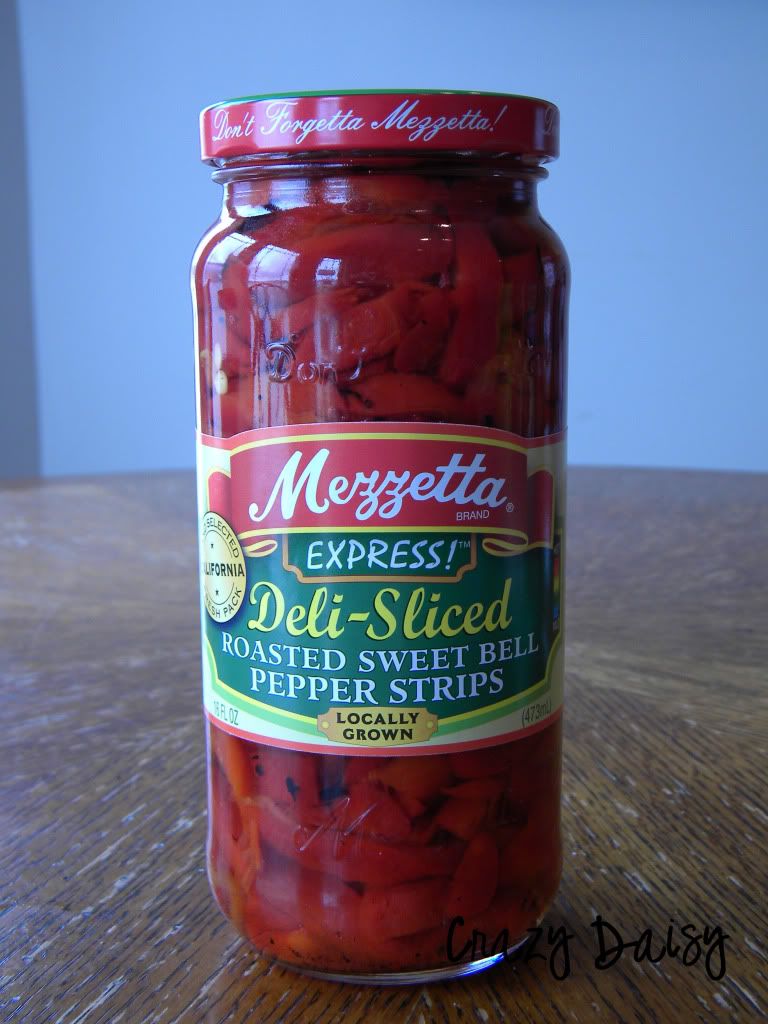
First, use any Roasted Red Pepper that you like, but I like these ones. They are already sliced into thin strips so all you have to do is run your knife through them a couple of times and they are ready. Just in case you aren't sure where to find them, look with the pickles at your grocery store. They are on the very top isle at my store.


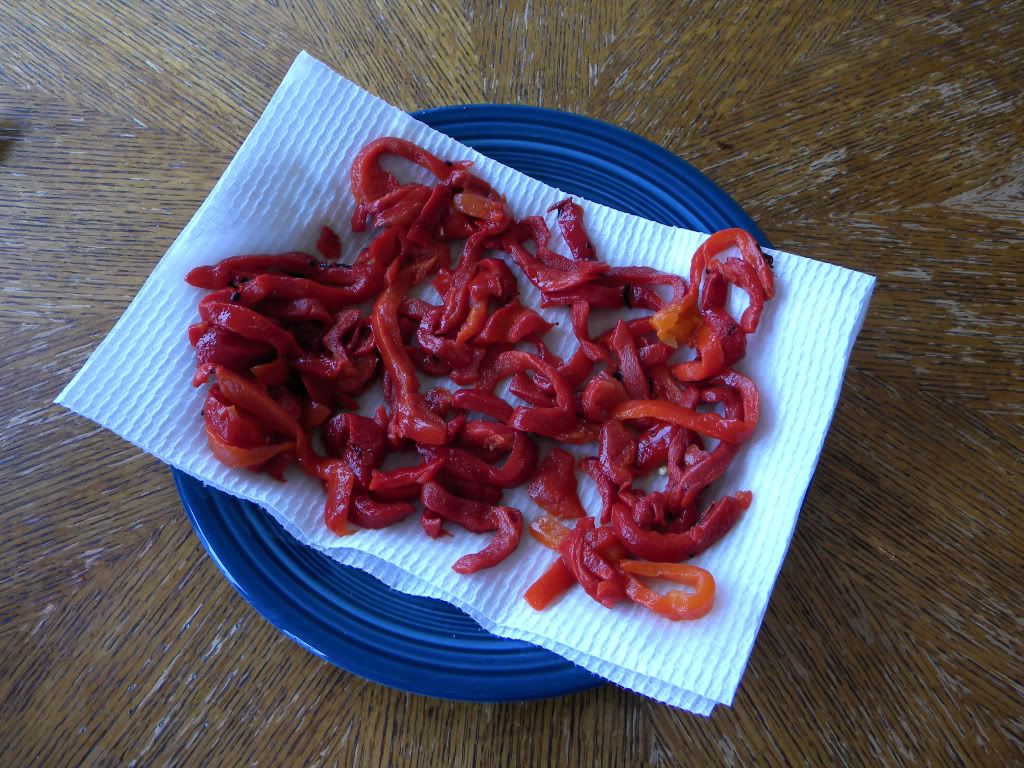
The peppers need to be drained so that your pasta isn't runny from the extra liquid. I line a plate with double paper towels and use a fork to place the peppers on top. Then I cover them with more paper towels and let all those pepper juices soak away.


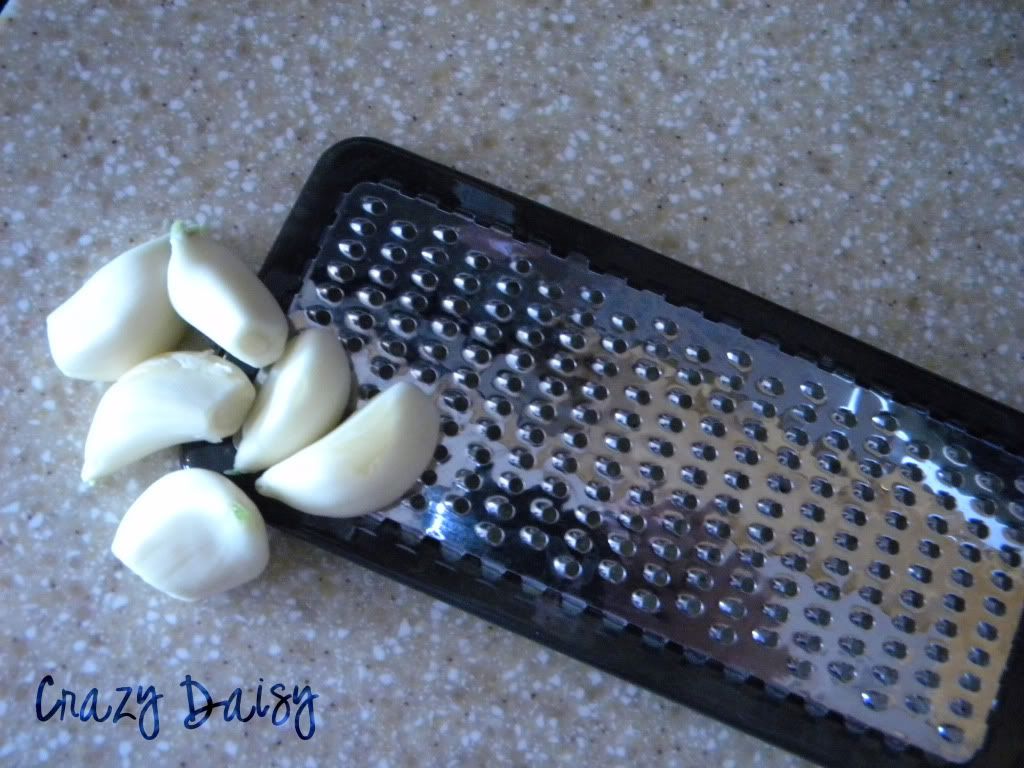
A little note on mincing garlic... I refuse to do it! I discovered this little trick that I love. I use a small grater and simply grate garlic right into my recipes.


Now, for the recipe...

Roasted Red Pepper Chicken Penne

6 tbls. butter, plus more for baking dishes
kosher salt
black pepper
1 lb. penne pasta
1 tsp. olive oil
4 boneless skinless ckicken breasts, cut into bite-size pieces
1/2 cup plus 2 tbsl. flour
6 garlic cloves, finely minced
6 cups milk
16 oz. mushrooms, sliced
16 oz. jar roasted red peppers, drained and cut into small pieces
2 cups (8 oz.) provolone or of a provolone/mozzerella mix
2 cups (8 oz.) freshly grated parmesan

Preheat oven to 400. Butter, or spray with cooking spray, two 2-quart baking dishes. A 9x13 rectangle and 8x8 square baking dish can also be used (a disposable is convienant for freezing). Boil pasta three minutes short of al dente. Drain and set aside.

While boiling pasta, heat oil in a large skillet over medium heat. Season chicken with salt and pepper and cook until browned and opaque throughout. Remove chicken and saute mushrooms until golden brown. Use extra oil if needed.

In a large stock pot, the one pasta was boiled in works well, melt butter over medium heat. Add flour and garlic; cook, whisking 1 minute. While whisking constantly, gradually add milk (I add two cups at a time); bring to a simmer. Continue to whisk frequently, for about another minute as sauce thickens. Add mushrooms and red peppers. Cook for another minute, take off heat and stir in provolone and a generous 1/2 cup parmesan cheese.

Add chicken and pasta to sauce and season with salt and pepper to taste. Divide pasta between baking dishes. If freezing, place a generous 1/2 cup parmesan into a baggie. If baking, sprinkle cheese on top.


Bake, uncovered, until golden and bubbling, about 25 minutes. Let stand a few minutes before serving.

FREEZER INSTRUCTIONS:

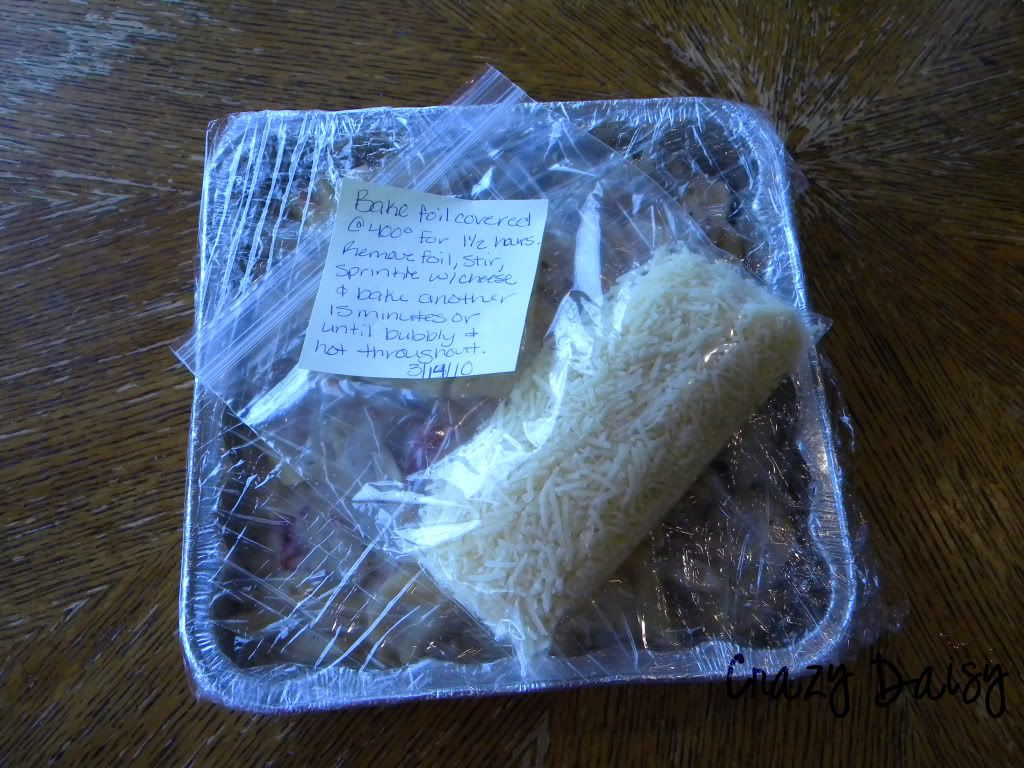
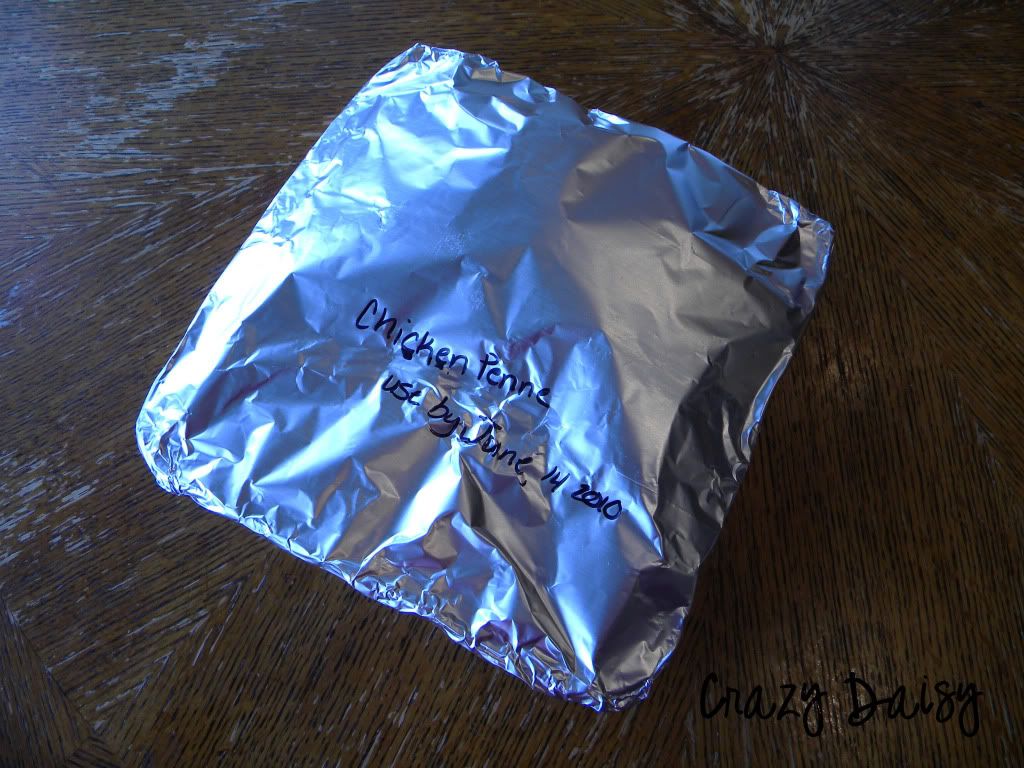
Once pasta is in baking dish, let cool. Wrap with plastic wrap. I ususally wrap it twice. Place baggie with cheese on top. I also add a little note with baking directions so that I am not scrambling for the recipe come baking time. Cover entire pan with foil. Again, I usually double wrap it. I use a marking pen to label and add a use by date. That way there are no mystery surprizes in my freezer. Freeze for up to three months. To bake, preheat oven to 400, remove foil, and plastic. Set cheese aside. Cover with foil and bake for 1 1/2 hours. Remove foil, stir pasta, and top with cheese. Bake, uncovered, another 15 minutes, or until bubbly and hot throughout.


Either way, you will end up with this...


Serve with warm bread and a salad. Ummmmmm!


Blessed with Grace


Photobucket

Sunday, March 7, 2010

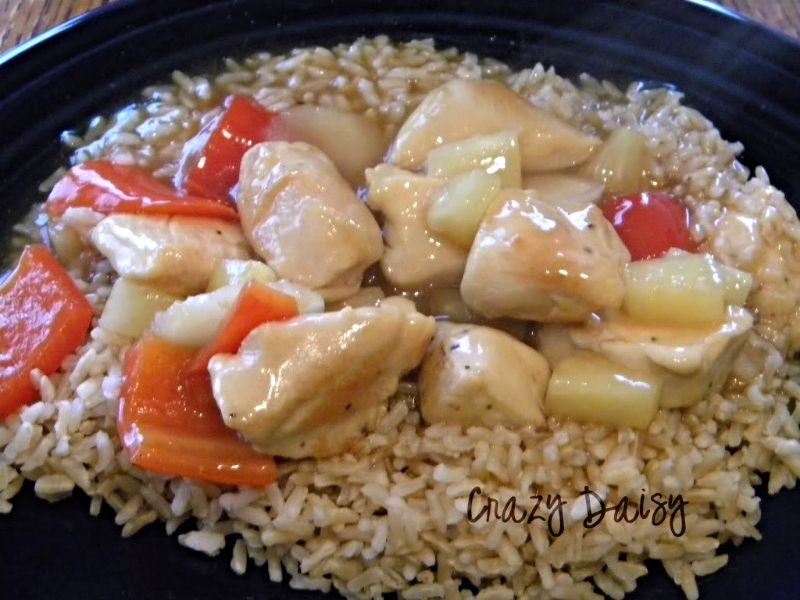
Easy Sweet and Sour Chicken


Chinese food has a special place in my kitchen. It sounds a little bit corny, but just listen. If the Mr. had to choose only one food to live on for the rest of his life, it would be something Chinese. Not only is it his very favorite, he actually proposed over a Chinese picnic. Awwwww, sweet, huh? Now, do you see why it might be so near and dear? So this is one of the Chinese recipes that I make that he really enjoys. I actually lost the recipe when we moved and he was extremely disappointed. I just recently found it, hooray! Not only is it easy, but it is also a teensy bit healthier than the traditional dish, because it trades the breaded chicken for a more healthier browned version. You'll have to see what you think.

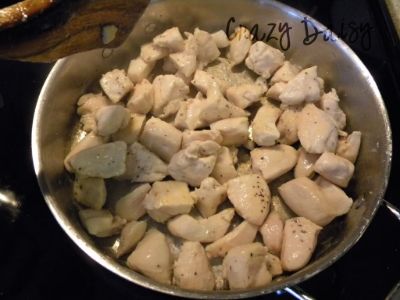
While the chicken is cooking,


Start the peppers. This is also a good time to put your rice on, which if you're not careful, you will forget to do.


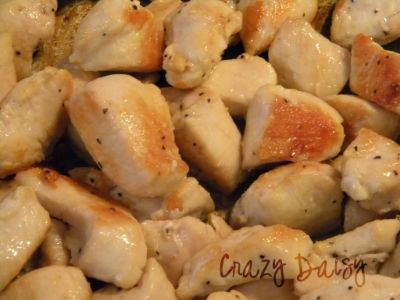
After your chicken is all browned and beautiful,


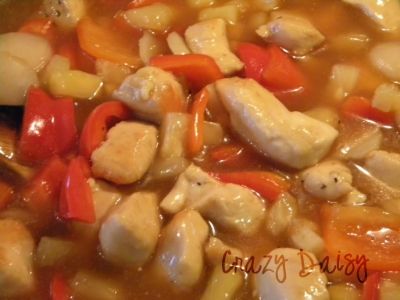
finish up your pineapple sauce and pour it over the chicken.


Delicious!


Wasn't that easy?

Easy Sweet and Sour Chicken

3 chicken breasts, cut into 1-inch pieces
1 (20-oz.) can pineapple tidbits, juiced pack
2 large sweet peppers, cut into 1-inch pieces
1/2 cup red wine vinegar, or vinegar
6 tablespoons sugar
4 tablespoons cornstarch
4 tablespoons soy sauce
1 teaspoon instant chicken bouillon granules
1 (8-oz.) can sliced water chesnuts, drained

First, heat some oil in a large skillet over medium low heat. Add chicken pieces and turn heat to medium high. While chicken cooks, start rice (I make around 3 cups).  You'll want to give your chicken a stir every once in a while so it browns evenly.

Now drain your pinapple, but save the juice and add enough water to make three cups. Pour into a medium saucepan and add sweet peppers. Bring to a boil and reduce heat. Cover and simmer for about 1 to 2 minutes or until peppers are crisp-tender. When your chicken is nice and browned like pictured above, take off of heat and cover to keep warm.

Now, take a small bowl and stir together the vinegar, sugar, corn starch, soy sauce, and chicken bouillon granules. Make sure that the cornstarch is incorporated and not stuck to the bottom of your bowl and stir mixture into sweet pepper mixture. Bring the heat to medium-high while you cook and stir until the mixture becomes thick and bubbly. Let cook for another 2 minutes before gently stirring in pineapple and water chesnuts. Pour over chicken. Cook and stir gently until heated through.

Serve over rice, hopefully you didn't forget to make it! This recipe comes together sooooo fast, that if I am not careful, the Sweet and Sour is ready, and the rice isn't.
Happy Day!