Monday, August 29, 2011

Chocolate Chunk Zucchini Brownies {with a gluten free recipe option}

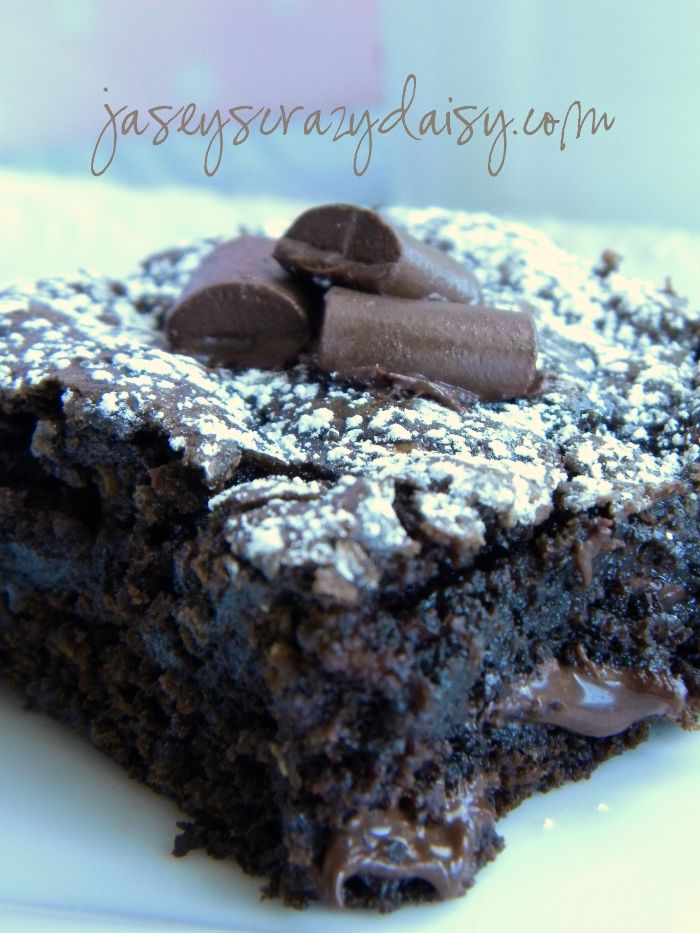
One summer afternoon, long ago when I was a little girl, I remember baking zucchini brownies with my aunt thinking, "Is she seriously going to put that green stuff in our brownies?!?!?!" They baked. They cooled. We tasted, I thought, "Are these the same brownies? The ones with the green stuff?" They were so yummy! No hint of anything green, just pure chocolately goodness. And if you eat them after they have cooled a little, the chocolate chunks are kind of soft and melted and gooey. In fact, after stating that he was ready to try some of those "BIKINI" brownies, my son declared, "How did you get the frosting on the inside?" I was tempted to top my warm brownie with a giant scoop a vanilla ice cream and a drizzle of hot fudge{I promise, that would have earned a place in the sundae hall of fame} except for the small fact that it's not even ten o'clock in the morning, AND I have been working really hard to consciously eat better... the whole smart choices and smaller proportion thing. By the way, the one I ate, it was totally worth it!

Chocolate Chunk Zucchini Brownies
*Recipe adapted from my aunt, Sue Bodner, by Crazy Daisy


2 cups flour
1 teaspoon salt
1 1/2 teaspoon baking soda
1/2 cup cocoa
1 1/4 cups sugar
1/2 cup Canola oil
2 eggs
2 teaspoons vanilla
2 cups shredded zucchini
1 cup chocolate chunks

*Note~ This is a fantastic gluten free brownie when Bob's Gluten Free All-Purpose Flour is substituted for the regular flour and if gluten free chocolate is used. I think the moisture from the zucchini helps keep the gluten free texture soft and yummy!


Preheat oven to 350. Spray 9x13 pan with cooking spray. In a medium bowl, whisk together flour, salt, baking soda, and cocoa. Set aside. In mixing bowl, cream together sugar and oil. Add egg and vanilla, beat until until incorporated. Stir in zucchini. Add dry ingredients and beat until mixed well. Add chocolate chunks, mixing well. Pour into prepared pan and bake for about 25 minutes or until a few crumbs come remain on toothpick after inserted into the middle. Cool slightly and dust with powder sugar, or frost, or simply enjoy as is.

We're off to enjoy our day... we are going for a bike ride.... and to get the rest of these brownies out of my house and to deliver some treats to some friends.
Photobucket
Very Good Recipe Tags: Brownies, Desserts, Zucchini
Enter your email address:


Delivered by FeedBurner

Sunday, August 28, 2011

Wishing You a Happy First Day of School {Free Back to School Printable}


It's that time of year again! We are busy getting ready to head back to school. I have to admit that it's my least favorite time of the year. While my son counts down the days until he gets to go back to school, see his friends, his teacher, and to learn, I am singing the Back To School Blues. He is so excited. I am anything but excited. I miss him already. I am sad, sad for myself. But really, I am thrilled for him. I love that he loves school, is so eager to learn, and has an amazing group of little buddies to play with. I wouldn't want it any other way, but that doesn't make it any easier. I wanted something fun to sneak in his lunch box, just to let him know I was thinking of him and hoping his day was happy. It turns out I wasn't so sneaky. He saw me working on the idea and wants to take them to share with his classmates.  Maybe we will just have to make some extras for my mom to take to her new fifth graders! Wouldn't they be a fun surprise to get from your teacher? However you decide to use them, I hope you have some fun adding a little happiness to someone's day.


Happy First Day of School Apples
*by Crazy Daisy

You'll need:
White card stock, they print 6 to a page, so plan according
Scissors
Hole punch
Gummy worms, at least one per printable
Embellishments, I used Pea Pod twine from The Twinery
Treat bags, optional, but I like because the worms aren't wrapped. I used the Wilton 4x9.5-inch ones from the baking isle at Walmart

Use the below Scrib'd link to download and print apples. Cut the apples out. I kept the boxes around them so they would sit straight in the treat bags, but you could cut the apple only if you wanted. Use hole punch to cut holes in the upper right corner of your apple. Punch four or five holes overlapping with each other to make it appear as if a worm has chewed through the apple. Insert gummy worm into the hole so that the face is in front. Embellish as desired, if you want. Place in treat bag, and tie. Wouldn't it be fun to line the bottom of the bag with extra worms?


Happy First Day of School Apple

For some reason, the words appears fuzzy, but they print just fine. Enjoy those last few summer days! What do you do to make that first day extra special?
Photobucket
This project is participating in
Visit thecsiproject.com
Enter your email address:


Delivered by FeedBurner

Monday, August 22, 2011

Chewy Chocolate Drizzled NutterButter Bars {No Bake}


I have been on a HUGE peanut butter kick, peanut butter and chocolate, that is. I just can't get enough. Remember this, cookies and cream no bake treat? Well, let me introduce you to it's peanut butter and chocolate cousin. They are made with NutterButter cookies instead of Oreos and drizzled with chocolate instead. I used dark chocolate, but use whatever makes you happy. Still no bake, still easy, still chocolatey and chewy, and still super yummy, ~but with a little peanut butter goodness added!

Chewy Chocolate Drizzled NutterButter Bars
*Recipe by Crazy Daisy

1 package of NutterButter Cookies
1 (10 oz.) bag of large marshmallows
4 Tablespoons butter, cut into cubes
1/3 cup chocolate chips, I used dark, but use what makes you happy

*Note~  double ingredients and use a 9x13 to serve a crowd.

Grease or butter a 8X8 pan. Place NutterButters in food processor and pulse into ground (you may have to work in batches). Pour NutterButter crumbs into a large bowl. In another large microwave-safe bowl, melt marshmallows and butter for 60 seconds. Stir. Repeat until mixture is melted and mixed together. Pour over NutterButters. Stir, using a wooden spoon, until mixed well. Mixture will become thick and hard to stir. Keep mixing until all the crumbs are incorporated. Pour into prepared pan and press to spread evenly. I find it helps to spray my fingers, or a wooden spoon with cooking spray to press the mixture without sticking. Set aside. Place chocolate chips in a zip-loc baggie. Place in microwave for 20 seconds. Take out and knead to mix. Repeat until chocolate is melted. Cut off a small piece of the corner of the bag and drizzle bars with chocolate. I usually place them in the fridge to hurry the process (but if you leave them too long, you will have to let them sit out to soften before cutting). Once chocolate has set, cut into bars and enjoy.

I'm off to enjoy the rest of the summer with my boys... two weeks left before my first grader is off to school everyday. He's so ready, his mom is not!!! We've got a whole bunch of fun things to squeeze in! I see more gelato in our future, and the pool, and some bike rides, picnics, and what ever else I can manage to throw in! How are you spending your last days of summer?
Photobucket
Enter your email address:


Delivered by FeedBurner

Monday, August 15, 2011

Chewy Oreo Bars {No Bake}


These have quickly became a favorite treat at my house. My kiddos request them frequently. Really, I'm not even sure what to call them. After glancing at the ingredients, you might think 'rice krispie treats' which is totally what I thought. However, while chewy, the end result is softer... almost like a brownie. I guess they lie somewhere in between the rice krispie treat and the brownie, like a yummy cross. Try them! Let me know what you think. I think you just might find a new treat to add to your list of favorites.

Chewy Oreo Bars
*Recipe adapted from Picky Palate

2 (16.6 oz) packages of Oreos
2 (10 oz.) bags of large marshmallows
1 stick butter, cut into cubes
1/2 cup white chocolate chips

*Note~ If you want to make a smaller batch, use a 8x8 pan and only half of the ingredients.

Grease or butter a 9x13 pan. Place Oreos in food processor and pulse into ground (you may have to work in batches). Pour Oreos into a large bowl. In another large microwave-safe bowl, melt marshmallows and butter for 60 seconds. Stir. Repeat until mixture is melted and mixed together. Pour over Oreos. Stir, using a wooden spoon, until mixed well. Mixture will become thick and hard to stir. Keep mixing until all the crumbs are incorporated. Pour into prepared pan and press to spread evenly. I find it helps to spray my fingers, or a wooden spoon with cooking spray to press the mixture without sticking. Set aside. Place white chocolate chips in a zip-loc baggie. Place in microwave for 20 seconds. Take out and knead to mix. Repeat until chocolate is melted. Cut off a small piece of the corner of the bag and drizzle bars with chocolate. I usually place them in the fridge to hurry the process (but if you leave them too long, you will have to let them sit out to soften before cutting). Once chocolate has set, cut into bars and enjoy.

What would you call these yummy cookies and cream treats? I'm open for suggestions...

PS - Have you heard of Pinterest? Find me here. What a beautiful place. Need an invite? Let me know and I will see what I can do!

PPS - If you like these treats, you make be interested in their Chocolate Drizzled NutterButter Bar cousins. Click here.
Photobucket
Enter your email address:


Delivered by FeedBurner

Friday, August 12, 2011

Cake Batter Gelato

My six year old loves everything cake batter! We have a frosting version, and a rice krispie treat version, both are fav's of his.  Creating this gelato was on his summer-to-do-list, as well as taking the training wheels of his bike and hiking to the waterfall. I am just about as excited as he is to cross this off his list! It turned out fabulous, super creamy, and not too sweet! We all loved it. In fact, you would have laughed (I laughed at myself) yesterday morning as I woke up early to sneakily make this ice cream cone to photograph before the kiddos woke up and polished it off. The things I do....

Cake Batter Gelato (@ 1 quart)
* Recipe by Jasey's Crazy Daisy

2 cups milk, whole is best, but I used 2% and it was still super creamy
1 cup heavy cream
4 large egg yolks
2/3 cup sugar
1 teaspoon vanilla
2/3 cup white cake mix, the powder (I have reverted to keeping a plastic container in my pantry so that I have it on hand to make all my kiddo's favorite treats)

In a heavy-bottom saucepan, combine the milk and cream. Place over medium-low heat and cook, stirring occasionally so a skin doesn't form, until tiny bubbles start to form around the edges and the mixture reaches a temperature of 170 degrees.

Meanwhile, in a heat-proof bowl, whisk the egg yolks until smooth. Gradually whisk in the sugar until the mixture is incorporated, thick, and pale yellow. This next part part is important and keeps you from having scrambled eggs in your gelato - it is called tempering the eggs. Take the mixture off of the heat. Using a ladle, scoop some of the hot milk mixture (after it gets the bubbles) and pour it into the eggs and whisk. Do this one more time, make sure to whisk well so the eggs don't have a chance to cook into scrambled eggs. Now slowly pour the egg mixture into the rest of the hot milk mixture, in the saucepan, whisking until incorporated. Pour in cake mix and vanilla and whisk again until well mixed. Return to heat and cook on low. Cook, stirring constantly with a wooden spoon until the custard is thick enough to coat the back of the spoon and/or it reaches a temperature of 185. Do not let it boil. Make sure to keep stirring so that the bottom doesn't burn. Don't worry if you see a little thick goop at the bottom, you will strain the mixture to take care of any lumps.

Pour the mixture through a fine-mesh strainer into a clean freezer-safe bowl. Let cool, stirring about every 5 minutes. Once, mixture reaches about room temperature, cover with plastic wrap - gently pressing it down until it touches mixture to prevent a skin from forming. Refrigerate for at least four hours, but overnight is best. Pour mixture into container of ice cream machine and churn as directed. Transfer to airtight container and refrigerate for two hours before serving. Let gelato set out for 10-15 minutes before serving. 

Enjoy~ hope you love this as much as we do! My son is so impressed. He says, "I can't believe we can make this. Now we don't even have to go to Cold Stone, we can just make our own. AND it's better!" We'd love to hear what you think if you give it a try!

Photobucket
Very Good Recipe Tags: Gelato, Desserts
Enter your email address:


Delivered by FeedBurner

Monday, August 1, 2011

Greek Feta Vinaigrette (and Homemade Greek Seasoning)


As you may know, I love treats (a quick glance at my recipe box proves this)~ in fact, this is something I am trying to work at. I still want treats, but am trying to focus on yummy, fresh, maybe a little healthier treats, for now anyways. After all, who wants a blogger booty, or at least that's what I call it when I feel like I have been a little heavy on the treat side, especially lately since I  hurt my darn back and haven't been able to get in as much exercise as I like. So I thought we'd start with this salad dressing recipe. It's so good~ great on a salad, and even better drizzled over a homemade gyro. It's cool and creamy, with a little kick. What will you drizzle?

Greek Feta Vinaigrette
*Adapted from Our Best Bites

1/4 cup freshly squeezed lemon juice
1/4 cup white vinegar, rice vinegar would be good
2 teaspoons sugar
1/2 teaspoon kosher salt
1/4 teaspoon red pepper flakes, more if you desire more heat
1/4 teaspoon, freshly ground pepper
4 cloves garlic, peeled
1/4 cup canola oil
1/4 cup crumbled feta cheese
1 teaspoon Greek seasoning, recipe follows

In blender container, combine all ingredients through garlic. Blend until smooth. While blender is running, add oil in a steady stream. Turn off blender, add feta and pulse the blender a few times or until you reach the creamy consistency that you want. Whisk, or blend in Greek seasoning. If possible, refrigerate for about an hour before serving. Drizzle over salad, or homemade gyros.

Greek Seasoning
*adapted slightly from Taste of Home

3 teaspoons dried oregano
1 teaspoon dried mint
2 teaspoons dried thyme
1 teaspoon dried basil
1 teaspoon dried marjoram
1 teaspoon minced onion
1/2 teaspoon minced garlic

Combine all ingredients in a zip-loc baggie. Use whenever a recipe asks for Greek Seasoning. Store in a cool dry place for up to 6 months.

Photobucket

Enter your email address:


Delivered by FeedBurner